Cloud
Overview
Commonly used documents can be stored in the Cloud Drive, a selection in the left-hand menu of your software, to access them anytime from any computer that has a connection to the internet and access to the database.
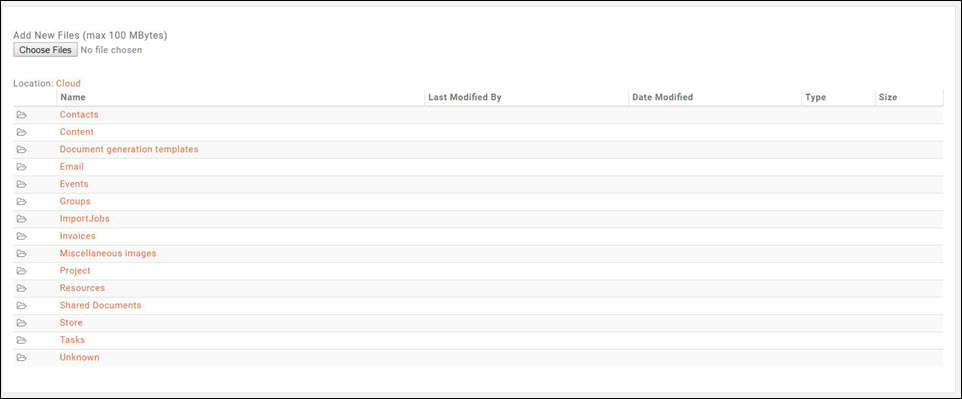
The database is seeded with default folders, that contain the documents that you have uploaded within other modules. For Example: There is a default Events folder in your cloud, and when expanded you will see folders for each of your events, and within those folders find the documents, images, etc. that you have uploaded for the event in the events module.
Working with Documents in the Cloud
Uploading Documents to the Cloud
Documents may be uploaded directly within the Cloud module, or within other modules in the software. To upload a document in the Cloud module:
- Click Cloud in the left hand navigation panel.
- Select the file folder to which you want to add the file.
- Click the Choose New File button. NOTE: File size may be a maximum of 100 MBytes.
- Navigate to the desired file and select. A progress bar will display the progress in importing the file.
Once imported, the file will be available for future use.
==Creating a Sharing Link for Documents in the Cloud== UNDER DEVELOPMENT
You can easily share the documents in your cloud by creating links to them. This is especially important when you wish to email documents. Best practice in emailing documents is to provide a link to the documents, rather than using an attachment.
- In the Cloud module, click the document for which you want to create a sharing link.
- Click Sharing.
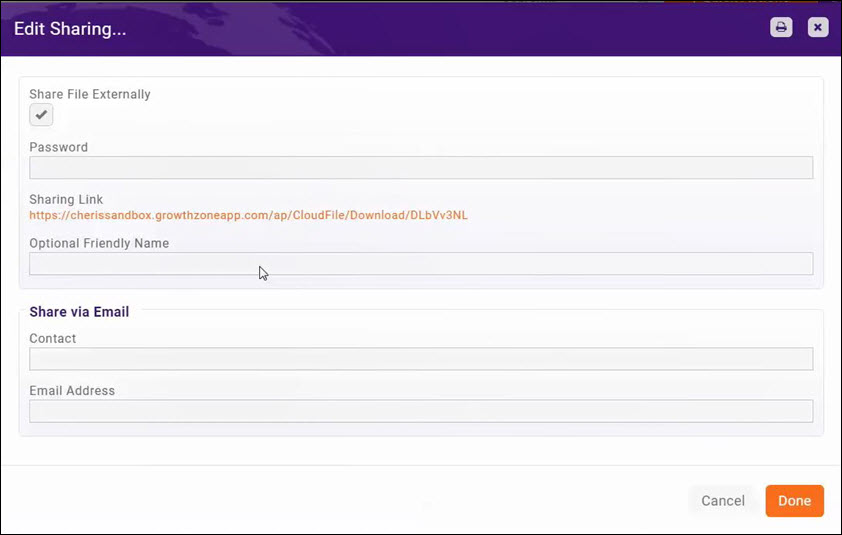
- If you wish to share the file externally, click the Share File Externally check-box. This is enabled by default.
- If you wish to secure this file, and only allow those to whom you have provided a password, enter a Password. This is optional. If you enter a password, the user will be prompted to enter this password when they click the sharing link.
- The Sharing Link is automatically created and you may copy this link to share.
- Enter a Optional Friendly Name. This will be used to generate a new sharing URL with the document. The URL would then be considerably shorter than the standard (omitting the directory path) and something that someone could relay over the phone without the recipient getting lost. FEB 2018 - THIS FUNCTIONALITY IS IN DEVELOPMENT
- Share Via Email: To automatically send this link to a contact:
- Enter the Contact name.
- Enter the contact's Email
- Click Done.
Downloading Documents from the Cloud
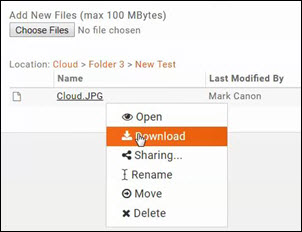
- In the Cloud module, click the document you wish to download.
- Click Download. The file will download to the default download folder configured on your pc or laptop.
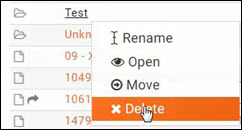
Renaming Documents from the Cloud
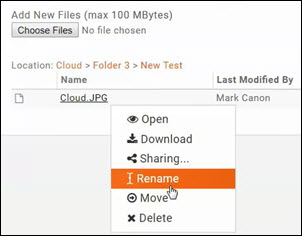
- In the Cloud module, click the document you wish to rename.
- Click Rename. The name field for the document is now editable.
- Type the new name for the file.
- Left click to save the new name.
Moving Documents in the Cloud
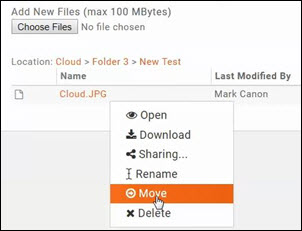
- In the Cloud module, click the document you wish to move.
- Click Move.
- From the Destination Folder drop-down list, select the folder to which you wish to move the document.
- Click Done.
Deleting Documents from the Cloud
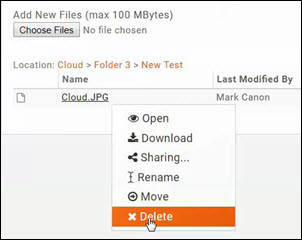
- In the Cloud module, click the document you wish to delete.
- Click Delete.
- Click OK.
Working with Folders in the Cloud
You may add, rename, move and delete folders in the Cloud.
Adding a New Folder
- Click the
 button. NOTE: If you wish to add the new folder as a sub-folder to an existing folder, open the existing folder first.
- Enter a Name for the new folder.
- Click Done.
Renaming Folders
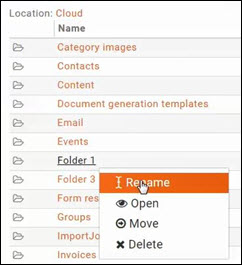
- Click the Folder that you wish to rename. Note: You may only rename folders that you have created, not the system generated folders.
- Click Rename.
- The folder name field is now editable, enter the new name of the folder.
- Left click to save changes.
Moving Folders
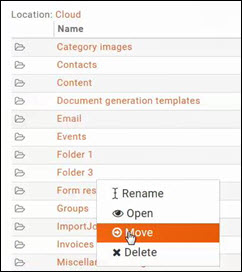
- Click the folder that you wish to move. NOTE: You may only move folders that you have created, not the system generated folders.
- Click Move.
- From the Destination Folder drop-down list, select the folder to which you wish to move your folder. NOTE: You may only move folders to folders that you have created, not the system generated folders.
- Click Done.
Deleting Folders
- Click the folder that you wish to delete. NOTE: You may only delete folders that you have created, not the system generated folders.
- Click Delete.
- Click OK.

