Difference between revisions of "Communications Basics"
Cpetterson (talk | contribs) |
|||
| (155 intermediate revisions by 7 users not shown) | |||
| Line 1: | Line 1: | ||
| − | == | + | <p style="font-size:30px">NEW!! Find all of your answers in the [https://helpdesk.growthzone.com/kb/article/1029-contents-communications/// GrowthZone Knowledge Base!]</p> |
| + | ---- | ||
| + | =='''<span style="color:#800080">Initial Communications Setup'''</span>== | ||
| + | ---- | ||
| − | + | ==='''<span style="color:#800080">Configure your Default From Email Address'''</span>=== | |
| + | ---- | ||
| + | Your GrowthZone software is setup to send automated messages. For Example: An automated message is sent when a new application is submitted on-line. To set the default '''From''' address for these messages: | ||
| + | |||
| + | #Select '''Setup''' in the Navigation Panel | ||
| + | #Click '''Email Settings''' in the '''Communications''' section. | ||
| + | #:[[File:Default From.jpg|1000px|center]] | ||
| + | #In the '''Default From Email Address''' field, enter the address to be used by default when emails are sent from your organization. | ||
| + | #Click '''Done'''. | ||
| − | + | ==='''<span style="color:#800080">Configure your Unsubscribe (Opt-out) Message'''</span>=== | |
| − | # | + | ---- |
| − | |||
| − | |||
| − | |||
| − | |||
| − | [ | + | #Select '''Setup''' in the Navigation Panel |
| + | #Click '''Email Settings''' in the '''Communications''' section. | ||
| + | #:[[File:Unsub settings.jpg|center]] | ||
| + | #A default unsubscribe message is included in your database. You can customize this as needed. | ||
| + | #Click '''Done'''. | ||
| − | + | When the user clicks the link, they will be presented with the '''Email Subscriptions''' screen. See '''[[Communications_Basics#What_happens_when_a_group_email_recipient_opts_out|What happens when a group email recipient opts out]]''' for further information. | |
| + | If you wish to add the unsubscribe message to individual emails or emails sent to multiple members, include the '''Unsubscribe URL''' merge field in your signature or in text at the bottom of an email. | ||
| − | + | [[File:Unsubscibe URL.jpg|center]]</div> | |
| − | + | ===='''<span style="color:#800080">What Happens When an Email Recipient Opts-out'''</span>==== | |
| − | + | ---- | |
| − | |||
| − | # | ||
| − | |||
| − | |||
| − | + | When you send out emails to your lists/committees or send mass emails, the unsubscribe message you have configured in your settings (See '''[[Communications_Basics#Configure_your_Unsubscribe_Message|Configure your Unsubscribe Message]]''') is appended to those emails. A recipient can set '''restrictions''' on the use of the email by clicking the link included in the message. | |
| − | |||
| − | + | [[File:Unsubscribe page.jpg|600px|center]] | |
| − | |||
| − | |||
| − | |||
| − | + | The recipient can set the following restrictions: | |
| − | |||
| − | |||
| − | |||
| − | |||
| − | |||
| − | |||
| − | |||
| − | |||
| − | |||
| − | |||
| − | |||
| − | |||
| − | |||
| − | |||
| − | |||
| − | + | * '''Continue Receiving Emails from {Your Organization Name}''': Selecting this option does '''NOT''' unsubscribe the recipient from the group email list. | |
| − | + | *''' Unsubscribe me from {Group Name}''': Selecting this option will mark the recipient email as '''Do Not Email''' within the group. '''NOTE''': It will '''NOT''' remove the recipient from the group. An email will be sent to those staff members who have subscribed to the ''' | |
| − | + | * '''Do not email me at this address except for transactional emails''': If this option is selected, the email will be marked as '''Only Transactional Emails'''. This ensures that the recipient does not receive any mass emails (including from your lists/committees as well as any mass emails you may be sending to dynamically created groups). However, any "transactional" type emails that you send, for example - invoices, will continue to be sent. This will unsubscribe the member from '''ALL''' group communication. The recipient is '''NOT''' removed from the group. | |
| + | * '''Update my preferences''': When this option is selected, the recipient will see a list of the groups that they are currently subscribed to. They can select or deselect the lists/committees that they wish to receive emails from. The recipients email address will be marked as '''Do Not Email''' for those groups de-selected. | ||
| + | [[File:Update preferences 2020.jpg|400px|center]] | ||
| + | ::The recipient may deselect the check-boxes for the groups they no longer wish to be subscribed to. The recipient will be marked as '''Do Not Contact''' within the group, but will '''NOT''' be removed from the group. | ||
| − | + | After making choice, click '''Submit'''. A confirmation of changes will be displayed. | |
| − | |||
| − | + | '''Special Considerations''' | |
| − | + | *If the recipient wishes to un-subscribe from a list/committee that you have configured as '''Dis-allow Opt-out''', this setting will trump the recipient's preference. | |
| − | + | *When a recipient unsubscribes from a group, they are '''NOT''' removed or inactivated in the group, the email is simply set to '''Do Not Email'''. | |
| + | *Only staff can set an email address as '''Do Not Contact'''. When this is set '''NO''' emails, including transactional emails will be sent to the email address. | ||
| + | *If you have integrated to Constant Contact or Mail Chimp, when someone unsubscribes to all messages in Constant Contact or Mail Chimp, the the contact’s email address will be set to '''No Mass Emails''', in the appropriate lists/committees. | ||
| − | = | + | ===='''<span style="color:#800080">Change the Restrictions set on an Email Address'''</span>==== |
| − | + | ---- | |
| − | # | + | From the back-office, staff can update the restrictions that have been set on an email address. |
| − | |||
| − | |||
| − | |||
| − | |||
| − | |||
| − | |||
| − | |||
| − | |||
| − | + | #Select the '''Profile''' tab for the desired organization/individual. | |
| + | #:[[File:Change restrictions.jpg|600px|center]] | ||
| + | #Click the [[File:Cp orange pencil.jpg|25px]] icon, next to the email address you wish to update. | ||
| + | #:[[File:Change restrictions set 2020.jpg|600px|center]] | ||
| + | #From the '''Restrictions''' list, select the desired status: | ||
| + | #*'''None''': There are no restrictions, the email address may be used for mass emails and individual emails. | ||
| + | #*'''Do Not Contact''': No emails can be sent to this email address. | ||
| + | #*'''Only Transactional Emails''': Only individual, transaction type (i.e. invoices, event confirmations, etc.), can be sent to this address. Specifically, this address will not receive emails sent to: | ||
| + | #**Lists/Committees | ||
| + | #**Dynamic Lists/Committees selected when you choose the '''...''' option (next to the '''To''') in sending an email. | ||
| + | #**When emails are sent to more recipients than the Email Bulk Mode Threshold (Setup > Communications > Email Settings) | ||
| + | #Click '''Done'''. | ||
| − | == | + | {| class="wikitable" |
| + | |- | ||
| + | | | ||
| + | [[File:One Row.png|25px]] | ||
| + | | style="width: 100%"| '''IMPORTANT''' The restrictions set will be set anywhere this email address is used. For example, if this individual is on any of your lists/committees, the email will be set to the restriction that you have set here. Additionally, If an email is synced to Constant Contact and is set to Only Transactional Emails by a staff user, the email will be unsubscribed from Constant Contact immediately. | ||
| + | |} | ||
| − | Email | + | ==='''<span style="color:#800080">Configure Visibility of E-mail Addresses when sending a Mass E-mail (Email Bulk Mode Threshold)'''</span>=== |
| + | ---- | ||
| + | The '''E-mail Bulk Mode Threshold''' determines, when sending bulk e-mails, whether emails are sent using the '''To''' field, or the '''BCC''' field. To view and configure this setting: | ||
| + | #Click '''Setup''' in the left-hand navigation panel. | ||
| + | #Click '''Email Settings''' in the '''Communications''' section. | ||
| + | #:[[File:Bulk Mode Threshold 2020.jpg|800px|center]] | ||
| + | #Set the '''E-mail Bulk Mode Threshold'''. For example: if set to 30, when an email is sent to 30 or less in the '''To''' field, all email addresses will be displayed and recipients will be able to "reply all". If the email is sent to 31 or more, the email will automatically BCC every one, so recipients will not see others email addresses and will not be able to reply all. | ||
| + | #Click '''Save'''. | ||
| − | + | ==='''<span style="color:#800080">Logging Messages sent via Outlook (or other email service)'''</span>=== | |
| + | ---- | ||
| − | + | In the '''Email Settings''' you will find and '''Archive Email Address'''. In order for your database to track emails that you have sent from Outlook (or other email service such as GMail), you will want to include this email address in the BCC line of the email. A copy of the email will then be sent to the archive address for evaluation. If the system can associate the contact to whom you sent the email to a contact in the database, your Outlook email will be displayed on the communications tabs. '''Please note''': You must be set up as a staff member in the Growthzone software to use this feature '''AND''' the email address you are sending from must be the one configured in GrowthZone. | |
| − | |||
| − | |||
| − | + | #Select '''Setup''' in the Navigation Panel | |
| − | + | #Click '''Email Settings''' in the '''Communications''' section. | |
| − | # | + | [[File:Archive email address 2020.jpg|800px|center]] |
| − | # | ||
| − | |||
| − | |||
| − | |||
| − | |||
| − | |||
| − | |||
| − | + | If there are any issues in matching an email, the sender will receive a notification, as shown below. From this notification, you will be able to choose to whom the email should be associated. | |
| − | + | [[File:Archive email notification 2020 1.jpg|800px|center]] | |
| − | + | If you as the staff person have more than 1 email address in your database, you will now receive your own separate email asking you to merge or clean up your duplicate email addresses but also giving you an option to choose where to store the email under the correct staff contact. | |
| − | + | [[File:Staff archive email 2020.jpg|800px|center]] | |
| − | + | ===='''<span style="color:#800080">View and Match Un-Matched Emails'''</span>==== | |
| − | + | ---- | |
| − | + | If the archive email address is included in the BCC line of emails sent via Outlook, a copy of the email will be sent to the archive address. If the database is able to associate the email to a contact in your system it will do so. Emails that could not be matched may be viewed under the Communications module: | |
| − | |||
| − | |||
| − | |||
| − | |||
| − | |||
| − | |||
| − | |||
| − | + | #Click '''Communications''' in the Navigation Panel. | |
| − | # | + | #Click the '''Unmatched Emails''' tab. |
| − | #Click | + | #:[[File:Unmatched emails 2020.jpg|600px|center]] |
| − | # | + | #A list of all unmatched emails will be displayed, to match these to a contact, click the Match action button. |
| − | #: | + | #:[[File:Match email address 2020.jpg|600px|center]] |
| − | #: | + | #Select the contact to which you wish to match the email: |
| − | # | + | #*'''Use suggested - We've found a possible match''': If the system has identified a potential match, the match will be displayed on the screen and you can evaluate if this is the appropriate match. |
| − | #Click | + | #*'''Find existing - Search your database''': Select this option if you wish to search your database for a match. You will then be able to enter the name of the contact. |
| − | + | #*'''Create new - Create a new organization record''': Select this option if you wish to add a new record. | |
| + | #*'''Do nothing - Do not create or match any contact record''' | ||
| + | #Click '''Done'''. | ||
| − | + | ==='''<span style="color:#800080">Setup Sender Policy Framework (SPF) Record'''</span>=== | |
| + | ---- | ||
| − | + | An SPF record is a type of Domain Name Service (DNS) record that identifies which mail servers are permitted to send email on behalf of your domain. The purpose of the SPF record | |
| + | is to ensure that your emails are received successfully. | ||
| − | + | Below are the steps to set-up the SPF record: | |
| − | #Click | + | #Verify whether you have an SPF Record. Third party software tools, such as MxToolbox can be used for this verification. Click '''[http://mxtoolbox.com/spf.aspx?command=spf here]''' to see how this is done. |
| − | + | #If you have an SPF Record, add '''include:clientemailspf.growthzoneapp.com''' to the record right after the v=spf1. Make sure there is a space before and after it. | |
| − | + | #:OR | |
| − | # | + | #If you do not have an SPF Record, work with your email administrator to obtain one. The SPF record can be created using software third party software, such as MxToolbox. Click '''[https://mxtoolbox.com/SPFRecordGenerator.aspx here]''' to see how this is done. After generating the SPF record, complete step 2 above |
| − | |||
| − | #: | ||
| − | # | ||
| − | |||
| − | |||
| − | |||
| − | |||
| − | |||
| − | |||
| − | |||
| − | == | + | ==='''<span style="color:#800080">Automated Messaging'''</span>=== |
| + | ---- | ||
Automatic messages may be configured to be sent in response to certain actions. For Example, an automated message may be sent to a new member when they have completed the Member Application Form, or, an automatic thank you message may be sent when someone registers for the event. Your database is pre-configured with automatic messages, which you may use "as-is" or customize to meet your needs. | Automatic messages may be configured to be sent in response to certain actions. For Example, an automated message may be sent to a new member when they have completed the Member Application Form, or, an automatic thank you message may be sent when someone registers for the event. Your database is pre-configured with automatic messages, which you may use "as-is" or customize to meet your needs. | ||
| + | |||
| + | The table below describes the automated messages available. | ||
| + | |||
| + | {| class="wikitable" | ||
| + | |- | ||
| + | ! Event !! Default Template to Send !! Description | ||
| + | |- | ||
| + | | Auto Payment Receipt|| Auto Payment Receipt || Sent when an automated payment has been applied to an invoice. | ||
| + | |- | ||
| + | | Certification Admin Review || None|| This notification is sent so certification executives can do a final review and sign off prior to the cert going active. It will be sent when a certification status is set to '''Admin Review'''. | ||
| + | |- | ||
| + | | Certification Application Denied || None || This notification is sent when staff sets certification status to '''Denied'''. | ||
| + | |- | ||
| + | | Email Member Login Added || Member or Representative On-line Access Added || This notification is sent when an existing login is added to your database. See '''[[Getting_Started#Add_Staff_Member_with_Access_to_Multiple_Databases|Add Staff Member with Access to Multiple Databases]]'''. | ||
| + | |- | ||
| + | | Email Member Login Info || Member or Representative Online Access || Send an email notifying a contact that they can create their log-in credentials. | ||
| + | |- | ||
| + | | Email Member Login Instruction || New Member Access || This email will be sent when you select to send log-in instructions to a contact. See '''[[Info_Hub#Setting_up_Individual.27s_Info_Hub_Access|Setting up Individual's Info Hub Access]]'''. | ||
| + | |- | ||
| + | | Event Approved|| Event approved by staff || This notification will be sent to the contact who submitted an event, once staff has approved the event. | ||
| + | |- | ||
| + | | Event Reminder || Event Reminder || This notification will be sent, 48 hours prior to the event, to all event registrants. This notification will only be sent if '''Send Reminder Email to Registrants 48 hours Prior''' is enabled for the event. See '''[[Event_Management#Setup_an_Automatic_Event_Reminder|Setup an Automatic Event Reminder]]''' for instructions. | ||
| + | |- | ||
| + | | Forum Comment Added || None || This notification will be sent, to those who have subscribed, when a new comment has been added to a forum, as staff who have subscribed to the notification. See '''[[Info_Hub#Set_Preferences_for_Forum_Notifications|Set Preferences for Forum Notifications]]'''. | ||
| + | |- | ||
| + | | Forum Topic Added || None|| This notification will be sent, to those who have subscribed, when a new topic has been added to a forum, as staff who have subscribed to the notification. See '''[[Info_Hub#Set_Preferences_for_Forum_Notifications|Set Preferences for Forum Notifications]]'''. | ||
| + | |- | ||
| + | | Fundraising Pledge Added || None || This email is automatically sent to thank a donor, after they have submitted a one-time donation or setup a pledge. A default is not assigned, however, the '''Fundraising/Donation/Pledge Thank You Template''' is a great starting point for your thank you letter. | ||
| + | |- | ||
| + | | Gateway Verified By Customer Service || None || This email is automatically sent to your organization when your GrowthZone Pay gateway has been verified by Growth Zone. | ||
| + | |- | ||
| + | | Growth Zone Pay Charge Dispute || Growth Zone Pay Charge Dispute || This notification is sent when a GrowthZone Pay charge is disputed, It will be sent to the staff member you have identified under the gateway setup '''Credit Card Account/Dispute Notifications Email'''. | ||
| + | |- | ||
| + | | Growth Zone Pay Charge Failed || Growth Zone Pay Charge Failed || This notification is sent when a GrowthZone Pay charge fails. It will be sent to the staff member you have identified under the gateway setup '''Credit Card Account/Dispute Notifications Email'''. See '''[[Billing#Configure_Gateway_Notifications_for_Disputes.2FCharge_Failures|Configure Gateway Notifications for Disputes/Charge Failures]]'''. | ||
| + | |- | ||
| + | | Invoice Payment Received || Member Invoice Payment Received || This notification is sent to staff when an invoice is paid on-line. | ||
| + | |- | ||
| + | | Membership Has Expired || None || Applies to memberships configured for '''Renewal Notifications''' only. This email will be sent • the day after the end of the Grace Period (or the day after Expiration if no Grace Period days are defined). See '''[[Membership_Management#Membership_Type_with_Renewal_Notifications_.28Coming_Soon.29|Membership Type with Renewal Notifications]]''' for further information. | ||
| + | |- | ||
| + | | Membership Is Expiring || Membership Expires Soon Email Template || Applies to memberships configured for '''Renewal Notifications''' only. This email notification is sent three days before the expiration date of the membership. See '''[[Membership_Management#Membership_Type_with_Renewal_Notifications_.28Coming_Soon.29|Membership Type with Renewal Notifications]]''' for further information. | ||
| + | |- | ||
| + | | Membership Renewal Reminder || Membership Renewal Reminder Email Template|| Applies to memberships configured for '''Renewal Notifications''' only. On the Renewal Notification Date the Membership Renewal Reminder Email will be sent. This notification is sent to Active and Courtesy members that will be billed an amount for their upcoming renewal. See '''[[Membership_Management#Membership_Type_with_Renewal_Notifications_.28Coming_Soon.29|Membership Type with Renewal Notifications]]''' for further information. | ||
| + | |- | ||
| + | | Membership Renewal Thank You || Membership Renewed - Thank You Template || Applies to memberships configured for '''Renewal Notifications''' only. This notification is sent once the member chooses one of the renew options. See '''[[Membership_Management#Membership_Type_with_Renewal_Notifications_.28Coming_Soon.29|Membership Type with Renewal Notifications]]''' for further information. | ||
| + | |- | ||
| + | | New First Time Tenant || New Account Activation || GrowthZone use only. | ||
| + | |- | ||
| + | | New Form Response || None || This notification is sent to the individual(s) identified to receive form '''Response Notifications''' for a form. See '''[[Forms_and_Surveys#Create_a_Form|Create a Form]]'''. | ||
| + | |- | ||
| + | | New Imported Contacts || New Contacts Created || December 2018 - IN DEV | ||
| + | |- | ||
| + | | New Member Application || Membership Application Confirmation Email || This email is sent to an applicant after they have completed the membership application form. | ||
| + | |- | ||
| + | | New Representative || New Contacts Created || This email is sent to staff when new contacts are added by a member, via the Info Hub '''OR''' when a new contact is added from the back-office. The email is sent to those staff members subscribed to the '''New Person Added to an Existing Membership''' notifications. See '''[[Getting_Started#Configure_User_Notifications|Configure User Notifications]]''' for information on subscribing to notifications. | ||
| + | |- | ||
| + | | New Staff Login || New Staff Invite || This email is sent to a staff member you have newly added to your system. Within the email will be a link for the staff member to setup credentials to the database. See '''[[Getting_Started#Add_Staff_Member|Add Staff Member]]'''. | ||
| + | |- | ||
| + | | New Tenant || New Account Activation || GrowthZone use only. | ||
| + | |- | ||
| + | | Online Payment Receipt || Online Payment Receipt || This notification is sent to the contact when they pay an invoice on-line. A link to the paid invoice is included in the email. | ||
| + | |- | ||
| + | | Recurring Charge Failed || Automatic Payment Failure || This notification is sent to the contact when an automatic recurring charge fails. Within the email is a '''Please retry payment for the invoice''' link. | ||
| + | |- | ||
| + | | Registered Event Attendee || Registered Event Attendee || This email is sent to an event registrant after completion of event registration form. | ||
| + | |- | ||
| + | | Registered Event Exhibitor || Registered Event Exhibitor || This email is sent to an event exhibitor after completion of the exhibitor registration. | ||
| + | |- | ||
| + | | Renewal Emails Sent || Renewal Emails Sent || Applies to memberships configured for '''Renewal Notifications''' only. This email is sent to staff subscribed to the '''Renewal Emails Sent''' notification, when renewal emails are sent to members. See '''[[Getting_Started#Configure_User_Notifications|Configure User Notifications]]'''. | ||
| + | |- | ||
| + | | Send Event Attendee Itinerary || Event Session Itinerary Confirmation || | ||
| + | |- | ||
| + | | Subscription Confirmation || None || December 2018 - UNDER REVIEW | ||
| + | |- | ||
| + | | Task Assigned || Task Assigned || This email is sent to the assignee, when a task has been assigned to them. | ||
| + | |- | ||
| + | | Unregistered Event Attendee || Unregistered Event Attendee || This email is sent to an event registrant when his/her registration is cancelled. | ||
| + | |- | ||
| + | | Task Assigned || Task Assigned || This email is sent to the assignee, when a task has been assigned to them. | ||
| + | |- | ||
| + | | Web Content Approved || None || This notification email is sent after a staff member approves the user's web content. This notification will go to the user that submitted the content. See '''[[Web_Content#Approving_Web_Content_Submissions|Approving Web Content Submissions]]'''. | ||
| + | |- | ||
| + | | Web Content Pre Expiration Notice || Web Content Pre Expiration Notice || This email is sent out, to the contact who submitted web content, three days prior to the expiration of the content. The email contains a link directing the contact to log-in, and extend dates if desired. | ||
| + | |- | ||
| + | | Web Content Publish Notice || Web Content Published || This email is sent out to those who have subscribed to web content notifications, when new web content is published. | ||
| + | |} | ||
| + | |||
| + | ===='''<span style="color:#800080">Configure Automated Messaging'''</span>==== | ||
| + | ---- | ||
| + | |||
#Click '''Setup''' in the navigation panel | #Click '''Setup''' in the navigation panel | ||
#In the '''Communications''' section, click '''Automated Messaging'''. A list of the available options for automated messages is displayed. See table below for further details. | #In the '''Communications''' section, click '''Automated Messaging'''. A list of the available options for automated messages is displayed. See table below for further details. | ||
| − | #:[[File:Auto | + | #:[[File:Auto Messages 19.jpg|1000px|center]] |
#You may change the default message sent for each of the available options. | #You may change the default message sent for each of the available options. | ||
| + | #You may also click the '''Do Not Send''' check-box for any messages you do not wish to be included in automatic messaging. | ||
#If changes are made, click the '''Save''' button to save your changes. | #If changes are made, click the '''Save''' button to save your changes. | ||
| + | {| class="wikitable" | ||
| + | |- | ||
| + | | | ||
| + | [[File:Smallest.png|25px]] | ||
| + | | style="width: 100%"| '''NOTE:''' Refer to [[Communications_Basics#Create_and_Manage_Email_Templates|Create and Manage Email Templates]] for details on working with email templates. When a template is selected for an automated message, the [[File:Orange edit.jpg|25px]] edit icon will be displayed, allowing you to access the template for editing. | ||
| + | |} | ||
| − | + | ===='''<span style="color:#800080">Disable Individual Automated Messages'''</span>==== | |
| + | ---- | ||
| − | + | If you do not wish to send one or more of the available automated messages: | |
| + | |||
| + | #Click '''Setup''' in the navigation panel | ||
| + | #In the '''Communications''' section, click '''Automated Messaging'''. A list of the available options for automated messages is displayed. See table below for further details. | ||
| + | #:[[File:Auto Messages 19.jpg|1000px|center]] | ||
| + | #Click the '''Do Not Send''' check-box for any messages of the messages you do wish to send. | ||
| + | #Click '''Save'''. | ||
| − | ===Configure | + | ==='''<span style="color:#800080">Configure Communication Categories'''</span>=== |
| + | ---- | ||
| − | + | '''Communication Categories''' provide a way for you to organize and filter email communications. Reports such as the '''Communication Report''' can be filtered by category to allow you to get a better understanding of the communications that are being sent. | |
| − | |||
| − | |||
| − | |||
| − | |||
| − | + | #Click '''Setup''' in the navigation panel | |
| + | #In the '''Communications''' section, click '''Communications Categories'''. A list of the current categories in the database will be displayed. | ||
| + | #Click the '''Add''' button to add a new category. The '''Add/Edit Communications Category''' dialog box will be displayed. | ||
| + | #Enter a '''Name''' for the category. This name will be displayed when you are selecting communication categories within the software so it should be descriptive and reflect the purpose of this category. | ||
| + | #N/A at this time | ||
| + | #Click '''Done''' to save the new category. | ||
| − | + | ==='''<span style="color:#800080">Signatures'''</span>=== | |
| − | [[File: | + | ---- |
| + | Creating your signature will save time when sending email correspondence. You can design your signature with both text & graphics, and easily select it when sending email correspondence. | ||
| + | ===='''<span style="color:#800080">Create your Signature'''</span>==== | ||
| + | ---- | ||
| + | #Click '''Setup''' in the navigation panel | ||
| + | #In the '''Communications''' section, click '''Signatures''' | ||
| + | #Click the '''Add''' Button. | ||
| + | #:[[File:Signature 2020.jpg|400px|center]] | ||
| + | #Provide a '''Name''' for the signature. You can create multiple signatures, so you will wish to provide a name that allows you to differentiate between signatures. | ||
| + | #If applicable, select a '''User'''. If a specific user is selected, the signature will only be available to that user. If no user is selected, then this signature is available to all users. | ||
| + | #In the '''Signature HTML''' text box you can customize your signature by adding your organization name, an image, a link, etc. Common word processing icons make it easy to format your signature as you desire. | ||
| + | #When completed, click '''Done'''. | ||
| + | ===='''<span style="color:#800080">Edit a Signature'''</span>==== | ||
| + | ---- | ||
| + | #Click '''Setup''' in the navigation panel | ||
| + | #In the '''Communications''' section, click '''Signatures'''. | ||
| + | #Click the hyper-link for the signature you wish to edit. | ||
| + | #Complete desired edits. | ||
| + | #Click '''Done'''. | ||
| + | ===='''<span style="color:#800080">Delete a Signature'''</span>==== | ||
| + | ---- | ||
| + | #Click '''Setup''' in the navigation panel | ||
| + | #In the '''Communications''' section, click '''Signatures'''. | ||
| + | #Click the hyper-link for the signature you wish to delete. | ||
| + | #Click the '''Delete''' button. | ||
| − | + | =='''<span style="color:#800080">Send E-mails'''</span>== | |
| − | + | ---- | |
| − | + | ==='''<span style="color:#800080">Send an Individual Email'''</span>=== | |
| + | ---- | ||
| + | Emails may be sent from multiple locations throughout the software | ||
| + | {| class="wikitable" | ||
| + | |- | ||
| + | | | ||
| + | [[File:One Row.png|25px]] | ||
| + | | style="width: 100%"| '''IMPORTANT''': You can click directly on an email address to send an email, however, this will send the email from your default email program (for example: Outlook). This is fine, but the communication will '''NOT''' be recorded on the recipient's '''Communication''' tab in the database. | ||
| + | |} | ||
| − | + | #In the '''Send Email''' window that appears, fill in the relevant and appropriate fields: | |
| + | #::[[File:EmailMessage.jpg|600px|center|]] | ||
| + | #:*'''From''': Required. This is a drop-down containing staff users | ||
| + | #:*'''To''': Required. If you initiate the email from within a Contact Record, this will already be populated. You can add recipients by clicking in the '''Add To''' field and typing the name you want. The system will search on-the-fly and you can select the user when it appears in the list. | ||
| + | #:*'''Add CC''': Begin typing in this field to select the user you want to Cc on the email. | ||
| + | #:*'''Add BCC''': Begin typing in this field to select the user you want to Cc on the email. | ||
| + | #:*'''Exclude Sending to Contacts on List''': If you have selected a list from the '''Address Book''' and you wish to exclude certain contacts on the list from receiving the email, enter the desired email addresses. See '''[[Communications_Basics#Send_a_Mass_Email|Send a Mass E-Mail]]''' for further details about using the '''Address Book'''. | ||
| + | #:*'''Subject''': Required. | ||
| + | #:*'''Category''': Select a Category if desired. Refer to '''[[Communications_Basics#Configure_Communication_Categories|Communication Categories]]''' for details. | ||
| + | #:*'''Template''': Select a Template if desired. Refer to '''[[Communications_Basics#Create_and_Manage_Email_Templates|Create and Manage Email Templates]]''' for details. | ||
| + | #:*'''Drafts''': If you are continuing an E-mail that you save as a draft, you can select it here. | ||
| + | #Enter the text of the message. You have editing capabilities and are able to insert database fields if desired. | ||
| + | #Click '''Attach Files''' if necessary. See '''[[Communications_Basics#Send_an_Email_Attachment|Send an Email Attachment]]''' for best practice information. | ||
| + | #Enter the Project name in the '''Project''' field if appropriate (requires the Projects/Tasks module.) This will record the email in the Communication Tab of the selected Project. | ||
| + | #'''View as Web Page''': Select this option to provide an option to recipients, should their email program have difficulty, to view the email. | ||
| + | #Enter a Date/Time in the '''Delay Delivery Until''' field if appropriate. This allows you to compose an email at your convenience but not have it sent until the day you select. | ||
| + | #If you need to finish the message later, click '''Save Draft''' | ||
| + | #If you are ready to send, click '''Send''' | ||
| − | + | The message will be recorded in the Contact's Communication Tab as well as the Communication Module. | |
| − | [[File: | + | ==='''<span style="color:#800080">Send a Mass Email'''</span>=== |
| + | ---- | ||
| + | The software provides you with an '''Address Book''' where lists/committees that you have created and dynamically created grouping have been created. For example: they system has dynamically created a group of all of your active members. Other dynamically created groups include: member category, event registrants, event attendees, event sponsors, etc. | ||
| + | To send an email using the address book: | ||
| + | #Click '''Quick Actions''' in the header bar. | ||
| + | #:[[File:Send email 2020.jpg|800px|center]] | ||
| + | #Click '''Send Email'''. | ||
| + | #On the '''Send Email''' screen, click the [[File:Address book icon 2020.jpg|25px]] icon, to open the address book. | ||
| + | #:[[File:Address book 2020.jpg|600px|center]] | ||
| + | #Select the desired group(s). You may select multiple. | ||
| + | #Click '''Done'''. | ||
| + | #If you wish to exclude any recipients from the email, enter the email addresses in the '''Exclude Sending to Contacts on List''' | ||
| + | #Complete your email as as described in [https://supportwiki.memberzone.org/Communications_Basics#Send_an_Individual_Email Send an Individual Email] and send. | ||
| − | == | + | {| class="wikitable" |
| + | |- | ||
| + | | | ||
| + | [[File:One Row.png|25px]] | ||
| + | | style="width: 100%"| '''NOTE:''' When sending a mass email, all recipients will be displayed in the "To" line, if the number of recipients is less than or equal to the '''Bulk E-Mail Threshold'''. If the number of recipients is greater than the '''Bulk E-Mail Threshold''', email addresses are blind-copied. See '''[[Communications_Basics#Configure_Visibility_of_E-mail_Addresses_when_sending_a_Mass_E-mail|Configure Visibility of E-mail Addresses when sending a Mass E-Mail]]'''. | ||
| + | |} | ||
| − | + | ==='''<span style="color:#800080">Preview an Email'''</span>=== | |
| + | ---- | ||
| + | If you have created an email with multiple images, merge fields, etc. you may wish to send a preview of the email to yourself or others. In the upper right-hand corner of the '''Send Email''' screen, you will find the '''Send Preview''' button. | ||
| + | [[File:Send Preview.jpg|600px|center]] | ||
| + | Clicking this, opens up simple email address input screen that allows you to easily sent a test of your email to yourself, or others. | ||
| − | + | [[File:Quick Email Preview.jpg|600px|center]] | |
| − | [[File: | + | {| class="wikitable" |
| + | |- | ||
| + | | | ||
| + | [[File:Smallest.png|25px]] | ||
| + | | style="width: 100%"| '''NOTE:''' If you are testing merge fields, you will want to ensure you have an individual in the TO field of the email (even if temporary). This allows the database to have information to merge from. | ||
| + | |} | ||
| − | |||
| − | |||
| − | |||
| − | |||
| − | |||
| − | |||
| − | |||
| − | + | ==='''<span style="color:#800080">Send an Email Attachment'''</span>=== | |
| + | ---- | ||
| − | [[ | + | It is best practice to include links to documents, rather than attach files. Attachments may cause emails to be blocked, and there may be maximum file sizes allowed by some email providers preventing your attachments from reaching the final destination. Your GrowthZone software includes a Cloud, to which you can easily upload documents and create sharing links to include in your email. See '''[[Cloud#Working_with_Documents_in_the_Cloud|Working with Documents in the Cloud]]''' for further information. |
| − | === | + | ==='''<span style="color:#800080">Forward an Email'''</span>=== |
| + | ---- | ||
| + | You can forward a previously sent email either from the Communications module on the Browse tab or from a contacts Communications tab, by clicking the | ||
| + | [[File:Forward icon 2021.jpg|25px]] icon. This will open the standard email screen, and place '''FWD:''' in front of the original subject. The forward icon will not show for notes, reminders or phone calls. | ||
| + | [[File:Communications browse 2021.jpg|800px|center]] | ||
| − | + | The forwarded email will get recorded in the Communication history like any regular email. | |
| − | + | '''NOTES''': | |
| − | + | *If forwarding an email that does not have merge fields, you'll be asked only to enter the forwarding email address. | |
| − | + | *If forwarding an email that originally had merge fields, you will be asked pick between two use cases: | |
| + | **Whether you want to send the previously merged data and if so, which recipient's data | ||
| + | **Whether you want to populate the merge fields with the data of the newly entered recipients of the forwarded email | ||
| − | ==== | + | =='''<span style="color:#800080">Create and Manage Email Templates'''</span>== |
| + | ---- | ||
| − | + | Email templates provide an easy way to respond to standard email tasks. For example, you may wish to send a thank you email to all those who have attended an event. You can create (or customize a default) template that can be used consistently for all of your events. This will allow you to efficiently send emails, and increase productivity. Email templates may also include database fields. | |
| − | + | There are a variety of default email templates populated in the database that you may us to meet your business needs. You may view the existing templates, edit copies of the existing templates, or create your own. To do any of these actions: | |
| − | |||
| − | |||
| − | |||
| − | |||
| − | + | #Click '''Setup''' in the navigation panel | |
| + | #In the '''Communications''' section, click '''Email Templates'''. A list of the default email templates will be displayed. | ||
| + | [[File:EmailTemplateList.png|center|600px]] | ||
| − | === | + | ==='''<span style="color:#800080">View a Default Email Template'''</span>=== |
| + | ---- | ||
| − | + | From the list of templates, (Setup > Communication > Email Templates), | |
| − | is to | + | #Click the name of the email template you wish to view or modify. The '''Edit Email Template''' dialog box will open. The following fields are displayed for your review: |
| + | #:'''Name''' - The name of the template is displayed for selection when you are sending emails. Additionally, the name of an email may be used for filtering and reporting. | ||
| + | #:'''Description''' - This field allows you to provide more details about this template. Visible internally only. | ||
| + | #:'''Category'''-The category field allows you to associate this template to specific email categories, and may also be used for filtering. Internal only. | ||
| + | #:'''Subject'''-The subject is the subject line of the email. | ||
| + | #:'''Template Text'''-The template text is the body of the email. | ||
| + | #:'''Make available to all users'''- when viewing a default template this checked box will indicate if the template is available to all users. | ||
| + | #Click the '''Done''' button when finished viewing | ||
| − | + | ==='''<span style="color:#800080">Edit a Default Email Template'''</span>=== | |
| − | + | ---- | |
| − | + | #Click '''Setup''' in the left-hand navigation panel. | |
| + | #Click '''Email Templates''' in the '''Communication''' section. | ||
| + | #Click the Edit icon ([[File:CopyTemplateIcon.png|50px]]) to the far right of the template name. '''NOTE:''' The system is actually making a ''copy'' for you to edit. Original templates themselves cannot be edited or deleted. | ||
| + | #Make changes in the Edit Email Template window that appears. See [[Communications_Basics#View_a_Default_Email_Template|View a Default Email Template]] above for description of available fields. | ||
| + | #:[[File:EditEmailTemplate.png|center|600px]] | ||
| + | #:'''Name''' - If you do not change the name, the system will add the word "Copy" to the end of it. | ||
| + | #:'''Description''' | ||
| + | #:'''Category''' | ||
| + | #:'''Subject''' Database fields (indicated by {{ }} ) cannot be added by the user to the subject line. If the subject line of the template you are editing contains a database field that you don't want, simply delete it (you cannot edit it). | ||
| + | #:'''Template Text''' In the body of the email database fields are in double brackets and also highlighted in yellow. The field contents will '''not''' be highlighted in the sent message. Also, only make cosmetic or location changes to these fields (do not edit the names). See below for how to add fields to the template. | ||
| + | #:'''From Email Address'''-select the staff address from the dropdown that will be used if the email is sent automatically | ||
| + | #:'''Make available to all users'''- check this box if you want this template to be available. If unchecked the template will only be available to the person who created it | ||
| + | #Click '''Done''' | ||
| − | ''' | + | ===='''<span style="color:#800080">Add Database Fields to a Template'''</span>==== |
| + | ---- | ||
| − | + | #Put your cursor where you want place the data base field. | |
| + | #Click on '''Insert Merge Field''' in the editing bar. | ||
| + | # | ||
| + | #Scroll through the list of available fields (or use the Search feature at the top of the list) | ||
| + | #*The fields available for merging are dependent on the email template type. For example, if the email template type is "Event" then event related fields will be available. | ||
| + | #* Not every field in the database is available to merge. | ||
| + | #* "Tenant" refers to your organization | ||
| + | #Click on the field you want to enter | ||
| + | #Click the '''Save & Close''' button | ||
| + | [[File:InsertMergeFields.png|center|600px]] | ||
{| class="wikitable" | {| class="wikitable" | ||
| − | |||
| − | |||
| − | |||
| − | |||
| − | |||
| − | |||
| − | |||
| − | |||
| − | |||
| − | |||
| − | |||
| − | |||
| − | |||
| − | |||
| − | |||
| − | |||
| − | |||
| − | |||
| − | |||
| − | |||
| − | |||
| − | |||
| − | |||
| − | |||
| − | |||
| − | |||
| − | |||
| − | |||
| − | |||
| − | |||
| − | |||
| − | |||
| − | |||
| − | |||
| − | |||
| − | |||
| − | |||
| − | |||
| − | |||
|- | |- | ||
| + | | | ||
| + | [[File:Smallest.png|25px]] | ||
| + | | style="width: 100%"| '''NOTE:''' '''Event-related fields''' will only populate correctly if sent from within an event. | ||
|} | |} | ||
| − | < | + | ==='''<span style="color:#800080">Add a New Email Template'''</span>=== |
| + | ---- | ||
| + | #Click '''Setup''' in the left-hand navigation panel. | ||
| + | #Click '''Email Templates''' in the '''Communication''' section. | ||
| + | #Click the '''Add''' button in the top right corner. | ||
| + | #:[[File:Email template.jpg|600px|center]] | ||
| + | #Configure the available fields: See [[Communications_Basics#View_a_Default_Email_Template|View a Default Email Template]] above for description of available fields. | ||
| + | #*'''Name''': This is the name that will appear in template selection drop-downs. | ||
| + | #*'''Description''': (Optional) | ||
| + | #*'''Category''': Select the appropriate category for the email template. This option drives which data base fields are available to include in your template '''AND''' where the template is available for use in the software. '''IMPORTANT''': The Category of an email template can '''NOT''' be changed after a merge field has been placed in and the template has been saved. This will help prevent merge fields that only work in certain categories to be unintentionally used elsewhere. See the table below for proper category usage. | ||
| + | #*'''Template Text''': Customize font and paragraphs using the standard word-processing icons such as bolding, italicizing, underlining, etc. You can also insert hyper-links, Youtube videos, images and merge fields. '''NOTE''': The merge fields available are based on the '''Category''' you have selected. | ||
| + | #*'''From Email Address''': This is the default from email address. It may be over-ridden when using the template. | ||
| + | #*'''Make Available to Other Users''': Select this option if you wish the template to be available to all of your staff members. If deselected, it will only be available to you. | ||
| + | #Click '''Done'''. | ||
| − | + | <table border="1" cellpadding="0" cellspacing="0" style="border-collapse:collapse;border:none;margin-left:auto;margin-right:auto;"> | |
| + | <tr> | ||
| + | <td colspan="2" style="width: 623px; border: 1pt solid windowtext; background: rgb(166, 166, 166); padding: 0in 5.4pt; vertical-align: top; text-align: center;"><span style="font-size:14.0pt;">Email Temp<span style="color:black;">late Categories</span></span></td> | ||
| + | </tr> | ||
| + | <tr> | ||
| + | <td style="width:221px;border:solid windowtext 1.0pt;border-top:none;padding:0in 5.4pt 0in 5.4pt;vertical-align:top;">Billing Finance</td> | ||
| + | <td style="width:401px;border-top:none;border-left:none;border-bottom:solid windowtext 1.0pt;border-right:solid windowtext 1.0pt;padding:0in 5.4pt 0in 5.4pt;vertical-align:top;">Use this category for email templates you wish to use for delivering invoices.</td> | ||
| + | </tr> | ||
| + | <tr> | ||
| + | <td style="width:221px;border:solid windowtext 1.0pt;border-top:none;padding:0in 5.4pt 0in 5.4pt;vertical-align:top;">Continuing Education</td> | ||
| + | <td style="width:401px;border-top:none;border-left:none;border-bottom:solid windowtext 1.0pt;border-right:solid windowtext 1.0pt;padding:0in 5.4pt 0in 5.4pt;vertical-align:top;">This category is used for email templates automatically sent for Continuing Education (i.e. Certification Completed)</td> | ||
| + | </tr> | ||
| + | <tr> | ||
| + | <td style="width:221px;border:solid windowtext 1.0pt;border-top:none;padding:0in 5.4pt 0in 5.4pt;vertical-align:top;">Event<br /> | ||
| + | Event Attendee<br /> | ||
| + | Event Invite<br /> | ||
| + | Event Reminder</td> | ||
| + | <td style="width:401px;border-top:none;border-left:none;border-bottom:solid windowtext 1.0pt;border-right:solid windowtext 1.0pt;padding:0in 5.4pt 0in 5.4pt;vertical-align:top;">Use this category for emails sent from the Events module. This will provide event specific fields that would not populate if sent from any where else in the software</td> | ||
| + | </tr> | ||
| + | <tr> | ||
| + | <td style="width:221px;border:solid windowtext 1.0pt;border-top:none;padding:0in 5.4pt 0in 5.4pt;vertical-align:top;">Forum</td> | ||
| + | <td style="width:401px;border-top:none;border-left:none;border-bottom:solid windowtext 1.0pt;border-right:solid windowtext 1.0pt;padding:0in 5.4pt 0in 5.4pt;vertical-align:top;">Use this category for emails automatically sent to those who have subscribed to Forum update notifications</td> | ||
| + | </tr> | ||
| + | <tr> | ||
| + | <td style="width:221px;border:solid windowtext 1.0pt;border-top:none;padding:0in 5.4pt 0in 5.4pt;vertical-align:top;">Fundraiser donation</td> | ||
| + | <td style="width:401px;border-top:none;border-left:none;border-bottom:solid windowtext 1.0pt;border-right:solid windowtext 1.0pt;padding:0in 5.4pt 0in 5.4pt;vertical-align:top;">Use this category for emails sent from within the Fundraiser module. Includes fields specific to fundraiser and the campaign you are sending from.</td> | ||
| + | </tr> | ||
| + | <tr> | ||
| + | <td style="width:221px;border:solid windowtext 1.0pt;border-top:none;padding:0in 5.4pt 0in 5.4pt;vertical-align:top;">Login Reset</td> | ||
| + | <td style="width:401px;border-top:none;border-left:none;border-bottom:solid windowtext 1.0pt;border-right:solid windowtext 1.0pt;padding:0in 5.4pt 0in 5.4pt;vertical-align:top;">Use this category for email templates you wish to use when communicating to members either from the member’s communication tab, the Quick Actions email option or groups. Includes specific merge fields for managing user login</td> | ||
| + | </tr> | ||
| + | <tr> | ||
| + | <td style="width:221px;border:solid windowtext 1.0pt;border-top:none;padding:0in 5.4pt 0in 5.4pt;vertical-align:top;">Member Communication<br /> | ||
| + | Board/Committee<br /> | ||
| + | Chapter Suborganization<br /> | ||
| + | Directory Contact Email<br /> | ||
| + | Other<br /> | ||
| + | Political Action<br /> | ||
| + | Sales Prospecting</td> | ||
| + | <td style="width:401px;border-top:none;border-left:none;border-bottom:solid windowtext 1.0pt;border-right:solid windowtext 1.0pt;padding:0in 5.4pt 0in 5.4pt;vertical-align:top;">Use this category for email templates you wish to use when communicating to members either from the member’s communication tab, the Quick Actions , Sales Funnel and Lists/Committees. In these cases, the category is simply a way for you to organize your email templates. All provide the same contact information</td> | ||
| + | </tr> | ||
| + | <tr> | ||
| + | <td style="width:221px;border:solid windowtext 1.0pt;border-top:none;padding:0in 5.4pt 0in 5.4pt;vertical-align:top;">Member Profile Update</td> | ||
| + | <td style="width:401px;border-top:none;border-left:none;border-bottom:solid windowtext 1.0pt;border-right:solid windowtext 1.0pt;padding:0in 5.4pt 0in 5.4pt;vertical-align:top;">Do not use</td> | ||
| + | </tr> | ||
| + | <tr> | ||
| + | <td style="width:221px;border:solid windowtext 1.0pt;border-top:none;padding:0in 5.4pt 0in 5.4pt;vertical-align:top;">Membership Renewal</td> | ||
| + | <td style="width:401px;border-top:none;border-left:none;border-bottom:solid windowtext 1.0pt;border-right:solid windowtext 1.0pt;padding:0in 5.4pt 0in 5.4pt;vertical-align:top;">Do not use</td> | ||
| + | </tr> | ||
| + | <tr> | ||
| + | <td style="width:221px;border:solid windowtext 1.0pt;border-top:none;padding:0in 5.4pt 0in 5.4pt;vertical-align:top;">Newsletter</td> | ||
| + | <td style="width:401px;border-top:none;border-left:none;border-bottom:solid windowtext 1.0pt;border-right:solid windowtext 1.0pt;padding:0in 5.4pt 0in 5.4pt;vertical-align:top;">Do not use</td> | ||
| + | </tr> | ||
| + | <tr> | ||
| + | <td style="width:221px;border:solid windowtext 1.0pt;border-top:none;padding:0in 5.4pt 0in 5.4pt;vertical-align:top;">Sales Funnel</td> | ||
| + | <td style="width:401px;border-top:none;border-left:none;border-bottom:solid windowtext 1.0pt;border-right:solid windowtext 1.0pt;padding:0in 5.4pt 0in 5.4pt;vertical-align:top;">Used for Sales Funnel automated messages. If provides your staff with sales funnel acceptance data. When sending email to contacts from the Sales Funnel use the Member Communication category</td> | ||
| + | </tr> | ||
| + | <tr> | ||
| + | <td style="width:221px;border:solid windowtext 1.0pt;border-top:none;padding:0in 5.4pt 0in 5.4pt;vertical-align:top;">Store</td> | ||
| + | <td style="width:401px;border-top:none;border-left:none;border-bottom:solid windowtext 1.0pt;border-right:solid windowtext 1.0pt;padding:0in 5.4pt 0in 5.4pt;vertical-align:top;">Do not use</td> | ||
| + | </tr> | ||
| + | <tr> | ||
| + | <td style="width:221px;border:solid windowtext 1.0pt;border-top:none;padding:0in 5.4pt 0in 5.4pt;vertical-align:top;">Trial Account</td> | ||
| + | <td style="width:401px;border-top:none;border-left:none;border-bottom:solid windowtext 1.0pt;border-right:solid windowtext 1.0pt;padding:0in 5.4pt 0in 5.4pt;vertical-align:top;">Do not use</td> | ||
| + | </tr> | ||
| + | </table> | ||
| − | + | ==='''<span style="color:#800080">Copy an Email Template'''</span>=== | |
| + | ---- | ||
| + | {| class="wikitable" | ||
| + | |- | ||
| + | | | ||
| + | [[File:One Row.png|25px]] | ||
| + | | style="width: 100%"| '''NOTE:''' You can only copy email templates that you have created from scratch, or from copies you have made of the default templates. | ||
| + | |} | ||
| + | #Click '''Setup''' in the left-hand navigation panel. | ||
| + | #Click '''Email Templates''' in the '''Communication''' section. | ||
| + | #:[[File:Copy email template 2020.jpg|1000px|none]] | ||
| + | #Click the [[File:Copy form 2020.jpg|30px]] icon for the template you wish to copy. | ||
| + | #Click '''OK''' to confirm that you wish to make a copy. The copy will be listed as "Copy of..." at the bottom of the list of templates. | ||
| − | == | + | =='''<span style="color:#800080">Outlook Add-on'''</span>== |
| + | ---- | ||
The Outlook Add-on provides the ability to attach e-mails, sent via Outlook, to a contact's general communication tab and/or to a project. | The Outlook Add-on provides the ability to attach e-mails, sent via Outlook, to a contact's general communication tab and/or to a project. | ||
| − | === | + | {| class="wikitable" |
| + | |- | ||
| + | | | ||
| + | [[File:One Row.png|25px]] | ||
| + | | style="width: 100%"| '''COMPATIBILITY''': The Outlook Add-on is only available for Windows OS. | ||
| + | |} | ||
| + | |||
| + | ==='''<span style="color:#800080">Install the Outlook Add-on'''</span>=== | ||
| + | ---- | ||
Download the Outlook Add-On to start tagging incoming or sent emails: | Download the Outlook Add-On to start tagging incoming or sent emails: | ||
| Line 307: | Line 567: | ||
#Click '''Save'''. | #Click '''Save'''. | ||
| − | + | {| class="wikitable" | |
| + | |- | ||
| + | | | ||
| + | [[File:Smallest.png|25px]] | ||
| + | | style="width: 100%"| '''NOTE:''' Connection settings will be saved for all future use and you will not need to re-enter your credentials. | ||
| + | |} | ||
| − | |||
| − | + | ==='''<span style="color:#800080">Attach emails to contacts/projects with the Outlook Add-on'''</span>=== | |
| + | ---- | ||
| + | |||
| + | This functionality will allow you to attach the communication to the original recipient(s) and sender. Additionally, you can select contacts from your database (or create new contacts) who may not have been initial recipient(s)/sender of the email. You can also attach the communication to your existing projects, or create a new project to which the communication can be associated. | ||
#In Outlook, open the email that you wish to attach to a contact/project. | #In Outlook, open the email that you wish to attach to a contact/project. | ||
| Line 332: | Line 599: | ||
#'''Attaching the communication to a Project''': If you are using the GrowthZone Projects module, you can also attach communications to projects. Begin typing the name of the project in the '''Projects''' text box. A list of projects matching your text will display. Select the desired project. If the project to which you wish to attach the communication does not exist, you can add a new project by clicking the '''Add''' button. | #'''Attaching the communication to a Project''': If you are using the GrowthZone Projects module, you can also attach communications to projects. Begin typing the name of the project in the '''Projects''' text box. A list of projects matching your text will display. Select the desired project. If the project to which you wish to attach the communication does not exist, you can add a new project by clicking the '''Add''' button. | ||
#Click '''Attach'''. | #Click '''Attach'''. | ||
| − | |||
| − | |||
| − | |||
| − | |||
| − | |||
| − | |||
| − | |||
| − | |||
| − | |||
| − | |||
| − | |||
| − | |||
| − | |||
| − | |||
| − | |||
| − | |||
| − | |||
| − | |||
| − | |||
| − | |||
| − | |||
| − | |||
| − | |||
| − | |||
| − | |||
| − | |||
| − | |||
| − | |||
| − | |||
| − | |||
| − | |||
| − | |||
| − | |||
| − | |||
| − | |||
| − | |||
| − | |||
| − | |||
| − | |||
| − | |||
| − | |||
| − | |||
| − | |||
| − | |||
| − | |||
| − | |||
| − | |||
| − | |||
| − | |||
| − | |||
| − | |||
| − | |||
| − | |||
| − | |||
| − | |||
| − | |||
| − | |||
| − | |||
| − | |||
| − | |||
| − | |||
| − | |||
| − | |||
| − | |||
| − | |||
| − | |||
| − | |||
| − | |||
| − | |||
| − | |||
| − | |||
| − | |||
| − | |||
| − | |||
| − | |||
| − | |||
| − | |||
| − | |||
| − | |||
| − | |||
| − | |||
| − | |||
| − | |||
| − | |||
| − | |||
| − | |||
| − | |||
| − | |||
| − | |||
| − | |||
| − | |||
| − | |||
| − | |||
| − | |||
| − | |||
| − | |||
| − | |||
| − | |||
| − | |||
| − | |||
| − | |||
| − | |||
| − | |||
| − | |||
| − | |||
| − | |||
| − | |||
| − | |||
| − | |||
| − | |||
| − | |||
| − | |||
| − | |||
| − | |||
| − | |||
| − | |||
| − | |||
| − | |||
| − | |||
| − | |||
| − | |||
| − | |||
| − | |||
| − | |||
| − | |||
| − | |||
| − | |||
| − | |||
| − | |||
| − | |||
| − | |||
| − | |||
| − | |||
| − | |||
| − | |||
| − | |||
| − | |||
| − | |||
| − | |||
| − | |||
| − | |||
| − | |||
| − | |||
| − | |||
| − | |||
| − | |||
| − | |||
| − | |||
| − | |||
| − | |||
| − | |||
| − | |||
| − | |||
| − | |||
| − | |||
| − | |||
| − | |||
| − | |||
| − | |||
| − | |||
| − | |||
| − | |||
| − | |||
| − | |||
| − | |||
| − | |||
| − | |||
| − | |||
| − | |||
| − | |||
| − | |||
| − | |||
| − | |||
| − | |||
| − | |||
| − | |||
| − | |||
| − | |||
| − | |||
| − | |||
| − | |||
| − | |||
| − | |||
| − | |||
| − | |||
| − | |||
| − | |||
=Communications Module= | =Communications Module= | ||
| Line 531: | Line 611: | ||
<div class='note'>'''NOTE:''' You can review communications to individual contacts on the contact's communication tab.</div> | <div class='note'>'''NOTE:''' You can review communications to individual contacts on the contact's communication tab.</div> | ||
| − | ===View Email Delivery Statistics=== | + | ==='''<span style="color:#800080">View Email Delivery Statistics'''</span>=== |
| + | ---- | ||
| + | |||
| + | The '''Communication Delivery Stats''' will help you understand the effectiveness of your email communications. You will be able to gauge the success of your email campaigns by looking at open rates, reviewing whether an individual recipient received/opened the message. This allows you to see who did not receive the communication based on a delivery failure so that you can determine possible list/contact cleanup then redistribute. | ||
| + | |||
| + | #Click '''Communications''' in the left-hand navigation panel. | ||
| + | #On the '''Browse''' tab, click the [[File:Del Stats.jpg]] in the '''Actions''' column for the desired email. | ||
| − | + | NOTE: Please view the new '''[https://helpdesk.growthzone.com/kb/article/81-view-email-delivery-statistics/| GrowthZone Knowledge Base]''' for updated screen captures and descriptions. | |
| − | + | The '''Communications Delivery Stats''' screen will display: | |
| + | *'''Total Recipients''': The total number of recipients to whom the email was sent. | ||
| + | *'''Recipients Who Opened''': Number of recipients who opened the email. | ||
| + | *'''Open Rate''': The total number of times your users opened your emails, divided by the total number of Delivered messages. | ||
| + | *'''Total Delivery Failures or Bounces''': Total number of emails that were not delivered. | ||
| + | *'''Number of Bounces''': Total number of bounces. A bounce occurs when the receiving server could not or would not accept the message. | ||
| + | *'''Bounce Rate''': Total number of bounces, divided by the total recipients. Bounced emails hurt your reputation as well as GrowthZone's so it’s important to keep your bounce rate low (ideally as close to 0% as possible). | ||
| + | *'''Number of Distinct Clicks''': The number of unique individuals that have clicked the links in your emails. | ||
| + | *'''Total Number of Clicks''': The total number of times your users have clicked on the various links within your emails. | ||
| + | *'''Recipients That Have Clicked''': The number of recipients who have clicked links in your emails. | ||
| + | *'''Click Through Rate''': The number of unique clicks divided by the number of unique opens. For Example: Let's say that you send out an email to 1000 recipients, and of those 1000 messages you register 300 unique opens. Then, out of those 300 unique opens, you record 100 unique clicks. This would give you a click-through rate of 33.3%, since 100 clicks divided by 300 opens equals 0.333 multiplied by 100. | ||
| + | *'''Open Events''': This section will display a list of all recipients who opened the email. | ||
| + | *'''Click Events''': This section will display a list of links that were clicked. Each of the links is unique, as the links in your email are converted for tracking purposes. Click into the link to view which recipient clicked. | ||
| + | |||
| + | {| class="wikitable" | ||
| + | |- | ||
| + | | | ||
| + | [[File:One Row.png|25px]] | ||
| + | | style="width: 100%"| '''NOTE''': Communication Delivery Statistics are not available for automated messages. | ||
| + | |} | ||
| − | [[File: | + | ===='''<span style="color:#800080">Download Communication Delivery Statistics'''</span>==== |
| + | ---- | ||
| + | Communication stats, described above, can be downloaded to an excel spreadsheet. | ||
| + | #Click '''Communications''' in the left-hand navigation panel. | ||
| + | #:[[File:Download comms stats 2020.png|800px|center]] | ||
| + | #On the '''Browse''' tab, click the [[File:Download 2020.png|25px]] icon in the '''Actions''' column for the desired email. | ||
| − | The | + | The delivery stats will download into an excel spreadsheet. |
==Send Newsletters== | ==Send Newsletters== | ||
| Line 577: | Line 687: | ||
'''NOTE:''' Once a draft email is sent, it is no longer listed on the Email Drafts page, nor will it be visible in the drafts drop-down list when sending emails. It is not a template. | '''NOTE:''' Once a draft email is sent, it is no longer listed on the Email Drafts page, nor will it be visible in the drafts drop-down list when sending emails. It is not a template. | ||
| − | ==View/Edit/Delete Scheduled Emails== | + | ==='''<span style="color:#800080">View/Edit/Delete Scheduled Emails'''</span>=== |
| − | + | ---- | |
On the '''Communications''' module '''Scheduled Emails''' tab, you can be view, edit and delete scheduled emails. | On the '''Communications''' module '''Scheduled Emails''' tab, you can be view, edit and delete scheduled emails. | ||
| − | |||
[[File:Scheduled Emails.jpg|frame|center]] | [[File:Scheduled Emails.jpg|frame|center]] | ||
| − | |||
Click the '''Edit Email''' [[File:Edit Email.jpg|frameless]] icon to view and edit the scheduled email. | Click the '''Edit Email''' [[File:Edit Email.jpg|frameless]] icon to view and edit the scheduled email. | ||
Click the '''Delete''' [[File:Delete Scheduled Email.jpg|frameless]] icon to view and edit the scheduled email. | Click the '''Delete''' [[File:Delete Scheduled Email.jpg|frameless]] icon to view and edit the scheduled email. | ||
| + | =='''<span style="color:#800080">Push Notifications'''</span>== | ||
| + | ---- | ||
| + | You can easily send notification to those members who have downloaded the '''MemberPlus''' app. You can choose to notify members of a list/committee or all users. See '''[[MemberPlus_App|MemberPlus App]]''' for more information on the app. | ||
| + | ==='''<span style="color:#800080">Send a Push Notification'''</span>=== | ||
| + | ---- | ||
| + | #Select '''Communications''' in the left-hand panel. | ||
| + | #Click the '''Push Notifications''' tab. | ||
| + | #:[[File:Push notifications complete 2020.jpg|600px|center]] | ||
| + | #'''Recipients''': Select '''Send To All Users''' to send the message to all MemberPlus app users, or enter one or more lists/committees to which you wish to send the message. | ||
| + | #Enter your '''Message'''. You message is limited to 255 characters. | ||
| + | #Click '''Send'''. | ||
| + | The notification has been sent to the selected recipients. | ||
| + | [[File:App push notification message 2020.jpg|200px|center]] | ||
| + | {| class="wikitable" | ||
| + | |- | ||
| + | | | ||
| + | [[File:One Row.png|25px]] | ||
| + | | style="width: 100%"| '''NOTE:''' Members must enable notifications on their device. They are prompted when first installing the app or when they view notifications in the app if they have not previously allowed notification permissions. Members can always view notifications in the app, even if their device does not prompt them, just tap on the bell icon in the top right of the app’s home page. | ||
| + | |} | ||
| + | =='''<span style="color:#800080">Email Designer'''</span>== | ||
| + | ---- | ||
| + | With your GrowthZone software, the '''Email Designer''' provides you the ability to create and design your own newsletters and email templates. The Email Designer is extremely flexible and provides tools for basic content elements that you can use to create and design your newsletter. Your content will look great on all devices, browsers and email clients. We have included a variety of templates for you, that you can update and customize as needed. Or you can simply start from scratch, scratch and create your own templates. | ||
| + | {| class="wikitable" | ||
| + | |- | ||
| + | | | ||
| + | [[File:One Row.png|25px]] | ||
| + | | style="width: 100%"| '''NOTE:''' The '''Email Designer''' is available to those who have purchased the '''Marketing Automation''' module. | ||
| + | |} | ||
| + | ==='''<span style="color:#800080">Designing Your Newsletters'''</span>=== | ||
| + | ---- | ||
| + | We have provided you with a variety of newsletter templates that you can use as designed, or edit to suit your business needs. Many standard and custom tools are available to you for designing your templates. | ||
| + | ===='''<span style="color:#800080">View Default Email Designer Templates'''</span>==== | ||
| + | ---- | ||
| + | #Click '''Communications''' in the left-hand navigation panel. | ||
| + | #:[[File:Email designer 2020.jpg|800px|center]] | ||
| + | #Click the '''Email Designer''' tab. | ||
| + | #In the '''Templates''' list, select the template you wish to view. | ||
| + | #:[[File:Select template 2020.jpg|500px|center]] | ||
| − | + | You can customize these templates to suit your needs, if you are going to immediately send the newsletter out. Changes to the template will '''NOT''' be saved. If you wish to design your own template for future use, see '''[[Communications_Basics#Create_a_Email_Designer_Template_from_Scratch|Create a Email Designer Template from Scratch]]'''. | |
| − | == | + | ===='''<span style="color:#800080">Create a Email Designer Template from Scratch'''</span>==== |
| + | ---- | ||
| + | Brand consistency is the first thing to consider when designing your email and newsletter templates. The look and feel of your email should be consistent with your brand's personality, graphics, colors, fonts and images. You can create a template from scratch, and include all of the elements that should consistently be included in your newsletters, such as your logo, contact us button, and more. Then, when you are ready to send out a newsletter, you will simply need to update the template with the latest news. | ||
| + | #Click '''Setup''' in the left-hand navigation panel. | ||
| + | #Click '''Email Templates''' in the '''Communications''' section. | ||
| + | #:[[File:Email designer scratch 2020.jpg|800px|center]] | ||
| + | #Click '''Email Designer'''. | ||
| + | #:[[File:Email designer blank 2020.jpg|800px|center]] | ||
| + | #Enter a '''Name''' for the template. | ||
| + | #Enter a '''Subject''' for the template. You will be able to over-ride the subject when sending the newsletter/email. | ||
| + | #Use all of the '''Standard Tools''' and '''Custom Tools''' to design your template. | ||
| + | #When your design is complete, click '''Done'''. This template will now be available for selection when sending out your newsletters. | ||
| − | + | {| class="wikitable" | |
| + | |- | ||
| + | | | ||
| + | [[File:One Row.png|25px]] | ||
| + | | style="width: 100%"| '''IMPORTANT''': These templates are only available when sending newsletters under '''Communications > Email Designer''', and will '''NOT''' be available when sending out standard eMails. | ||
| + | |} | ||
| − | + | ===='''<span style="color:#800080">Template Settings - Global'''</span>==== | |
| − | + | ---- | |
| − | + | ===='''<span style="color:#800080">Template Body'''</span>==== | |
| − | + | ---- | |
| − | + | Using the '''Body''' option, you can define the global settings for your templates, including the width of the template, the background color, default fonts to be used, link color, etc. | |
| − | + | [[File:Body tool 2020.jpg|600px|center]] | |
| − | |||
| − | |||
| − | [[File: | + | ===='''<span style="color:#800080">Standard Tools'''</span>==== |
| + | ---- | ||
| + | Tools are basic content elements that are used to design your templates. Text, image, and button are some examples of the built-in tools. To start using these tools, you will simply drag them into your newsletter to add content. Content formatting options are displayed when a tool is add to your document. | ||
| + | |||
| + | [[File:All tools 2020.jpg|300px|center]] | ||
| + | ====='''<span style="color:#800080">Columns'''</span>===== | ||
| + | ---- | ||
| + | Rows and columns make it easy to organize content elements, like images and text. When getting started with designing your newsletter, you may wish to use the column tool to add columns and rows first, so you can then add additional content in just the right place. | ||
| + | Drag & drop the '''Column''' tool into your template. You will then be able to define the number of columns in each row. Add as many rows as needed, you will always be able to go back and remove rows or change the number of columns you have added to the rows. | ||
| − | + | '''''<span style="color:#800080">Learn more! View a short tutorial on adding columns to your template'''''</span> | |
| + | :[[File:Columns in action.jpg|500px|center|link=https://www.screencast.com/t/Ik8gaElpkY]] | ||
| − | + | ====='''<span style="color:#800080">Text'''</span>===== | |
| − | + | ---- | |
| − | + | {| | |
| − | + | |- | |
| − | + | |style="padding: 20px" | | |
| − | + | [[File:Text tool icon 2020.jpg|50px]] | |
| − | + | ||The '''Text''' tool allows you to add the text block to your newsletter. Simply drag and drop the block into your newsletter, and type your text. Standard word processing functions are available, such as font size, alignment, etc, are available for formatting your text. The ability to insert merge fields allows for further customization, such as adding today's date, the Info Hub login URL, etc. | |
| − | *''' | + | |} |
| − | + | '''TIPS:''' | |
| + | *Ensure your text is easy to read, and avoid the pitfalls of using background or font colors that make your text difficult to read. | ||
| + | *A variety of fonts are available for your text, however, stick to standard web safe fonts, such as Arial, Verdana, Georgia, Times New Roman, and Courier. Not all fonts are supported universally, so if you’re using something niche, you may be at the mercy of having the email platform it’s displayed on change it to something else—which could potentially affect spacing, layout, and the overall look. | ||
| + | *'''NOTE:''' "Line Height" settings may not be honored/displayed correctly by all email programs (notably Outlook). | ||
| − | + | ====='''<span style="color:#800080">Add Merge Tags to Text'''</span>===== | |
| − | + | ---- | |
| + | When working with the text tool, you have the ability to insert merge fields for further customization, such as adding today's date, the Info Hub login URL, etc. | ||
| + | #Drag & Drop the text block into your newsletter. | ||
| + | #If needed, begin typing your text. | ||
| + | #Place your cursor where you would like to insert the merge field. | ||
| + | #:[[File:Merge tags 2020.jpg|400px|center]] | ||
| + | #Click '''Merge Tags''' and select the desired tag. | ||
| − | == | + | ====='''<span style="color:#800080">Image Tool'''</span>===== |
| + | ---- | ||
| + | {| | ||
| + | |- | ||
| + | |style="padding: 20px" | [[File:Image icon 2020.jpg|55px]] ||A newsletter full of text can be very boring to look at, and images can be a really great way of communicating what you're about to your readers. Images can help readers to connect with the content of your email and can keep their attention focused on the right area. Use the '''Image''' tool to add images to your newsletter. Simply drag & drop the image tool into your newsletter template, then upload your image and format as needed. | ||
| + | |} | ||
| + | '''<span style="color:#800080">TIP:'''</span>''' | ||
| + | :Because some email clients don’t display background images, ensure that your email looks good and works without images. Use '''alt text''' to describe any images you use so that even with images disabled, the newsletter will still make sense. | ||
| + | '''''<span style="color:#800080">Learn more! View a short tutorial on adding images to your template'''''</span> | ||
| + | :[[File:Columns in action.jpg|500px|center|link=https://www.screencast.com/t/FruWvC0js]] | ||
| + | A variety of stock images are also available for you to use. Click the '''Images''' icon, to choose an image, and drag & drop it into your newsletter. | ||
| + | [[File:Stock images 2020.jpg|600px|center]] | ||
| + | ====='''<span style="color:#800080">Social Icon Tool'''</span>===== | ||
| + | ---- | ||
| + | {| | ||
| + | |- | ||
| + | |style="padding: 20px" | [[File:Social tool icon 2020.jpg|55px]] ||Including your social network icons on your template provides an additional opportunity for your members to connect with you. Include your company's Facebook page, twitter account, etc. We recommend that you add these social media buttons at the bottom of your templates. Drag & Drop tool onto your template, then select the social networks you wish to include, and provide the appropriate URL. | ||
| + | |} | ||
| + | '''''<span style="color:#800080">Learn more! View a short tutorial on adding social network icons to your template'''''</span> | ||
| + | :[[File:Columns in action.jpg|500px|center|link=https://www.screencast.com/t/UttUtpFI]] | ||
| − | + | ====='''<span style="color:#800080">Video Tool'''</span>===== | |
| + | ---- | ||
| + | {| | ||
| + | |- | ||
| + | | style="padding: 20px" | [[File:Video tool 2020.jpg|55px]] ||Videos embedded in your newsletter are a dynamic way to engage your readers. Using the Video tool, you can include a YouTube or Vimeo URL to automatically generate a preview image. The image will then link to the provided URL. | ||
| + | |} | ||
| + | '''''<span style="color:#800080">Learn more! View a short tutorial on adding a video to your template'''''</span> | ||
| + | :[[File:Columns in action.jpg|400px|center|link=https://www.screencast.com/t/89s0dgICK2b]] | ||
| − | + | ====='''<span style="color:#800080">HTML Tool'''</span>===== | |
| − | # | + | ---- |
| − | + | {| | |
| − | + | |- | |
| − | + | |style="padding: 20px" | [[File:Html tool icon 2020.jpg|55px]] ||The '''HTML''' tool allows you to add custom HTML content into your template. We recommend that only users familiar with HTML use these blocks since adding custom code to the template can affect its rendering and responsiveness. Once you have added the HTML block to your newsletter, default code '''"Hello world!"''' is displayed, click on the content block to add you HTML code. You can write your own HTML or paste in existing HTML in the code editor, then click Save Code to return to the email template. As you enter your code, an immediate preview is displayed in your newsletter. | |
| − | + | |} | |
| − | + | '''''<span style="color:#800080">Learn more! View a short tutorial on adding HTML Code to your template'''''</span> | |
| − | + | :[[File:Columns in action.jpg|400px|center|link=https://www.screencast.com/t/4v8IY2xUTk]] | |
| − | |||
| − | [[File: | + | ====='''<span style="color:#800080">Divider Tool'''</span>===== |
| + | ---- | ||
| + | {| | ||
| + | |- | ||
| + | |style="padding: 20px" | [[File:Divider tool 2020.jpg|55px]] ||The Divider tool allows you to add styled horizontal lines that divide your content. This will help organize and add visual content in your newsletter. Drag and drop the tool into your newsletter, then click anywhere on the divider to open the editing tool. You will be able to change the thickness, length, and padding of the divider lines. | ||
| + | |} | ||
| + | '''''<span style="color:#800080">Learn more! View a short tutorial on adding a divider to your template'''''</span> | ||
| + | :[[File:Columns in action.jpg|400px|center|link=https://www.screencast.com/t/yEmyVmXZ0]] | ||
| − | + | ====='''<span style="color:#800080">Button Tool'''</span>===== | |
| + | ---- | ||
| + | {| | ||
| + | |- | ||
| + | |style="padding: 20px" | [[File:Button tool 2020.jpg|50px]]||The '''Button''' tool can be used to drive your readers to action. Perhaps you want to send the reader to your events page, or event a fundraiser page. By using this tool you can send the reader to these external links. Alternately, buttons may be used to send an email, dial a phone number, or event send an SMS. Drag & Drop the button onto your newsletter, then you will be able to style to button, and configure the desired action. | ||
| + | |} | ||
| + | '''''<span style="color:#800080">Learn more! View a short tutorial on adding a Button to your template'''''</span> | ||
| + | :[[File:Columns in action.jpg|400px|center|link=https://www.screencast.com/t/irNQrIQHbrJl]] | ||
| − | You can | + | ==='''<span style="color:#800080">Custom Tools'''</span>=== |
| + | ---- | ||
| + | With GrowthZone, we have provided tools custom to your association. You can include a list of your new members, a list of upcoming events, lists of your web content (job postings, Hot Deals, etc), or recent forum topics. | ||
| + | ===='''<span style="color:#800080">Add a List of New Members to Your Newsletter'''</span>==== | ||
| + | ---- | ||
| + | {| | ||
| + | |- | ||
| + | |style="padding: 20px" | | ||
| + | [[File:NewMembers icon 2020.jpg|80px|left]] | ||
| + | ||The '''New Members''' custom tools allows you to easily put the spotlight on your new members. You will be able to define the members displayed based on start date. Additionally, you can define the information included for those members (name, membership type, directory listing link). | ||
| + | |} | ||
| − | + | '''''<span style="color:#800080">Learn more! View a short tutorial on adding a list of new members to your template'''''</span> | |
| − | + | :[[File:Columns in action.jpg|400px|center|link=https://www.screencast.com/t/RQDsyMyfL]] | |
| − | |||
| − | |||
| − | |||
| − | |||
| − | [[File: | ||
| − | |||
| − | |||
| − | : | + | *Enter the first date to use to identify new members |
| − | * | + | *Choose your layout |
| + | *Choose how you would like the members sorted: Name, Membership Type, Join Date | ||
| + | *Set container padding - this is the space that will surround the list | ||
| + | *Choose the fields you wish to display: Name, Primary Contact, Membership Type, Directory Listing link | ||
| + | [[File:New members 2020.jpg|800px|center]] | ||
| − | == | + | ===='''<span style="color:#800080">Add a List of Upcoming Events to Your Newsletter'''</span>==== |
| + | ---- | ||
| − | + | {| | |
| + | |- | ||
| + | |style="padding: 20px" | | ||
| + | [[File:Events icon 2020.jpg|Events icon 2020]] | ||
| + | ||Promote your events using the '''Upcoming Events''' custom tool. Once included in your newsletter/email, recipients will be able to view event details and link the the event page and registration page. | ||
| + | |} | ||
| + | |||
| + | |||
| + | '''''<span style="color:#800080">Learn more! View a short tutorial on adding a list of upcoming events to your template'''''</span> | ||
| + | :[[File:Columns in action.jpg|400px|center|link=https://www.screencast.com/t/qNNSywp7R]] | ||
| + | |||
| + | Drag & Drop the Events block into your news letter, then click the block to: | ||
| + | *Select the calendar(s) you wish to include | ||
| + | *Select the category(ies) you wish to include | ||
| + | *Select the number of months you wish to look ahead for events | ||
| + | *Select whether to include the event date or not. | ||
| + | *Select the sort order of the list (by date or name) | ||
| + | *Use the text editor options to format your text, add additional verbiage, and other pertinent links. | ||
| + | '''Note''': Any formatting that you apply yourself after the upcoming events are loaded would be lost if you needed to reload the list again for any reason (such as changing the date range). | ||
| + | |||
| + | [[File:GZ Upcoming Events 06262020.jpg|800px|center|Upcoming Events Email Designer block]] | ||
| − | + | ===='''<span style="color:#800080">Add a List of Web Content to Your Newsletter'''</span>==== | |
| − | + | ---- | |
| − | |||
| − | # | ||
| − | |||
| − | |||
| − | |||
| − | |||
| − | [[File: | + | {| |
| + | |- | ||
| + | |style="padding: 20px" | | ||
| + | [[File:WebContent icon 2020.jpg|80px|left|Web Content icon]] | ||
| + | ||Promote your job postings, news releases, hot deals, etc. using the '''Web Content''' custom tool. Once included in your newsletter/email, recipients will be able to click the link to view the featured content. | ||
| + | |} | ||
| − | + | '''''<span style="color:#800080">Learn more! View a short tutorial on adding a list of web content to your template'''''</span> | |
| + | :[[File:Columns in action.jpg|400px|center|link=https://www.screencast.com/t/QaHXF8KE]] | ||
| − | + | Drag and drop the '''Web Content''' tool into your newsletter, then you will be able to: | |
| − | * | + | *Choose the web content list you wish to include. The default title for this block will be "Web Content" use the editor to customize your title, format the text, add custom fields, links, and more. |
| − | + | *Choose the number of items to be displayed | |
| − | + | *Choose the details to be included: Title, Sub title, Description, Image, etc. | |
| − | + | *Use the text editor to update and format the web content block | |
| − | + | [[File:Web content 2020.jpg|800px|center]] | |
| − | |||
| − | * | ||
| − | [[File: | ||
| − | + | ===='''<span style="color:#800080">Add a List of Forum Topics to Your Newsletter'''</span>==== | |
| − | + | ---- | |
| + | {| | ||
| + | |- | ||
| + | |style="padding: 20px" | | ||
| + | [[File:ForumTopics icon 2020.jpg|80px|left|Forum Topics icon]] | ||
| + | ||Feature some or all of your recent Forum posts, using the '''Forum Topics''' custom tool. Once included in your newsletter/email, recipients will be able to click the link into the forum to view topics and posts. | ||
| + | |} | ||
| − | = | + | '''''<span style="color:#800080">Learn more! View a short tutorial on adding a list of forum topics to your template'''''</span> |
| + | :[[File:Columns in action.jpg|400px|center|link=https://www.screencast.com/t/qBhXIOsT28f]] | ||
| − | ''' | + | Drag and drop the '''Forum Topics''' block into your newsletter, and you will be able to: |
| + | *Select a single forum to feature, or choose to show posts from all forums | ||
| + | *Choose the number of items to be displayed | ||
| + | *Use the text editor to update and format the Forum Topics block | ||
| − | + | [[File:GZ Forum Topics 06302020.jpg|800px|center|Forum Topics in the Email Designer]] | |
| − | [ | + | ==='''<span style="color:#800080">Email Designer Common Tasks'''</span>=== |
| + | ---- | ||
| + | ===='''<span style="color:#800080">Copy/Duplicate a Block'''</span>==== | ||
| + | ---- | ||
| + | #Click the block you wish to copy. | ||
| + | #:[[File:Duplicate block 2020.jpg|400px|center]] | ||
| + | #Click the [[File:Copy icon 2020.jpg|25px]] icon. A copy of the block will be placed directly below the original block. | ||
| + | ===='''<span style="color:#800080">Move a Block'''</span>==== | ||
| + | ---- | ||
| + | #Click the block you wish to move. | ||
| + | #:[[File:Move a block 2020.jpg|400px|center]] | ||
| + | #Click the [[File:Move icon 2020.jpg|25px]] icon. | ||
| + | #Drag the block to the desired location. | ||
| + | ===='''<span style="color:#800080">Delete a Block'''</span>==== | ||
| + | ---- | ||
| + | #Click the block you wish to delete. | ||
| + | #:[[File:Delete a block 2020.jpg|400px|center]] | ||
| + | #Click the [[File:Trash icon 2020.jpg|25px]] icon. | ||
| + | #Confirm that you wish to delete the block. | ||
| + | ==='''<span style="color:#800080">Distribute your Newsletter'''</span>=== | ||
| + | ---- | ||
| + | ===='''<span style="color:#800080">Preview your Newsletter'''</span>==== | ||
| + | ---- | ||
| + | Prior to sending out your Newsletter, you will likely want to preview. Preview icons are available at the bottom of the screen. | ||
| + | *Click the [[File:Desktop preview 2020.jpg|25px]] icon to view a desktop preview | ||
| + | *Click the [[File:Moble preview 2020.jpg|25px]] icon to view a mobile preview | ||
| − | ''' | + | ===='''<span style="color:#800080">Email a Preview of your Newsletter'''</span>==== |
| + | ---- | ||
| + | #On the '''Email Designer''' tab, click the '''Actions''' button. | ||
| + | #:[[File:Send preview 2020.jpg|600px|center]] | ||
| + | #Click '''Send Preview'''. | ||
| + | #:[[File:Send preview email 2020.jpg|500px|center]] | ||
| + | #Enter the recipient email address. You can enter more than one email as needed. | ||
| + | #Click '''Done'''. | ||
| − | + | ===='''<span style="color:#800080">Save Newsletter as Draft'''</span>==== | |
| − | + | ---- | |
| − | # | + | #Click '''Send Preview'''. |
| − | + | #:[[File:Send preview 2020.jpg|800px|center]] | |
| − | # | + | #Click '''Save as Draft'''. |
| − | #:[[File: | + | The newsletter has now been saved as a draft, and will be available for selection from the '''Draft''' list. |
| − | # | ||
| − | |||
| − | |||
| − | |||
| − | + | ===='''<span style="color:#800080">Save Newsletter as A New Template'''</span>==== | |
| + | ---- | ||
| + | #Click Actions -> Save as New Template | ||
| + | #:[[File:ED SaveAsNewTemplate 2021.png|800px|center]] | ||
| + | #Give the template a Name and a Subject. | ||
| + | #:[[File:ED SaveAsNewTemplate2 2021.png|800px|center]] | ||
| + | The newsletter has now been saved as a template, and will be available for selection from the "Template" dropdown list. | ||
| − | + | ===='''<span style="color:#800080">Send your Newsletter'''</span>==== | |
| + | ---- | ||
| + | Once you have completed the design and content of your newsletter, you will be able to send it from the Email Designer tab, or schedule it for later delivery. | ||
| + | ====='''<span style="color:#800080">Send your Newsletter Immediately'''</span>===== | ||
| + | #Click the "Send" button in the upper right corner. | ||
| + | #:[[File:Send newsletter 2020.jpg|800px|center]] | ||
| + | #Enter the desired sender and recipient information. See '''[[Communications_Basics#Send_a_Mass_Email|Send a Mass eMail]]''' for further instructions. | ||
| + | #Click the '''Send''' button. | ||
| − | ''' | + | ====='''<span style="color:#800080">Schedule your Newsletter to be Delivered Later'''</span>===== |
| + | #After completing your email design and entering your desired sender and recipient information, click the calendar icon (1) in the "Delay Delivery Until" field. | ||
| + | #:[[File:DelayDeliveryUntil 08112020.jpg|800px|center|A screenshot of the Delay Delivery Until field]] | ||
| + | #Select a date (2) and a time (3) for the email to be sent. This information will now appear in the "Delay Delivery Until" field. | ||
| + | #Click the "Send" button; your email is now scheduled for later delivery. See '''[[Communications_Basics#View.2FEdit.2FDelete_Scheduled_Emails|View/Edit/Delete Scheduled Emails]]''' for more information. | ||
| + | |||
| + | {| class="wikitable" | ||
| + | |- | ||
| + | | | ||
| + | [[File:One Row.png|25px]] | ||
| + | | style="width: 100%"| '''WIDGET DATA IN DELAYED DELIVERY EMAILS''': If using the widgets (i.e. new members, upcoming events, etc.), the information that was populated upon creation of the email will be sent. The information will not recalculate when scheduled for sending at a later time. | ||
| + | |} | ||
| + | |||
| + | ='''<span style="color:#800080">Communications Reports'''</span>= | ||
| + | ---- | ||
| + | A variety of reports are available for managing and analyzing communications. See '''[[Reports#Communications_Reports|Communications Reports]]'''. | ||
| + | |||
| + | ='''<span style="color:#800080">Additional Email Settings'''</span>= | ||
| + | ---- | ||
| + | ==='''<span style="color:#800080">Flood Protection Settings'''</span>=== | ||
| + | ---- | ||
| + | Flood Protection setting determines how many "Allowed Identical Emails Per Recipient". To Enable this option: | ||
| + | #Select '''Setup''' in the Navigation Panel | ||
| + | #Click '''Email Settings''' in the '''Communications''' section. | ||
| + | #:[[File:Flood protection 2020.png|800px|center]] | ||
| + | #Enable '''Flood Protection'''. | ||
| + | #Set '''Allowed Identical Emails Per Recipient'''. This is recommended for everyday use. | ||
| + | #Click '''Done'''. | ||
Latest revision as of 19:58, 21 May 2021
NEW!! Find all of your answers in the GrowthZone Knowledge Base!
Contents
- 1 Initial Communications Setup
- 1.1 Configure your Default From Email Address
- 1.2 Configure your Unsubscribe (Opt-out) Message
- 1.3 Configure Visibility of E-mail Addresses when sending a Mass E-mail (Email Bulk Mode Threshold)
- 1.4 Logging Messages sent via Outlook (or other email service)
- 1.5 Setup Sender Policy Framework (SPF) Record
- 1.6 Automated Messaging
- 1.7 Configure Communication Categories
- 1.8 Signatures
- 2 Send E-mails
- 3 Create and Manage Email Templates
- 4 Outlook Add-on
- 5 Communications Module
- 5.1 Review All Communications
- 5.2 Send Newsletters
- 5.3 View Email Drafts
- 5.4 Push Notifications
- 5.5 Email Designer
- 6 Communications Reports
- 7 Additional Email Settings
Initial Communications Setup
Configure your Default From Email Address
Your GrowthZone software is setup to send automated messages. For Example: An automated message is sent when a new application is submitted on-line. To set the default From address for these messages:
- Select Setup in the Navigation Panel
- Click Email Settings in the Communications section.
- In the Default From Email Address field, enter the address to be used by default when emails are sent from your organization.
- Click Done.

Configure your Unsubscribe (Opt-out) Message
- Select Setup in the Navigation Panel
- Click Email Settings in the Communications section.
- A default unsubscribe message is included in your database. You can customize this as needed.
- Click Done.

When the user clicks the link, they will be presented with the Email Subscriptions screen. See What happens when a group email recipient opts out for further information. If you wish to add the unsubscribe message to individual emails or emails sent to multiple members, include the Unsubscribe URL merge field in your signature or in text at the bottom of an email.

What Happens When an Email Recipient Opts-out
When you send out emails to your lists/committees or send mass emails, the unsubscribe message you have configured in your settings (See Configure your Unsubscribe Message) is appended to those emails. A recipient can set restrictions on the use of the email by clicking the link included in the message.

The recipient can set the following restrictions:
- Continue Receiving Emails from {Your Organization Name}: Selecting this option does NOT unsubscribe the recipient from the group email list.
- Unsubscribe me from {Group Name}: Selecting this option will mark the recipient email as Do Not Email within the group. NOTE: It will NOT remove the recipient from the group. An email will be sent to those staff members who have subscribed to the
- Do not email me at this address except for transactional emails: If this option is selected, the email will be marked as Only Transactional Emails. This ensures that the recipient does not receive any mass emails (including from your lists/committees as well as any mass emails you may be sending to dynamically created groups). However, any "transactional" type emails that you send, for example - invoices, will continue to be sent. This will unsubscribe the member from ALL group communication. The recipient is NOT removed from the group.
- Update my preferences: When this option is selected, the recipient will see a list of the groups that they are currently subscribed to. They can select or deselect the lists/committees that they wish to receive emails from. The recipients email address will be marked as Do Not Email for those groups de-selected.

- The recipient may deselect the check-boxes for the groups they no longer wish to be subscribed to. The recipient will be marked as Do Not Contact within the group, but will NOT be removed from the group.
After making choice, click Submit. A confirmation of changes will be displayed.
Special Considerations
- If the recipient wishes to un-subscribe from a list/committee that you have configured as Dis-allow Opt-out, this setting will trump the recipient's preference.
- When a recipient unsubscribes from a group, they are NOT removed or inactivated in the group, the email is simply set to Do Not Email.
- Only staff can set an email address as Do Not Contact. When this is set NO emails, including transactional emails will be sent to the email address.
- If you have integrated to Constant Contact or Mail Chimp, when someone unsubscribes to all messages in Constant Contact or Mail Chimp, the the contact’s email address will be set to No Mass Emails, in the appropriate lists/committees.
Change the Restrictions set on an Email Address
From the back-office, staff can update the restrictions that have been set on an email address.
- Select the Profile tab for the desired organization/individual.
- Click the
 icon, next to the email address you wish to update.
- From the Restrictions list, select the desired status:
- None: There are no restrictions, the email address may be used for mass emails and individual emails.
- Do Not Contact: No emails can be sent to this email address.
- Only Transactional Emails: Only individual, transaction type (i.e. invoices, event confirmations, etc.), can be sent to this address. Specifically, this address will not receive emails sent to:
- Lists/Committees
- Dynamic Lists/Committees selected when you choose the ... option (next to the To) in sending an email.
- When emails are sent to more recipients than the Email Bulk Mode Threshold (Setup > Communications > Email Settings)
- Click Done.


|
|
IMPORTANT The restrictions set will be set anywhere this email address is used. For example, if this individual is on any of your lists/committees, the email will be set to the restriction that you have set here. Additionally, If an email is synced to Constant Contact and is set to Only Transactional Emails by a staff user, the email will be unsubscribed from Constant Contact immediately. |
Configure Visibility of E-mail Addresses when sending a Mass E-mail (Email Bulk Mode Threshold)
The E-mail Bulk Mode Threshold determines, when sending bulk e-mails, whether emails are sent using the To field, or the BCC field. To view and configure this setting:
- Click Setup in the left-hand navigation panel.
- Click Email Settings in the Communications section.
- Set the E-mail Bulk Mode Threshold. For example: if set to 30, when an email is sent to 30 or less in the To field, all email addresses will be displayed and recipients will be able to "reply all". If the email is sent to 31 or more, the email will automatically BCC every one, so recipients will not see others email addresses and will not be able to reply all.
- Click Save.

Logging Messages sent via Outlook (or other email service)
In the Email Settings you will find and Archive Email Address. In order for your database to track emails that you have sent from Outlook (or other email service such as GMail), you will want to include this email address in the BCC line of the email. A copy of the email will then be sent to the archive address for evaluation. If the system can associate the contact to whom you sent the email to a contact in the database, your Outlook email will be displayed on the communications tabs. Please note: You must be set up as a staff member in the Growthzone software to use this feature AND the email address you are sending from must be the one configured in GrowthZone.
- Select Setup in the Navigation Panel
- Click Email Settings in the Communications section.

If there are any issues in matching an email, the sender will receive a notification, as shown below. From this notification, you will be able to choose to whom the email should be associated.

If you as the staff person have more than 1 email address in your database, you will now receive your own separate email asking you to merge or clean up your duplicate email addresses but also giving you an option to choose where to store the email under the correct staff contact.

View and Match Un-Matched Emails
If the archive email address is included in the BCC line of emails sent via Outlook, a copy of the email will be sent to the archive address. If the database is able to associate the email to a contact in your system it will do so. Emails that could not be matched may be viewed under the Communications module:
- Click Communications in the Navigation Panel.
- Click the Unmatched Emails tab.
- A list of all unmatched emails will be displayed, to match these to a contact, click the Match action button.
- Select the contact to which you wish to match the email:
- Use suggested - We've found a possible match: If the system has identified a potential match, the match will be displayed on the screen and you can evaluate if this is the appropriate match.
- Find existing - Search your database: Select this option if you wish to search your database for a match. You will then be able to enter the name of the contact.
- Create new - Create a new organization record: Select this option if you wish to add a new record.
- Do nothing - Do not create or match any contact record
- Click Done.


Setup Sender Policy Framework (SPF) Record
An SPF record is a type of Domain Name Service (DNS) record that identifies which mail servers are permitted to send email on behalf of your domain. The purpose of the SPF record is to ensure that your emails are received successfully.
Below are the steps to set-up the SPF record:
- Verify whether you have an SPF Record. Third party software tools, such as MxToolbox can be used for this verification. Click here to see how this is done.
- If you have an SPF Record, add include:clientemailspf.growthzoneapp.com to the record right after the v=spf1. Make sure there is a space before and after it.
- OR
- If you do not have an SPF Record, work with your email administrator to obtain one. The SPF record can be created using software third party software, such as MxToolbox. Click here to see how this is done. After generating the SPF record, complete step 2 above
Automated Messaging
Automatic messages may be configured to be sent in response to certain actions. For Example, an automated message may be sent to a new member when they have completed the Member Application Form, or, an automatic thank you message may be sent when someone registers for the event. Your database is pre-configured with automatic messages, which you may use "as-is" or customize to meet your needs.
The table below describes the automated messages available.
| Event | Default Template to Send | Description |
|---|---|---|
| Auto Payment Receipt | Auto Payment Receipt | Sent when an automated payment has been applied to an invoice. |
| Certification Admin Review | None | This notification is sent so certification executives can do a final review and sign off prior to the cert going active. It will be sent when a certification status is set to Admin Review. |
| Certification Application Denied | None | This notification is sent when staff sets certification status to Denied. |
| Email Member Login Added | Member or Representative On-line Access Added | This notification is sent when an existing login is added to your database. See Add Staff Member with Access to Multiple Databases. |
| Email Member Login Info | Member or Representative Online Access | Send an email notifying a contact that they can create their log-in credentials. |
| Email Member Login Instruction | New Member Access | This email will be sent when you select to send log-in instructions to a contact. See Setting up Individual's Info Hub Access. |
| Event Approved | Event approved by staff | This notification will be sent to the contact who submitted an event, once staff has approved the event. |
| Event Reminder | Event Reminder | This notification will be sent, 48 hours prior to the event, to all event registrants. This notification will only be sent if Send Reminder Email to Registrants 48 hours Prior is enabled for the event. See Setup an Automatic Event Reminder for instructions. |
| Forum Comment Added | None | This notification will be sent, to those who have subscribed, when a new comment has been added to a forum, as staff who have subscribed to the notification. See Set Preferences for Forum Notifications. |
| Forum Topic Added | None | This notification will be sent, to those who have subscribed, when a new topic has been added to a forum, as staff who have subscribed to the notification. See Set Preferences for Forum Notifications. |
| Fundraising Pledge Added | None | This email is automatically sent to thank a donor, after they have submitted a one-time donation or setup a pledge. A default is not assigned, however, the Fundraising/Donation/Pledge Thank You Template is a great starting point for your thank you letter. |
| Gateway Verified By Customer Service | None | This email is automatically sent to your organization when your GrowthZone Pay gateway has been verified by Growth Zone. |
| Growth Zone Pay Charge Dispute | Growth Zone Pay Charge Dispute | This notification is sent when a GrowthZone Pay charge is disputed, It will be sent to the staff member you have identified under the gateway setup Credit Card Account/Dispute Notifications Email. |
| Growth Zone Pay Charge Failed | Growth Zone Pay Charge Failed | This notification is sent when a GrowthZone Pay charge fails. It will be sent to the staff member you have identified under the gateway setup Credit Card Account/Dispute Notifications Email. See Configure Gateway Notifications for Disputes/Charge Failures. |
| Invoice Payment Received | Member Invoice Payment Received | This notification is sent to staff when an invoice is paid on-line. |
| Membership Has Expired | None | Applies to memberships configured for Renewal Notifications only. This email will be sent • the day after the end of the Grace Period (or the day after Expiration if no Grace Period days are defined). See Membership Type with Renewal Notifications for further information. |
| Membership Is Expiring | Membership Expires Soon Email Template | Applies to memberships configured for Renewal Notifications only. This email notification is sent three days before the expiration date of the membership. See Membership Type with Renewal Notifications for further information. |
| Membership Renewal Reminder | Membership Renewal Reminder Email Template | Applies to memberships configured for Renewal Notifications only. On the Renewal Notification Date the Membership Renewal Reminder Email will be sent. This notification is sent to Active and Courtesy members that will be billed an amount for their upcoming renewal. See Membership Type with Renewal Notifications for further information. |
| Membership Renewal Thank You | Membership Renewed - Thank You Template | Applies to memberships configured for Renewal Notifications only. This notification is sent once the member chooses one of the renew options. See Membership Type with Renewal Notifications for further information. |
| New First Time Tenant | New Account Activation | GrowthZone use only. |
| New Form Response | None | This notification is sent to the individual(s) identified to receive form Response Notifications for a form. See Create a Form. |
| New Imported Contacts | New Contacts Created | December 2018 - IN DEV |
| New Member Application | Membership Application Confirmation Email | This email is sent to an applicant after they have completed the membership application form. |
| New Representative | New Contacts Created | This email is sent to staff when new contacts are added by a member, via the Info Hub OR when a new contact is added from the back-office. The email is sent to those staff members subscribed to the New Person Added to an Existing Membership notifications. See Configure User Notifications for information on subscribing to notifications. |
| New Staff Login | New Staff Invite | This email is sent to a staff member you have newly added to your system. Within the email will be a link for the staff member to setup credentials to the database. See Add Staff Member. |
| New Tenant | New Account Activation | GrowthZone use only. |
| Online Payment Receipt | Online Payment Receipt | This notification is sent to the contact when they pay an invoice on-line. A link to the paid invoice is included in the email. |
| Recurring Charge Failed | Automatic Payment Failure | This notification is sent to the contact when an automatic recurring charge fails. Within the email is a Please retry payment for the invoice link. |
| Registered Event Attendee | Registered Event Attendee | This email is sent to an event registrant after completion of event registration form. |
| Registered Event Exhibitor | Registered Event Exhibitor | This email is sent to an event exhibitor after completion of the exhibitor registration. |
| Renewal Emails Sent | Renewal Emails Sent | Applies to memberships configured for Renewal Notifications only. This email is sent to staff subscribed to the Renewal Emails Sent notification, when renewal emails are sent to members. See Configure User Notifications. |
| Send Event Attendee Itinerary | Event Session Itinerary Confirmation | |
| Subscription Confirmation | None | December 2018 - UNDER REVIEW |
| Task Assigned | Task Assigned | This email is sent to the assignee, when a task has been assigned to them. |
| Unregistered Event Attendee | Unregistered Event Attendee | This email is sent to an event registrant when his/her registration is cancelled. |
| Task Assigned | Task Assigned | This email is sent to the assignee, when a task has been assigned to them. |
| Web Content Approved | None | This notification email is sent after a staff member approves the user's web content. This notification will go to the user that submitted the content. See Approving Web Content Submissions. |
| Web Content Pre Expiration Notice | Web Content Pre Expiration Notice | This email is sent out, to the contact who submitted web content, three days prior to the expiration of the content. The email contains a link directing the contact to log-in, and extend dates if desired. |
| Web Content Publish Notice | Web Content Published | This email is sent out to those who have subscribed to web content notifications, when new web content is published. |
Configure Automated Messaging
- Click Setup in the navigation panel
- In the Communications section, click Automated Messaging. A list of the available options for automated messages is displayed. See table below for further details.
- You may change the default message sent for each of the available options.
- You may also click the Do Not Send check-box for any messages you do not wish to be included in automatic messaging.
- If changes are made, click the Save button to save your changes.

|
|
NOTE: Refer to Create and Manage Email Templates for details on working with email templates. When a template is selected for an automated message, the |
Disable Individual Automated Messages
If you do not wish to send one or more of the available automated messages:
- Click Setup in the navigation panel
- In the Communications section, click Automated Messaging. A list of the available options for automated messages is displayed. See table below for further details.
- Click the Do Not Send check-box for any messages of the messages you do wish to send.
- Click Save.
Configure Communication Categories
Communication Categories provide a way for you to organize and filter email communications. Reports such as the Communication Report can be filtered by category to allow you to get a better understanding of the communications that are being sent.
- Click Setup in the navigation panel
- In the Communications section, click Communications Categories. A list of the current categories in the database will be displayed.
- Click the Add button to add a new category. The Add/Edit Communications Category dialog box will be displayed.
- Enter a Name for the category. This name will be displayed when you are selecting communication categories within the software so it should be descriptive and reflect the purpose of this category.
- N/A at this time
- Click Done to save the new category.
Signatures
Creating your signature will save time when sending email correspondence. You can design your signature with both text & graphics, and easily select it when sending email correspondence.
Create your Signature
- Click Setup in the navigation panel
- In the Communications section, click Signatures
- Click the Add Button.
- Provide a Name for the signature. You can create multiple signatures, so you will wish to provide a name that allows you to differentiate between signatures.
- If applicable, select a User. If a specific user is selected, the signature will only be available to that user. If no user is selected, then this signature is available to all users.
- In the Signature HTML text box you can customize your signature by adding your organization name, an image, a link, etc. Common word processing icons make it easy to format your signature as you desire.
- When completed, click Done.

Edit a Signature
- Click Setup in the navigation panel
- In the Communications section, click Signatures.
- Click the hyper-link for the signature you wish to edit.
- Complete desired edits.
- Click Done.
Delete a Signature
- Click Setup in the navigation panel
- In the Communications section, click Signatures.
- Click the hyper-link for the signature you wish to delete.
- Click the Delete button.
Send E-mails
Send an Individual Email
Emails may be sent from multiple locations throughout the software
|
|
IMPORTANT: You can click directly on an email address to send an email, however, this will send the email from your default email program (for example: Outlook). This is fine, but the communication will NOT be recorded on the recipient's Communication tab in the database. |
- In the Send Email window that appears, fill in the relevant and appropriate fields:
- From: Required. This is a drop-down containing staff users
- To: Required. If you initiate the email from within a Contact Record, this will already be populated. You can add recipients by clicking in the Add To field and typing the name you want. The system will search on-the-fly and you can select the user when it appears in the list.
- Add CC: Begin typing in this field to select the user you want to Cc on the email.
- Add BCC: Begin typing in this field to select the user you want to Cc on the email.
- Exclude Sending to Contacts on List: If you have selected a list from the Address Book and you wish to exclude certain contacts on the list from receiving the email, enter the desired email addresses. See Send a Mass E-Mail for further details about using the Address Book.
- Subject: Required.
- Category: Select a Category if desired. Refer to Communication Categories for details.
- Template: Select a Template if desired. Refer to Create and Manage Email Templates for details.
- Drafts: If you are continuing an E-mail that you save as a draft, you can select it here.
- Enter the text of the message. You have editing capabilities and are able to insert database fields if desired.
- Click Attach Files if necessary. See Send an Email Attachment for best practice information.
- Enter the Project name in the Project field if appropriate (requires the Projects/Tasks module.) This will record the email in the Communication Tab of the selected Project.
- View as Web Page: Select this option to provide an option to recipients, should their email program have difficulty, to view the email.
- Enter a Date/Time in the Delay Delivery Until field if appropriate. This allows you to compose an email at your convenience but not have it sent until the day you select.
- If you need to finish the message later, click Save Draft
- If you are ready to send, click Send

The message will be recorded in the Contact's Communication Tab as well as the Communication Module.
Send a Mass Email
The software provides you with an Address Book where lists/committees that you have created and dynamically created grouping have been created. For example: they system has dynamically created a group of all of your active members. Other dynamically created groups include: member category, event registrants, event attendees, event sponsors, etc. To send an email using the address book:
- Click Quick Actions in the header bar.
- Click Send Email.
- On the Send Email screen, click the
 icon, to open the address book.
- Select the desired group(s). You may select multiple.
- Click Done.
- If you wish to exclude any recipients from the email, enter the email addresses in the Exclude Sending to Contacts on List
- Complete your email as as described in Send an Individual Email and send.


|
|
NOTE: When sending a mass email, all recipients will be displayed in the "To" line, if the number of recipients is less than or equal to the Bulk E-Mail Threshold. If the number of recipients is greater than the Bulk E-Mail Threshold, email addresses are blind-copied. See Configure Visibility of E-mail Addresses when sending a Mass E-Mail. |
Preview an Email
If you have created an email with multiple images, merge fields, etc. you may wish to send a preview of the email to yourself or others. In the upper right-hand corner of the Send Email screen, you will find the Send Preview button.

Clicking this, opens up simple email address input screen that allows you to easily sent a test of your email to yourself, or others.

|
|
NOTE: If you are testing merge fields, you will want to ensure you have an individual in the TO field of the email (even if temporary). This allows the database to have information to merge from. |
Send an Email Attachment
It is best practice to include links to documents, rather than attach files. Attachments may cause emails to be blocked, and there may be maximum file sizes allowed by some email providers preventing your attachments from reaching the final destination. Your GrowthZone software includes a Cloud, to which you can easily upload documents and create sharing links to include in your email. See Working with Documents in the Cloud for further information.
Forward an Email
You can forward a previously sent email either from the Communications module on the Browse tab or from a contacts Communications tab, by clicking the
![]() icon. This will open the standard email screen, and place FWD: in front of the original subject. The forward icon will not show for notes, reminders or phone calls.
icon. This will open the standard email screen, and place FWD: in front of the original subject. The forward icon will not show for notes, reminders or phone calls.

The forwarded email will get recorded in the Communication history like any regular email.
NOTES:
- If forwarding an email that does not have merge fields, you'll be asked only to enter the forwarding email address.
- If forwarding an email that originally had merge fields, you will be asked pick between two use cases:
- Whether you want to send the previously merged data and if so, which recipient's data
- Whether you want to populate the merge fields with the data of the newly entered recipients of the forwarded email
Create and Manage Email Templates
Email templates provide an easy way to respond to standard email tasks. For example, you may wish to send a thank you email to all those who have attended an event. You can create (or customize a default) template that can be used consistently for all of your events. This will allow you to efficiently send emails, and increase productivity. Email templates may also include database fields.
There are a variety of default email templates populated in the database that you may us to meet your business needs. You may view the existing templates, edit copies of the existing templates, or create your own. To do any of these actions:
- Click Setup in the navigation panel
- In the Communications section, click Email Templates. A list of the default email templates will be displayed.

View a Default Email Template
From the list of templates, (Setup > Communication > Email Templates),
- Click the name of the email template you wish to view or modify. The Edit Email Template dialog box will open. The following fields are displayed for your review:
- Name - The name of the template is displayed for selection when you are sending emails. Additionally, the name of an email may be used for filtering and reporting.
- Description - This field allows you to provide more details about this template. Visible internally only.
- Category-The category field allows you to associate this template to specific email categories, and may also be used for filtering. Internal only.
- Subject-The subject is the subject line of the email.
- Template Text-The template text is the body of the email.
- Make available to all users- when viewing a default template this checked box will indicate if the template is available to all users.
- Click the Done button when finished viewing
Edit a Default Email Template
- Click Setup in the left-hand navigation panel.
- Click Email Templates in the Communication section.
- Click the Edit icon (
 ) to the far right of the template name. NOTE: The system is actually making a copy for you to edit. Original templates themselves cannot be edited or deleted.
 - Make changes in the Edit Email Template window that appears. See View a Default Email Template above for description of available fields.
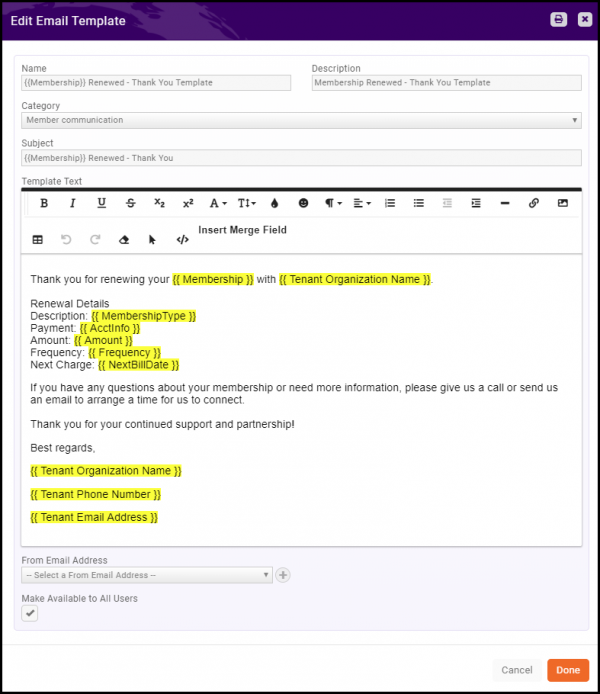
- Name - If you do not change the name, the system will add the word "Copy" to the end of it.
- Description
- Category
- Subject Database fields (indicated by {{ }} ) cannot be added by the user to the subject line. If the subject line of the template you are editing contains a database field that you don't want, simply delete it (you cannot edit it).
- Template Text In the body of the email database fields are in double brackets and also highlighted in yellow. The field contents will not be highlighted in the sent message. Also, only make cosmetic or location changes to these fields (do not edit the names). See below for how to add fields to the template.
- From Email Address-select the staff address from the dropdown that will be used if the email is sent automatically
- Make available to all users- check this box if you want this template to be available. If unchecked the template will only be available to the person who created it
- Click Done

Add Database Fields to a Template
- Put your cursor where you want place the data base field.
- Click on Insert Merge Field in the editing bar.
- Scroll through the list of available fields (or use the Search feature at the top of the list)
- The fields available for merging are dependent on the email template type. For example, if the email template type is "Event" then event related fields will be available.
- Not every field in the database is available to merge.
- "Tenant" refers to your organization
- Click on the field you want to enter
- Click the Save & Close button

|
|
NOTE: Event-related fields will only populate correctly if sent from within an event. |
Add a New Email Template
- Click Setup in the left-hand navigation panel.
- Click Email Templates in the Communication section.
- Click the Add button in the top right corner.
- Configure the available fields: See View a Default Email Template above for description of available fields.
- Name: This is the name that will appear in template selection drop-downs.
- Description: (Optional)
- Category: Select the appropriate category for the email template. This option drives which data base fields are available to include in your template AND where the template is available for use in the software. IMPORTANT: The Category of an email template can NOT be changed after a merge field has been placed in and the template has been saved. This will help prevent merge fields that only work in certain categories to be unintentionally used elsewhere. See the table below for proper category usage.
- Template Text: Customize font and paragraphs using the standard word-processing icons such as bolding, italicizing, underlining, etc. You can also insert hyper-links, Youtube videos, images and merge fields. NOTE: The merge fields available are based on the Category you have selected.
- From Email Address: This is the default from email address. It may be over-ridden when using the template.
- Make Available to Other Users: Select this option if you wish the template to be available to all of your staff members. If deselected, it will only be available to you.
- Click Done.

| Email Template Categories | |
| Billing Finance | Use this category for email templates you wish to use for delivering invoices. |
| Continuing Education | This category is used for email templates automatically sent for Continuing Education (i.e. Certification Completed) |
| Event Event Attendee |
Use this category for emails sent from the Events module. This will provide event specific fields that would not populate if sent from any where else in the software |
| Forum | Use this category for emails automatically sent to those who have subscribed to Forum update notifications |
| Fundraiser donation | Use this category for emails sent from within the Fundraiser module. Includes fields specific to fundraiser and the campaign you are sending from. |
| Login Reset | Use this category for email templates you wish to use when communicating to members either from the member’s communication tab, the Quick Actions email option or groups. Includes specific merge fields for managing user login |
| Member Communication Board/Committee |
Use this category for email templates you wish to use when communicating to members either from the member’s communication tab, the Quick Actions , Sales Funnel and Lists/Committees. In these cases, the category is simply a way for you to organize your email templates. All provide the same contact information |
| Member Profile Update | Do not use |
| Membership Renewal | Do not use |
| Newsletter | Do not use |
| Sales Funnel | Used for Sales Funnel automated messages. If provides your staff with sales funnel acceptance data. When sending email to contacts from the Sales Funnel use the Member Communication category |
| Store | Do not use |
| Trial Account | Do not use |
Copy an Email Template
|
|
NOTE: You can only copy email templates that you have created from scratch, or from copies you have made of the default templates. |
- Click Setup in the left-hand navigation panel.
- Click Email Templates in the Communication section.
- Click the
 icon for the template you wish to copy.
 - Click OK to confirm that you wish to make a copy. The copy will be listed as "Copy of..." at the bottom of the list of templates.

Outlook Add-on
The Outlook Add-on provides the ability to attach e-mails, sent via Outlook, to a contact's general communication tab and/or to a project.
|
|
COMPATIBILITY: The Outlook Add-on is only available for Windows OS. |
Install the Outlook Add-on
Download the Outlook Add-On to start tagging incoming or sent emails:
- Click Setup.
- Click Outlook Add-on in the Software Add-Ons section. NOTE: The Outlook Add-on must be installed on all pc's, laptops, etc. that will require its use.
- Run the Windows Installer Package as directed.
- Once you have completed the installation of the Outlook Add-on, open your Outlook program. In the menu bar, you will be able to see a GrowthZone option.

- Click the GrowthZone link.
- Click Settings.
- Click Connection.
- Enter or confirm your GrowthZone user name and password.
- Click Connect.
- Click Save.


|
|
NOTE: Connection settings will be saved for all future use and you will not need to re-enter your credentials. |
Attach emails to contacts/projects with the Outlook Add-on
This functionality will allow you to attach the communication to the original recipient(s) and sender. Additionally, you can select contacts from your database (or create new contacts) who may not have been initial recipient(s)/sender of the email. You can also attach the communication to your existing projects, or create a new project to which the communication can be associated.
- In Outlook, open the email that you wish to attach to a contact/project.
- Click the Attach icon located on far right in the menu bar.
- In the Contact(s) section, a list of the to/from contacts of the email will be listed. To attach the initial recipient(s)/sender of the email:
- By default all contacts are selected, which would result in the communication being attached to all. You can deselect any of the to/from contacts if you do not wish to attach to their communication log.
- If the email address is associated to a Contact in your database, the name of the contact will be displayed in the last column.
- In the example below, the system was able to match the first email to a contact, but not to the others.
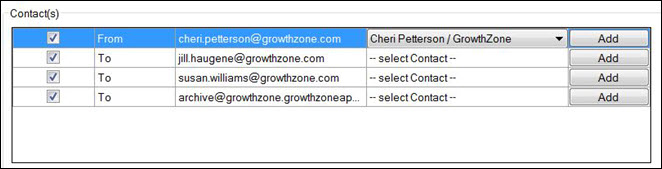
- If there are multiple contacts associated to the same email address, --select Contact-- will be displayed. Double-click on --select Contact-- to select the appropriate contact name. In the example below, multiple contacts were associated to the email address.
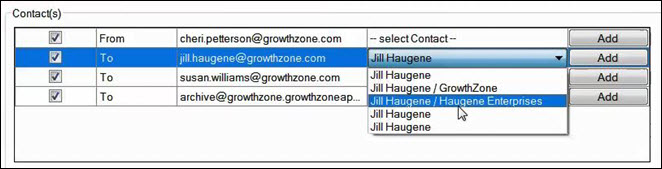
- If there are no matching contacts in the database, no selections will be available when clicking --select Contact--. If you wish to add the contact to your database, click the Add button adjacent to the appropriate row. The Add Contact dialog box will be displayed. Enter contact information, and click Save.
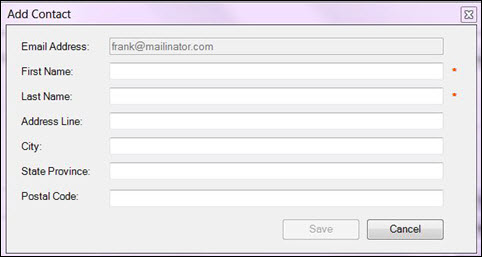
- Attaching the communication to other contacts (not the original recipient(s)/sender of the email: Begin typing the name of the contact in the Additional Contacts text box. A list of contacts matching your text will be displayed. Select the desired contact and click the Add to List button.
- If no match is found in your database to the information you have typed in the Additional Contacts text box, you may add a new contact to the database by clicking the Create New Contact button.
- Select a communication Category. This is optional, but allows you to classify your communications for ease in filtering and reporting.
- Attaching the communication to a Project: If you are using the GrowthZone Projects module, you can also attach communications to projects. Begin typing the name of the project in the Projects text box. A list of projects matching your text will display. Select the desired project. If the project to which you wish to attach the communication does not exist, you can add a new project by clicking the Add button.
- Click Attach.


Communications Module
Review All Communications
You may review and manage all communications in the Communications module. (Select Communications in the Navigation Panel). On the Communications module Browse tab, you will be able to review ALL communications. This list includes emails, notes and logged phone calls. You may easily search the list, or filter/customize the result using the options on the top of the screen.

View Email Delivery Statistics
The Communication Delivery Stats will help you understand the effectiveness of your email communications. You will be able to gauge the success of your email campaigns by looking at open rates, reviewing whether an individual recipient received/opened the message. This allows you to see who did not receive the communication based on a delivery failure so that you can determine possible list/contact cleanup then redistribute.
- Click Communications in the left-hand navigation panel.
- On the Browse tab, click the
 in the Actions column for the desired email.
NOTE: Please view the new GrowthZone Knowledge Base for updated screen captures and descriptions.
The Communications Delivery Stats screen will display:
- Total Recipients: The total number of recipients to whom the email was sent.
- Recipients Who Opened: Number of recipients who opened the email.
- Open Rate: The total number of times your users opened your emails, divided by the total number of Delivered messages.
- Total Delivery Failures or Bounces: Total number of emails that were not delivered.
- Number of Bounces: Total number of bounces. A bounce occurs when the receiving server could not or would not accept the message.
- Bounce Rate: Total number of bounces, divided by the total recipients. Bounced emails hurt your reputation as well as GrowthZone's so it’s important to keep your bounce rate low (ideally as close to 0% as possible).
- Number of Distinct Clicks: The number of unique individuals that have clicked the links in your emails.
- Total Number of Clicks: The total number of times your users have clicked on the various links within your emails.
- Recipients That Have Clicked: The number of recipients who have clicked links in your emails.
- Click Through Rate: The number of unique clicks divided by the number of unique opens. For Example: Let's say that you send out an email to 1000 recipients, and of those 1000 messages you register 300 unique opens. Then, out of those 300 unique opens, you record 100 unique clicks. This would give you a click-through rate of 33.3%, since 100 clicks divided by 300 opens equals 0.333 multiplied by 100.
- Open Events: This section will display a list of all recipients who opened the email.
- Click Events: This section will display a list of links that were clicked. Each of the links is unique, as the links in your email are converted for tracking purposes. Click into the link to view which recipient clicked.
|
|
NOTE: Communication Delivery Statistics are not available for automated messages. |
Download Communication Delivery Statistics
Communication stats, described above, can be downloaded to an excel spreadsheet.
- Click Communications in the left-hand navigation panel.
- On the Browse tab, click the
 icon in the Actions column for the desired email.

The delivery stats will download into an excel spreadsheet.
Send Newsletters
On the Communications module Newsletters tab, you can be easily created and send newsletters. Default Newsletter templates have been setup in your system that may be used as designed or you may customize them to meet your needs. Refer to Create and Manage Email Templates to view the default templates.
You can send the newsletter to individual contacts and/or a list/committee by entering the contact name in the To box.

The content of the Newsletter can be edited, by clicking into the different sections of the letter and using the style editor functions to format text, add links, images and so on.

Click the Send Preview button to send the newsletter to yourself or others for review prior to sending the newsletter out.

View Email Drafts
When you have created and email and clicked Save Draft, you can view the drafts on the Email Drafts tab of the Communications module.

You can edit or delete the Email Draft on the Email Drafts tab. Additionally, but clicking the subject of an email, the Send Email screen will be displayed, and you can send the email.
Sending Your Draft Emails
If you wish to send a draft email, you can select it from the Drafts list on any Send Email screen.

NOTE: Once a draft email is sent, it is no longer listed on the Email Drafts page, nor will it be visible in the drafts drop-down list when sending emails. It is not a template.
View/Edit/Delete Scheduled Emails
On the Communications module Scheduled Emails tab, you can be view, edit and delete scheduled emails.

Click the Edit Email ![]() icon to view and edit the scheduled email.
Click the Delete
icon to view and edit the scheduled email.
Click the Delete ![]() icon to view and edit the scheduled email.
icon to view and edit the scheduled email.
Push Notifications
You can easily send notification to those members who have downloaded the MemberPlus app. You can choose to notify members of a list/committee or all users. See MemberPlus App for more information on the app.
Send a Push Notification
- Select Communications in the left-hand panel.
- Click the Push Notifications tab.
- Recipients: Select Send To All Users to send the message to all MemberPlus app users, or enter one or more lists/committees to which you wish to send the message.
- Enter your Message. You message is limited to 255 characters.
- Click Send.

The notification has been sent to the selected recipients.

|
|
NOTE: Members must enable notifications on their device. They are prompted when first installing the app or when they view notifications in the app if they have not previously allowed notification permissions. Members can always view notifications in the app, even if their device does not prompt them, just tap on the bell icon in the top right of the app’s home page. |
Email Designer
With your GrowthZone software, the Email Designer provides you the ability to create and design your own newsletters and email templates. The Email Designer is extremely flexible and provides tools for basic content elements that you can use to create and design your newsletter. Your content will look great on all devices, browsers and email clients. We have included a variety of templates for you, that you can update and customize as needed. Or you can simply start from scratch, scratch and create your own templates.
|
|
NOTE: The Email Designer is available to those who have purchased the Marketing Automation module. |
Designing Your Newsletters
We have provided you with a variety of newsletter templates that you can use as designed, or edit to suit your business needs. Many standard and custom tools are available to you for designing your templates.
View Default Email Designer Templates
- Click Communications in the left-hand navigation panel.
- Click the Email Designer tab.
- In the Templates list, select the template you wish to view.


You can customize these templates to suit your needs, if you are going to immediately send the newsletter out. Changes to the template will NOT be saved. If you wish to design your own template for future use, see Create a Email Designer Template from Scratch.
Create a Email Designer Template from Scratch
Brand consistency is the first thing to consider when designing your email and newsletter templates. The look and feel of your email should be consistent with your brand's personality, graphics, colors, fonts and images. You can create a template from scratch, and include all of the elements that should consistently be included in your newsletters, such as your logo, contact us button, and more. Then, when you are ready to send out a newsletter, you will simply need to update the template with the latest news.
- Click Setup in the left-hand navigation panel.
- Click Email Templates in the Communications section.
- Click Email Designer.
- Enter a Name for the template.
- Enter a Subject for the template. You will be able to over-ride the subject when sending the newsletter/email.
- Use all of the Standard Tools and Custom Tools to design your template.
- When your design is complete, click Done. This template will now be available for selection when sending out your newsletters.


|
|
IMPORTANT: These templates are only available when sending newsletters under Communications > Email Designer, and will NOT be available when sending out standard eMails. |
Template Settings - Global
Template Body
Using the Body option, you can define the global settings for your templates, including the width of the template, the background color, default fonts to be used, link color, etc.

Standard Tools
Tools are basic content elements that are used to design your templates. Text, image, and button are some examples of the built-in tools. To start using these tools, you will simply drag them into your newsletter to add content. Content formatting options are displayed when a tool is add to your document.

Columns
Rows and columns make it easy to organize content elements, like images and text. When getting started with designing your newsletter, you may wish to use the column tool to add columns and rows first, so you can then add additional content in just the right place. Drag & drop the Column tool into your template. You will then be able to define the number of columns in each row. Add as many rows as needed, you will always be able to go back and remove rows or change the number of columns you have added to the rows.
Learn more! View a short tutorial on adding columns to your template
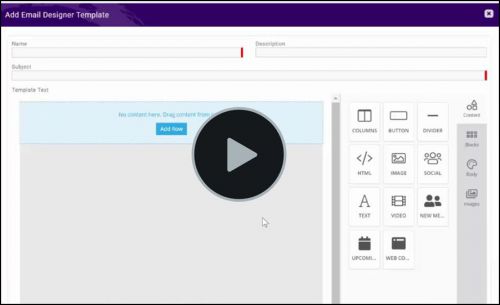
Text
|
|
The Text tool allows you to add the text block to your newsletter. Simply drag and drop the block into your newsletter, and type your text. Standard word processing functions are available, such as font size, alignment, etc, are available for formatting your text. The ability to insert merge fields allows for further customization, such as adding today's date, the Info Hub login URL, etc. |
TIPS:
- Ensure your text is easy to read, and avoid the pitfalls of using background or font colors that make your text difficult to read.
- A variety of fonts are available for your text, however, stick to standard web safe fonts, such as Arial, Verdana, Georgia, Times New Roman, and Courier. Not all fonts are supported universally, so if you’re using something niche, you may be at the mercy of having the email platform it’s displayed on change it to something else—which could potentially affect spacing, layout, and the overall look.
- NOTE: "Line Height" settings may not be honored/displayed correctly by all email programs (notably Outlook).
Add Merge Tags to Text
When working with the text tool, you have the ability to insert merge fields for further customization, such as adding today's date, the Info Hub login URL, etc.
- Drag & Drop the text block into your newsletter.
- If needed, begin typing your text.
- Place your cursor where you would like to insert the merge field.
- Click Merge Tags and select the desired tag.

Image Tool
| A newsletter full of text can be very boring to look at, and images can be a really great way of communicating what you're about to your readers. Images can help readers to connect with the content of your email and can keep their attention focused on the right area. Use the Image tool to add images to your newsletter. Simply drag & drop the image tool into your newsletter template, then upload your image and format as needed. |
TIP:
- Because some email clients don’t display background images, ensure that your email looks good and works without images. Use alt text to describe any images you use so that even with images disabled, the newsletter will still make sense.
Learn more! View a short tutorial on adding images to your template
A variety of stock images are also available for you to use. Click the Images icon, to choose an image, and drag & drop it into your newsletter.

Social Icon Tool
| Including your social network icons on your template provides an additional opportunity for your members to connect with you. Include your company's Facebook page, twitter account, etc. We recommend that you add these social media buttons at the bottom of your templates. Drag & Drop tool onto your template, then select the social networks you wish to include, and provide the appropriate URL. |
Learn more! View a short tutorial on adding social network icons to your template
Video Tool
 |
Videos embedded in your newsletter are a dynamic way to engage your readers. Using the Video tool, you can include a YouTube or Vimeo URL to automatically generate a preview image. The image will then link to the provided URL. |
Learn more! View a short tutorial on adding a video to your template

HTML Tool
| The HTML tool allows you to add custom HTML content into your template. We recommend that only users familiar with HTML use these blocks since adding custom code to the template can affect its rendering and responsiveness. Once you have added the HTML block to your newsletter, default code "Hello world!" is displayed, click on the content block to add you HTML code. You can write your own HTML or paste in existing HTML in the code editor, then click Save Code to return to the email template. As you enter your code, an immediate preview is displayed in your newsletter. |
Learn more! View a short tutorial on adding HTML Code to your template
Divider Tool
 |
The Divider tool allows you to add styled horizontal lines that divide your content. This will help organize and add visual content in your newsletter. Drag and drop the tool into your newsletter, then click anywhere on the divider to open the editing tool. You will be able to change the thickness, length, and padding of the divider lines. |
Learn more! View a short tutorial on adding a divider to your template
Button Tool
 |
The Button tool can be used to drive your readers to action. Perhaps you want to send the reader to your events page, or event a fundraiser page. By using this tool you can send the reader to these external links. Alternately, buttons may be used to send an email, dial a phone number, or event send an SMS. Drag & Drop the button onto your newsletter, then you will be able to style to button, and configure the desired action. |
Learn more! View a short tutorial on adding a Button to your template
Custom Tools
With GrowthZone, we have provided tools custom to your association. You can include a list of your new members, a list of upcoming events, lists of your web content (job postings, Hot Deals, etc), or recent forum topics.
Add a List of New Members to Your Newsletter
|
|
The New Members custom tools allows you to easily put the spotlight on your new members. You will be able to define the members displayed based on start date. Additionally, you can define the information included for those members (name, membership type, directory listing link). |
Learn more! View a short tutorial on adding a list of new members to your template
- Enter the first date to use to identify new members
- Choose your layout
- Choose how you would like the members sorted: Name, Membership Type, Join Date
- Set container padding - this is the space that will surround the list
- Choose the fields you wish to display: Name, Primary Contact, Membership Type, Directory Listing link

Add a List of Upcoming Events to Your Newsletter
|
|
Promote your events using the Upcoming Events custom tool. Once included in your newsletter/email, recipients will be able to view event details and link the the event page and registration page. |
Learn more! View a short tutorial on adding a list of upcoming events to your template
Drag & Drop the Events block into your news letter, then click the block to:
- Select the calendar(s) you wish to include
- Select the category(ies) you wish to include
- Select the number of months you wish to look ahead for events
- Select whether to include the event date or not.
- Select the sort order of the list (by date or name)
- Use the text editor options to format your text, add additional verbiage, and other pertinent links.
Note: Any formatting that you apply yourself after the upcoming events are loaded would be lost if you needed to reload the list again for any reason (such as changing the date range).

Add a List of Web Content to Your Newsletter
|
|
Promote your job postings, news releases, hot deals, etc. using the Web Content custom tool. Once included in your newsletter/email, recipients will be able to click the link to view the featured content. |
Learn more! View a short tutorial on adding a list of web content to your template
Drag and drop the Web Content tool into your newsletter, then you will be able to:
- Choose the web content list you wish to include. The default title for this block will be "Web Content" use the editor to customize your title, format the text, add custom fields, links, and more.
- Choose the number of items to be displayed
- Choose the details to be included: Title, Sub title, Description, Image, etc.
- Use the text editor to update and format the web content block

Add a List of Forum Topics to Your Newsletter
|
|
Feature some or all of your recent Forum posts, using the Forum Topics custom tool. Once included in your newsletter/email, recipients will be able to click the link into the forum to view topics and posts. |
Learn more! View a short tutorial on adding a list of forum topics to your template
Drag and drop the Forum Topics block into your newsletter, and you will be able to:
- Select a single forum to feature, or choose to show posts from all forums
- Choose the number of items to be displayed
- Use the text editor to update and format the Forum Topics block

Email Designer Common Tasks
Copy/Duplicate a Block
- Click the block you wish to copy.
- Click the
 icon. A copy of the block will be placed directly below the original block.

Move a Block
- Click the block you wish to move.
- Click the
 icon.
icon. - Drag the block to the desired location.

Delete a Block
- Click the block you wish to delete.
- Click the
 icon.
icon. - Confirm that you wish to delete the block.

Distribute your Newsletter
Preview your Newsletter
Prior to sending out your Newsletter, you will likely want to preview. Preview icons are available at the bottom of the screen.
- Click the
 icon to view a desktop preview
 - Click the
 icon to view a mobile preview
Email a Preview of your Newsletter
- On the Email Designer tab, click the Actions button.
- Click Send Preview.
- Enter the recipient email address. You can enter more than one email as needed.
- Click Done.


Save Newsletter as Draft
- Click Send Preview.
- Click Save as Draft.
The newsletter has now been saved as a draft, and will be available for selection from the Draft list.
Save Newsletter as A New Template
- Click Actions -> Save as New Template
- Give the template a Name and a Subject.


The newsletter has now been saved as a template, and will be available for selection from the "Template" dropdown list.
Send your Newsletter
Once you have completed the design and content of your newsletter, you will be able to send it from the Email Designer tab, or schedule it for later delivery.
Send your Newsletter Immediately
- Click the "Send" button in the upper right corner.
- Enter the desired sender and recipient information. See Send a Mass eMail for further instructions.
- Click the Send button.

Schedule your Newsletter to be Delivered Later
- After completing your email design and entering your desired sender and recipient information, click the calendar icon (1) in the "Delay Delivery Until" field.
- Select a date (2) and a time (3) for the email to be sent. This information will now appear in the "Delay Delivery Until" field.
- Click the "Send" button; your email is now scheduled for later delivery. See View/Edit/Delete Scheduled Emails for more information.

|
|
WIDGET DATA IN DELAYED DELIVERY EMAILS: If using the widgets (i.e. new members, upcoming events, etc.), the information that was populated upon creation of the email will be sent. The information will not recalculate when scheduled for sending at a later time. |
Communications Reports
A variety of reports are available for managing and analyzing communications. See Communications Reports.
Additional Email Settings
Flood Protection Settings
Flood Protection setting determines how many "Allowed Identical Emails Per Recipient". To Enable this option:
- Select Setup in the Navigation Panel
- Click Email Settings in the Communications section.
- Enable Flood Protection.
- Set Allowed Identical Emails Per Recipient. This is recommended for everyday use.
- Click Done.
