Difference between revisions of "Contact Management"
| (102 intermediate revisions by 6 users not shown) | |||
| Line 1: | Line 1: | ||
| + | <p style="font-size:30px">NEW!! Find all of your answers in the [https://helpdesk.growthzone.com/kb/article/1075-contents-contacts// GrowthZone Knowledge Base!]</p> | ||
| + | |||
At its core, the membership management system is a sophisticated database with an easy to use interface that allows you to track and summarize all relevant data regarding your contacts and members. Adding contacts and updating information is a snap. You’ll never lose your contact information and you’ll have access to your data anytime, anywhere. | At its core, the membership management system is a sophisticated database with an easy to use interface that allows you to track and summarize all relevant data regarding your contacts and members. Adding contacts and updating information is a snap. You’ll never lose your contact information and you’ll have access to your data anytime, anywhere. | ||
| + | |||
| + | =='''<span style="color:#800080">Search for a Contact'''</span>== | ||
| + | ---- | ||
| + | You can search for any contact in the system by using the global search bar at the top of the window. Matching records- individuals, events, businesses, even files- will appear in the selection box as you type. | ||
| + | |||
| + | [[File:Contactsearch2 08202020.jpg|800px|center|Screenshot of the global search bar in GrowthZone]] | ||
| + | |||
| + | {| class="wikitable" | ||
| + | |- | ||
| + | | | ||
| + | [[File:Video-call-24.jpg|link=https://www.screencast.com/t/QRfuzU41w]] | ||
| + | | style="width: 100%"| '''See Viewing & Finding Members in Action!''' | ||
| + | |} | ||
=='''<span style="color:#800080">Add a New Organization Contact'''</span>== | =='''<span style="color:#800080">Add a New Organization Contact'''</span>== | ||
---- | ---- | ||
#Click the '''Quick Actions''' button in the header bar. | #Click the '''Quick Actions''' button in the header bar. | ||
| − | #Click '''Contacts - Add | + | #:[[File:AddNewBusinessContact01.png|center]] |
| − | #:[[File: | + | #Click '''Contacts - Add Business''' |
| + | #:[[File:AddNewBusinessContact02.png|center]] | ||
#Fill in the Contact Information | #Fill in the Contact Information | ||
#*'''Phone, email or website''' - once this field is entered, a drop-down list will be displayed to select further details, such as the type of phone number. If you wish to add additional phone numbers, emails or websites, click the '''+''' button. '''NOTE''': If you are entering a website, and the web address begins with a number, include '''www.'''. If this is not included, the website address is interpreted as a phone number. | #*'''Phone, email or website''' - once this field is entered, a drop-down list will be displayed to select further details, such as the type of phone number. If you wish to add additional phone numbers, emails or websites, click the '''+''' button. '''NOTE''': If you are entering a website, and the web address begins with a number, include '''www.'''. If this is not included, the website address is interpreted as a phone number. | ||
| Line 12: | Line 28: | ||
#Click '''Done''' | #Click '''Done''' | ||
| − | The new organization contact is now added to your database. The organization's membership status will be set to the default status you have selected under '''Setup > Contact Status Options'''. | + | The new organization contact is now added to your database. The organization's membership status will be set to the default status you have selected under '''Setup > Miscellaneous > Contact Status Options'''. |
| − | [[File: | + | [[File:ContactStatusOptions 05152020.png|800px|center]] |
=='''<span style="color:#800080">Add New Contact - Individual'''</span>== | =='''<span style="color:#800080">Add New Contact - Individual'''</span>== | ||
| Line 20: | Line 36: | ||
#Click the '''Quick Actions''' Button in the header bar. | #Click the '''Quick Actions''' Button in the header bar. | ||
| + | #:[[File:AddNewBusinessContact01.png|center]] | ||
#Click '''Contacts - Add Individual'''. | #Click '''Contacts - Add Individual'''. | ||
#:[[File:Add Indiv.jpg|600px|center]] | #:[[File:Add Indiv.jpg|600px|center]] | ||
| Line 33: | Line 50: | ||
In the event that you have duplicate individual contacts in your database, you can use the '''Merge Contacts''' function to combine the contacts together. All information, billing history, communications, activity, etc. will be merged to the destination contact. | In the event that you have duplicate individual contacts in your database, you can use the '''Merge Contacts''' function to combine the contacts together. All information, billing history, communications, activity, etc. will be merged to the destination contact. | ||
| + | |||
| + | {| class="wikitable" | ||
| + | |- | ||
| + | | | ||
| + | [[File:One Row.png|25px]] | ||
| + | | style="width: 100%"| '''IMPORTANT - REALTOR EDITION:''' When merging contacts together, you '''MUST''' disable the sync process prior to performing the merge. Once you have merged the records, verify and update the NRDS data as needed, then re-enable the sync. | ||
| + | |} | ||
| + | |||
#Click '''Contacts''' in the left-hand navigation panel OR begin typing the name of the contact you wish to merge in the global search box in the header bar. | #Click '''Contacts''' in the left-hand navigation panel OR begin typing the name of the contact you wish to merge in the global search box in the header bar. | ||
#Select the individual contact you wish to merge. | #Select the individual contact you wish to merge. | ||
| − | #Click the '''Actions''' button. | + | #Click the purple '''Actions''' button on the far right. |
| − | #:[[File: | + | #: |
| + | [[File:MergeContacts01.png|200px|center]] | ||
#Select '''Merge Contact'''. | #Select '''Merge Contact'''. | ||
#:[[File:Add Merge Person.jpg|center]] | #:[[File:Add Merge Person.jpg|center]] | ||
| Line 58: | Line 84: | ||
=='''<span style="color:#800080">View Contacts'''</span>== | =='''<span style="color:#800080">View Contacts'''</span>== | ||
---- | ---- | ||
| + | Click '''Contacts''' in the left-hand navigation panel. | ||
| − | + | [[File:Contacts List 2019.jpg|800px|center]] | |
| − | [[File:Contacts | ||
All contacts in your database are displayed by default. You can view contacts in a card format by clicking the [[File:Card view.jpg|30px]] icon, or in a list view by clicking the [[File:List view.jpg|30px]] icon. By starting to type the name of a contact in the '''Search''' box, type ahead functionality will filter the list of contacts as you type. '''NOTE''': Accented letters, for example: á vs. a, are considered two different characters and their use would return different results. | All contacts in your database are displayed by default. You can view contacts in a card format by clicking the [[File:Card view.jpg|30px]] icon, or in a list view by clicking the [[File:List view.jpg|30px]] icon. By starting to type the name of a contact in the '''Search''' box, type ahead functionality will filter the list of contacts as you type. '''NOTE''': Accented letters, for example: á vs. a, are considered two different characters and their use would return different results. | ||
| Line 91: | Line 117: | ||
You may also filter the results by clicking the '''Customize Results''' button, and selecting additional options. | You may also filter the results by clicking the '''Customize Results''' button, and selecting additional options. | ||
[[File:Contacts Customize Results.jpg|700px|center]] | [[File:Contacts Customize Results.jpg|700px|center]] | ||
| + | |||
| + | =='''<span style="color:#800080">View Contacts - Event Attendees Potential Contacts'''</span>== | ||
| + | ---- | ||
| + | In the '''Contacts''' module, you can filter the list to event attendees, who are not currently contacts in your database by selecting '''Event Attendees Potential Contacts'''. | ||
| + | |||
| + | |||
| + | [[File:Event attendees potential contacts 2021.jpg|800px|center]] | ||
| + | |||
| + | If you wish to add this contact to your database, click into the contact's name, then you will be able to select '''Convert to Contact''' using the purple common tasks action button. | ||
| + | [[File:Convert contact 2020.jpg|1000px|center]] | ||
=='''<span style="color:#800080">Managing Contacts'''</span>== | =='''<span style="color:#800080">Managing Contacts'''</span>== | ||
---- | ---- | ||
| + | |||
| + | {| class="wikitable" | ||
| + | |- | ||
| + | | | ||
| + | [[File:Video-call-24.jpg|link=https://www.screencast.com/t/cLE7edey3E]] | ||
| + | | style="width: 100%"| '''See Managing Contacts in Action!''' | ||
| + | |} | ||
==='''<span style="color:#800080">Update Contact/Organization Logo/Image'''</span>=== | ==='''<span style="color:#800080">Update Contact/Organization Logo/Image'''</span>=== | ||
| Line 102: | Line 145: | ||
#Click the image icon to the left of the contact name. | #Click the image icon to the left of the contact name. | ||
#:[[File:Add Member Logo.jpg|1000px|center]] | #:[[File:Add Member Logo.jpg|1000px|center]] | ||
| − | #:The '''Image Manager''' dialog box will open. | + | #:The '''Image Manager''' dialog box will open. '''For a contact/organization photo, the recommended size is 400x400 pixels in a 1:1 ratio.''' |
#:[[File:Image Manager.jpg|400px|center]] | #:[[File:Image Manager.jpg|400px|center]] | ||
#Drag and drop the desired image or click '''Upload''' to browse and select the desired file. '''NOTE:''' If you have previously uploaded the desired image, you can click '''Select Existing''' to choose the image from the '''Cloud'''. | #Drag and drop the desired image or click '''Upload''' to browse and select the desired file. '''NOTE:''' If you have previously uploaded the desired image, you can click '''Select Existing''' to choose the image from the '''Cloud'''. | ||
#Crop the image as desired and click '''Crop and Save'''. | #Crop the image as desired and click '''Crop and Save'''. | ||
| − | |||
| − | |||
| − | |||
| − | |||
| − | |||
| − | |||
| − | |||
| − | |||
| − | |||
| − | |||
| − | |||
| − | |||
| − | |||
| − | |||
| − | |||
==='''<span style="color:#800080">Add/Update Contact/Organization Account Number'''</span>=== | ==='''<span style="color:#800080">Add/Update Contact/Organization Account Number'''</span>=== | ||
| Line 144: | Line 172: | ||
You can add tags to your Organization/Individuals to make it easy to track something specific about that organization/individual. For example, if an individual has expressed interest in volunteering, you could add "volunteer" as a tag. The '''[[Contact_Management#Contacts_Report|Contacts Report]]''' may be used to generate a report based on specific tags. | You can add tags to your Organization/Individuals to make it easy to track something specific about that organization/individual. For example, if an individual has expressed interest in volunteering, you could add "volunteer" as a tag. The '''[[Contact_Management#Contacts_Report|Contacts Report]]''' may be used to generate a report based on specific tags. | ||
[[File:Tags.jpg|center]] | [[File:Tags.jpg|center]] | ||
| + | |||
| + | Tags should be used in the following situations: | ||
| + | *If the information is intended to be for “internal use” only and is used to segment records into groups. For example: Minority owned, Hot Prospect, Volunteers | ||
| + | *If you wish to track information “temporarily”. For example: You may have a tag called “Hot Prospect”, but would remove this tag if the contact because a member. | ||
To add a tag: | To add a tag: | ||
| Line 151: | Line 183: | ||
You can add as many tags as you wish. To remove a tag, click the '''x''' next to the tag name. | You can add as many tags as you wish. To remove a tag, click the '''x''' next to the tag name. | ||
| − | |||
| − | |||
{| class="wikitable" | {| class="wikitable" | ||
|- | |- | ||
| | | | ||
[[File:Smallest.png|25px]] | [[File:Smallest.png|25px]] | ||
| − | | style="width: 100%"| '''NOTE:''' | + | | style="width: 100%"| '''NOTE:''' Your GrowthZone software allows you to use tags, custom fields and categories. To guide your decision in which to use, see a comparison list [https://supportwiki.memberzone.org/images/4/43/Comparison_of_Tags_Custom_Fields_Categories.pdf here.] |
|} | |} | ||
| − | |||
===='''<span style="color:#800080">View/Manage Tags'''</span>==== | ===='''<span style="color:#800080">View/Manage Tags'''</span>==== | ||
---- | ---- | ||
| − | |||
Under '''Setup > Miscellaneous > Tags''' you can see a list of all tags and how they are being used in your system. You can also edit the name of a tag or globally delete a tag. | Under '''Setup > Miscellaneous > Tags''' you can see a list of all tags and how they are being used in your system. You can also edit the name of a tag or globally delete a tag. | ||
| − | |||
#Click '''Setup''' in the left-hand navigation panel. | #Click '''Setup''' in the left-hand navigation panel. | ||
#Click '''Tags''' in the '''Miscellaneous''' section. | #Click '''Tags''' in the '''Miscellaneous''' section. | ||
#:[[File:Tags1.jpg|800px|center]] | #:[[File:Tags1.jpg|800px|center]] | ||
A list of all current tags and the number of usage (by module) will be displayed. | A list of all current tags and the number of usage (by module) will be displayed. | ||
| − | |||
===='''<span style="color:#800080">Edit a Tag Globally'''</span>==== | ===='''<span style="color:#800080">Edit a Tag Globally'''</span>==== | ||
---- | ---- | ||
| Line 179: | Line 205: | ||
#Edit the name of the tag. | #Edit the name of the tag. | ||
#Click '''Done'''. | #Click '''Done'''. | ||
| − | |||
===='''<span style="color:#800080">Delete a Tag Globally'''</span>==== | ===='''<span style="color:#800080">Delete a Tag Globally'''</span>==== | ||
---- | ---- | ||
| Line 205: | Line 230: | ||
[[File:Smallest.png|25px]] | [[File:Smallest.png|25px]] | ||
| style="width: 100%"| '''NOTE:''' Designations are configured under '''Setup > Miscellaneous'''. See '''[[Getting_Started#Configure_Designations|Configure Designations]]''' for instructions. | | style="width: 100%"| '''NOTE:''' Designations are configured under '''Setup > Miscellaneous'''. See '''[[Getting_Started#Configure_Designations|Configure Designations]]''' for instructions. | ||
| + | |} | ||
| + | |||
| + | ==='''<span style="color:#800080">View Contact History'''</span>=== | ||
| + | ---- | ||
| + | |||
| + | To view historical contact relationship history: | ||
| + | |||
| + | #For the desired contact, click the common tasks '''Actions''' button. | ||
| + | #:[[File:Actions contact history.jpg|800px|center]] | ||
| + | #Click '''Contact History'''. | ||
| + | [[File:Contact roles.jpg|600px|center]] | ||
| + | |||
| + | ==='''<span style="color:#800080">Send Member an Email to Contact(s) to Update their Profile'''</span>=== | ||
| + | ---- | ||
| + | |||
| + | Make it easy for your contacts to keep their own contact and directory information up to date. On the '''Contacts''' module main page, you have the ability to send a '''Member Profile Update''' email to selected contacts. Within this email is a link that will take the contact to a page where they can review and change their information. This option does not require the contact to access the Info Hub. <br>'''NOTE''': The email will be sent to the primary contact on the '''membership'''. If there is not an email available for the primary contact, the email will be sent to the organization.</br> | ||
| + | |||
| + | #Click '''Contacts''' in the left-hand navigation panel. | ||
| + | #:[[File:Update Contacts 2019.jpg|800px|center]] | ||
| + | #Click the [[File:Orange actions button 2019.jpg|35px]] button. | ||
| + | #Select '''Email Member Profile Update'''. | ||
| + | #:[[File:Email member profile update 2020.jpg|600px|center]] | ||
| + | #Select any desired filtering options, to limit the contacts to whom you are sending the email: | ||
| + | #*'''Renewal Month''': Select a renewal month if you wish to limit recipients to a specific renewal month. | ||
| + | #*'''Membership Type''': Select a membership type if you wish to limit recipients to a specific membership type. | ||
| + | #*'''Contact''': Enter a specific contact if you wish to email just that contact. | ||
| + | #Enter a '''Subject'''. This will default to '''Update/Verify Your Profile''' but you can change if you wish. | ||
| + | #Select a '''From''' address. | ||
| + | #Click '''Send'''. | ||
| + | |||
| + | The email message sent is displayed below. | ||
| + | |||
| + | [[File:Update verify message 2019.jpg|600px|center]] | ||
| + | |||
| + | Your contacts can click the '''Verify/Update your Contact and Directory Information''' to view and update their own information. Once the contact clicks the '''Submit''' button, your database will be updated with these changes. | ||
| + | |||
| + | {| class="wikitable" | ||
| + | |- | ||
| + | | | ||
| + | [[File:One Row.png|25px]] | ||
| + | | style="width: 100%"| '''IMPORTANT''' While this option gives members an easy way to update their data, it also has the potential to overwrite backoffice data. Meaning, the data the member changes will also change in the backoffice. | ||
| + | |} | ||
| + | |||
| + | ==='''<span style="color:#800080">Incomplete Contact Records'''</span>=== | ||
| + | You may see records in your Contacts module that are not clickable; these records are incomplete, and are generally created when data is imported into the system. While not directly editable, there is a way they can be accessed. | ||
| + | [[File:Incompletecontacts1.jpg|800px|center]] | ||
| + | |||
| + | {| class="wikitable" | ||
| + | |- | ||
| + | | | ||
| + | [[File:Video-call-24.jpg|30px|link=https://www.screencast.com/t/fgHChpb3rST]] | ||
| + | | style="width: 100%"| '''See Fixing Incomplete Contact Records in Action!''' | ||
| + | |} | ||
| + | |||
| + | #Go to Reports and open a Contacts Report. | ||
| + | #Add "ContactID" to the Fields to Display, and run the report. Those "empty" contact records will be at the top (if not, you can sort by the Contact Name column to bring them to the top). | ||
| + | #Select one of the ContactIDs and copy it. | ||
| + | #:[[File:Incompletecontacts2.jpg|800px|center]] | ||
| + | #In your browser, right click your open GrowthZone tab and select "Duplicate". | ||
| + | #In the new tab, navigate to the Contacts module and open any accessible contact. | ||
| + | #Highlight the numbers in the address bar, and paste the ContactID of the "empty" record you just copied. | ||
| + | You should now be able to see the incomplete contact record- most often the record is missing a first or last name, preventing it from displaying fully in the system. Determine if the record should be deleted or updated, and perform those steps. | ||
| + | [[File:Incompletecontacts3.jpg|800px|center]] | ||
| + | |||
| + | {| class="wikitable" | ||
| + | |- | ||
| + | | | ||
| + | [[File:One Row.png|25px]] | ||
| + | | style="width: 100%"| '''MORE THAN 100 INCOMPLETE RECORDS''': Please contact '''[[Main_Page|GrowthZone Support]]''' for assistance. | ||
|} | |} | ||
| Line 265: | Line 359: | ||
#Click the orange action button. | #Click the orange action button. | ||
#Select '''Download Census''' or '''Email Census'''. | #Select '''Download Census''' or '''Email Census'''. | ||
| − | #:[[File: | + | #:[[File:Census email 2020.jpg|600px|center]] |
#Select desired filtering options (Note: : | #Select desired filtering options (Note: : | ||
#*If you wish to limit the contacts to specific '''Membership Types''', select the desired types from the drop-down list. | #*If you wish to limit the contacts to specific '''Membership Types''', select the desired types from the drop-down list. | ||
#*If you wish to limit the contacts to a specific '''Renewal Month''', select the month from the drop-down list. | #*If you wish to limit the contacts to a specific '''Renewal Month''', select the month from the drop-down list. | ||
| + | #*Alternately, the census can be sent to an individual contact by entering the '''Contact''' name. Only one contact may be entered. | ||
#Select the '''Document Generation Template''' you wish to use for the census. | #Select the '''Document Generation Template''' you wish to use for the census. | ||
#Click '''Done'''. Depending on the size of document, the download could take up to an hour to generate. Best practice would be to select smaller segments of members. Emailing will attach a unique pdf for each member and send to the membership owner. | #Click '''Done'''. Depending on the size of document, the download could take up to an hour to generate. Best practice would be to select smaller segments of members. Emailing will attach a unique pdf for each member and send to the membership owner. | ||
| Line 302: | Line 397: | ||
---- | ---- | ||
| − | If a users email address has been noted as invalid, a red yield sign [[File:Red Yield Sign CP.jpg]] will be displayed in the contact info section next to the email. | + | If a users email address has been noted as invalid, a red yield sign [[File:Red Yield Sign CP.jpg]] will be displayed in the contact info section next to the email. '''NOTE''': You can use the '''Invalid Email Addresses''' report to generate a list of all contacts with invalid email addresses. See '''[https://supportwiki.memberzone.org/Reports#Invalid_Email_Addresses_Report Invalid Email Addresses Report]''' for instructions. |
[[File:Invalid Contact Info.jpg|800px|center]] | [[File:Invalid Contact Info.jpg|800px|center]] | ||
| Line 312: | Line 407: | ||
#Select the desired action: | #Select the desired action: | ||
#*'''None''' - select this option to simply leave the email address as invalid. | #*'''None''' - select this option to simply leave the email address as invalid. | ||
| − | #*'''Mark as valid''' - select this option to mark the email as valid. If you've personally verified this address is good even though the verification system indicates it is not, we've given you an option to mark it as good and remove it from the Quarantine list. Please do not abuse this option; we want to protect your email sender reputation. | + | #*'''Mark as valid''' - select this option to mark the email as valid. If you've personally verified this address is good even though the verification system indicates it is not, we've given you an option to mark it as good and remove it from the Quarantine list. Please do not abuse this option; we want to protect your email sender reputation. '''NOTE''': If the email address is still invalid, the next time the process runs to check for invalid emails, this email will once again be flagged. |
| − | #*'''Recheck address''' - select this option to recheck the email address. If the address is found to be valid, will be removed from the invalid list. If the address is found to be invalid, it will remain on the invalid list. | + | #*'''Recheck address''' - select this option to recheck the email address. If the address is found to be valid, will be removed from the invalid list. If the address is found to be invalid, it will remain on the invalid list. '''NOTE:''' After you have chosen to recheck the email address, reload the profile page to verify that the email is no longer flagged as invalid. |
| − | #*'''Edit email address and recheck''' - selecting this option will open a text box for you to enter a new email address. This system will check the new email address, and if valid the email will no longer be marked as invalid. | + | #*'''Edit email address and recheck''' - selecting this option will open a text box for you to enter a new email address. This system will check the new email address, and if valid the email will no longer be marked as invalid. '''NOTE''': After editing and rechecking the email address, reload the profile page to verify that the email is no longer flagged as invalid. |
#Click '''Close'''. | #Click '''Close'''. | ||
| − | ===Add Individual Contacts to an Organization/Business=== | + | {| class="wikitable" |
| + | |- | ||
| + | | | ||
| + | [[File:One Row.png|25px]] | ||
| + | | style="width: 100%"| '''NOTE:''' If you see an email address that is marked as invalid and you are unable to validate or flag them as valid, check and if you have an integration with Constant Contact or Mailchimp set up, they may be marked as invalid with that service, and you will not be able to change it in GrowthZone. | ||
| + | |} | ||
| + | |||
| + | ==='''<span style="color:#800080">Manage Contacts of a Business/Organization</span>'''=== | ||
| + | ---- | ||
| + | ===='''<span style="color:#800080">View Individual Contacts of an Organization/Business</span>'''==== | ||
| + | ---- | ||
| + | Individuals associated to your business/organization contacts can be viewed on the Organization's '''Profile''' tab. The list is limited to 20, but an indication of the total number of contacts is displayed and you can click on the | ||
| + | [[File:Available merge fields icon 2020.jpg|25px]] to view the complete list on the '''Individuals''' tab. | ||
| + | [[File:Contact list 2020.jpg|600px|center]] | ||
| + | |||
| + | |||
| + | ===='''<span style="color:#800080">Add Individual Contacts to an Organization/Business</span>'''==== | ||
| + | ---- | ||
| + | |||
| + | {| class="wikitable" | ||
| + | |- | ||
| + | | | ||
| + | [[File:Video-call-24.jpg|link=https://www.screencast.com/t/QRfuzU41w]] | ||
| + | | style="width: 100%"| '''See Adding/Editing Contacts to a Business in Action!''' | ||
| + | |} | ||
You may add/edit contacts to an organization in the '''Contacts''' section of the organization's '''Profile''' tab. The '''Contacts''' section displays the last 20 updated contacts sorted by last update date. To view a full list of the contacts for this organization, click the [[File:List link.jpg]] to view the full list of contacts for this organization. | You may add/edit contacts to an organization in the '''Contacts''' section of the organization's '''Profile''' tab. The '''Contacts''' section displays the last 20 updated contacts sorted by last update date. To view a full list of the contacts for this organization, click the [[File:List link.jpg]] to view the full list of contacts for this organization. | ||
| Line 337: | Line 456: | ||
#Click '''Done'''. | #Click '''Done'''. | ||
| − | ====Provide Info Hub Access to Individual Contacts | + | ==='''<span style="color:#800080">Provide Info Hub Access to Individual Contacts'''</span>=== |
| − | + | ---- | |
| − | |||
| − | + | Once you have setup a new individual contact in the database, you will need to send the log-in instructions to the Info Hub. '''NOTE:''' You must be on the individual's page not the business page to follow these instructions. | |
#Click the '''Actions''' button to view common tasks. | #Click the '''Actions''' button to view common tasks. | ||
| Line 357: | Line 475: | ||
#Click '''Done'''. | #Click '''Done'''. | ||
| − | An automated email (example show below) will be sent to the individual. | + | An automated email (example show below) will be sent to the individual. The email template used by default is the '''New Member Access''' template, we recommend that you edit this template to suit your specific needs. See '''[https://supportwiki.memberzone.org/Communications_Basics#Edit_a_Default_Email_Template Edit a Default Email Template]'''. |
| + | |||
[[File:Login Email.jpg|center]] | [[File:Login Email.jpg|center]] | ||
| Line 363: | Line 482: | ||
<div class='note'>'''NOTE:''' You will be able to review which users have access to the Info Hub by generating the '''User Account Report'''.</div> | <div class='note'>'''NOTE:''' You will be able to review which users have access to the Info Hub by generating the '''User Account Report'''.</div> | ||
| − | + | ===='''<span style="color:#800080">Send Reset an Info Hub Password email to a User'''</span>==== | |
| − | =====Send Reset an Info Hub Password email to a User | + | ---- |
| − | |||
If an Info Hub user has forgotten his/her password, you can send a reset password email from the individual's page. | If an Info Hub user has forgotten his/her password, you can send a reset password email from the individual's page. | ||
| Line 378: | Line 496: | ||
[[File:Acct Reset Instructions.jpg|center]] | [[File:Acct Reset Instructions.jpg|center]] | ||
| + | {| class="wikitable" | ||
| + | |- | ||
| + | | | ||
| + | [[File:Smallest.png|25px]] | ||
| + | | style="width: 100%"| '''NOTE:''' A '''Forgot your Username or Password?''' link is displayed on the Info Hub log-in page, this allows the user to use his/her user name or email address to reset own password. | ||
| + | |} | ||
| − | < | + | ===='''<span style="color:#800080">Change a Users Info Hub Access Level'''</span>==== |
| − | + | ---- | |
| − | + | #For the desired representative, click the purple '''Actions''' tab. | |
| + | #:[[File:User login button 2020.png|600px|center]] | ||
| + | #Click '''User Login'''. | ||
| + | #:[[File:Edit user access 2020.png|500px|center]] | ||
| + | #Make the desired changes to access level. | ||
| + | #Click '''Done'''. | ||
| + | ====='''<span style="color:#800080">Set a Temporary Password for an Info Hub User'''</span>===== | ||
| + | ---- | ||
#Click the purple '''Actions''' button to view common tasks. | #Click the purple '''Actions''' button to view common tasks. | ||
| + | #:[[File:User login button 2020.png|600px|center]] | ||
#Click '''User Login'''. | #Click '''User Login'''. | ||
#:[[File:Edit User Access 3.jpg|center]] | #:[[File:Edit User Access 3.jpg|center]] | ||
| Line 390: | Line 522: | ||
There is no automation when you manually reset the password from the back-office, you must communicate the new password to the member. The password is only temporary, when the user logs into the Info Hub with a manually reset password, the user is immediately presented with the change username/password screen. | There is no automation when you manually reset the password from the back-office, you must communicate the new password to the member. The password is only temporary, when the user logs into the Info Hub with a manually reset password, the user is immediately presented with the change username/password screen. | ||
| + | {| class="wikitable" | ||
| + | |- | ||
| + | | | ||
| + | [[File:One Row.png|25px]] | ||
| + | | style="width: 100%"| '''NOTE:''' A '''Forgot your Username or Password?''' link is displayed on the Info Hub log-in page, this allows the user to use his/her user name or email address to reset own password. | ||
| + | |} | ||
| + | |||
| + | ====='''<span style="color:#800080">Send Password Reset Email'''</span>===== | ||
| + | ---- | ||
| + | #Click the purple '''Actions''' button to view common tasks. | ||
| + | #:[[File:User login button 2020.png|600px|center]] | ||
| + | #Click '''User Login'''. | ||
| + | #:[[File:Edit User Access 3.jpg|center]] | ||
| + | #Select '''Send Password Reset Email'''. | ||
| + | #Click '''Done'''. | ||
| − | + | The email sent to the member will include the member's user name, and a link to reset their password. | |
| − | ===== | + | ===='''<span style="color:#800080">Add an Individual to an Existing Business'''</span>==== |
| + | ---- | ||
| + | #On the individual's '''Profile''' tab, click the orange plus button in the '''Businesses''' section. | ||
| + | #:[[File:Add org 2020.jpg|600px|center]] | ||
| + | #Enter the name of the organization. If the organization exists in your database, select the organization, and organization information will be populated.. If the organization does not exist, you will create a new organization record. | ||
| + | #Click '''Done'''. | ||
| + | The individual is now associated to the new organization. | ||
| + | ===='''<span style="color:#800080">Deactivate an Individual Contact with a Business'''</span>==== | ||
| + | ---- | ||
If an individual contact is no longer a part of a business organization, you may deactivate them. '''NOTE:''' It is not recommended that you delete individuals, as the database maintains historical information about you individuals. | If an individual contact is no longer a part of a business organization, you may deactivate them. '''NOTE:''' It is not recommended that you delete individuals, as the database maintains historical information about you individuals. | ||
| − | |||
#On the Business Contact's '''Profile''' tab, click the pencil icon adjacent to the individual you wish to deactivate. | #On the Business Contact's '''Profile''' tab, click the pencil icon adjacent to the individual you wish to deactivate. | ||
#:[[File:Deactivate Contact.jpg|center]] | #:[[File:Deactivate Contact.jpg|center]] | ||
| Line 402: | Line 556: | ||
#:[[File:Deactivate Contact 2.jpg|center]] | #:[[File:Deactivate Contact 2.jpg|center]] | ||
#Click '''Done'''. | #Click '''Done'''. | ||
| − | |||
The de-activated individual will no longer be associated to the business, however, an individual record will be maintained and the individual will have a status of non-member. | The de-activated individual will no longer be associated to the business, however, an individual record will be maintained and the individual will have a status of non-member. | ||
| + | '''NOTE:''' The individual's access to the info hub is not automatically revoked. | ||
| − | ''' | + | ===='''<span style="color:#800080">Move an Individual to a Different Business'''</span>==== |
| + | ---- | ||
| + | When individuals move from one business to another, follow these steps: | ||
| − | + | #Delete the individual's Info Hub access as described in '''[[Info_Hub#Delete_User_Info_Hub_Access|Delete an Individual's Info Hub Access]]'''. | |
| + | #De-activate the individual as described in '''[[Contact_Management#Deactivate_an_Individual_Contact_with_a_Business|Deactivate an Individual Contact with a Business]]'''. | ||
| + | #Associate the individual to the new organization as described in '''[[Contact_Management#Add_Individual_Contacts_to_an_Organization.2FBusiness|Add Individuals to Business/Organization]]'''. | ||
| + | #Resend login instructions to the individual as described in '''[[Info_Hub#Setting_up_Individual.27s_Info_Hub_Access|Set up Individual's Info Hub Access]]'''. | ||
| + | ===='''<span style="color:#800080">(Staff) Impersonate a Member in the Info Hub'''</span>==== | ||
| + | ---- | ||
Staff may “impersonate” a representative in order to see what the rep would see in the Info Hub and perform tasks on their behalf. This may be useful if a member is having difficulty using the Info Hub, and you wish to view the Info Hub as they are seeing it to assist them. | Staff may “impersonate” a representative in order to see what the rep would see in the Info Hub and perform tasks on their behalf. This may be useful if a member is having difficulty using the Info Hub, and you wish to view the Info Hub as they are seeing it to assist them. | ||
| − | + | {| class="wikitable" | |
| − | + | |- | |
| + | | | ||
| + | [[File:One Row.png|25px]] | ||
| + | | style="width: 100%"| '''NOTE:''' When staff impersonates the member, the staff member has the same rights granted to the member. If the member does '''NOT''' have an Info Hub account, the access level granted to staff is the default level of access configured under '''Setup > Users > Login Settings'''. | ||
| + | |} | ||
#On the Individual's '''Profile''' tab, click the [[File:Orange Arrow.jpg]] in the '''Contact Info''' section. | #On the Individual's '''Profile''' tab, click the [[File:Orange Arrow.jpg]] in the '''Contact Info''' section. | ||
| Line 419: | Line 584: | ||
==='''<span style="color:#800080">Add a Business/Organization to Lists/Committees'''</span>=== | ==='''<span style="color:#800080">Add a Business/Organization to Lists/Committees'''</span>=== | ||
---- | ---- | ||
| − | |||
#Click the contact's '''Profile''' tab. | #Click the contact's '''Profile''' tab. | ||
| − | #:[[File: | + | #:[[File:Add contact to list 2020.jpg|800px|center]] |
| − | #Click the pencil icon adjacent to '''Lists/Committees'''. A list of the lists/committees that are configured in your system will be displayed. Those lists/committees to which the contact already belongs will be | + | #Click the [[File:Cp orange pencil.jpg|25px]] icon adjacent to '''Lists/Committees'''. A list of the lists/committees that are configured in your system will be displayed. Those lists/committees to which the contact already belongs will be selected. |
| − | #Click the check-box for | + | #:[[File:List comms add 2020.jpg|600px|center]] |
| + | #Click the check-box for the list/committees to which you wish to associate this contact. | ||
#Click '''Done'''. | #Click '''Done'''. | ||
| − | |||
{| class="wikitable" | {| class="wikitable" | ||
|- | |- | ||
| Line 433: | Line 597: | ||
|} | |} | ||
| − | + | ==='''<span style="color:#800080">Remove a Business/Organization from a List/Committee'''</span>=== | |
| − | ===Remove a Business/Organization from a List/Committee=== | + | ---- |
| − | |||
#On the Contact '''Profile''' tab, click the pencil icon adjacent to '''Lists/Committees''' from which you wish to remove the organization/individual. | #On the Contact '''Profile''' tab, click the pencil icon adjacent to '''Lists/Committees''' from which you wish to remove the organization/individual. | ||
#Select '''Do Not Contact''' to maintain the organization/individual within the group, but prevent the system from sending emails to the associated email address '''OR''' | #Select '''Do Not Contact''' to maintain the organization/individual within the group, but prevent the system from sending emails to the associated email address '''OR''' | ||
#Click '''Remove from Group''' to completely remove from the group. | #Click '''Remove from Group''' to completely remove from the group. | ||
| − | === | + | ==='''<span style="color:#800080">Contact Categories'''</span>=== |
| − | + | ---- | |
| − | # | + | It is recommended that you use categories: |
| + | *If they are intended for public or internal use and you wish to segment records into groups | ||
| + | *If you wish to allow visitors to your directory, web content, events, etc. ability to filter to specific categories | ||
| + | *If you wish to display the information publicly and in the Info Hub | ||
| + | *If you wish to track specific information about a contact, and have it visible on the Profile tab. Similar to custom fields, but better visibility. | ||
| + | ===='''<span style="color:#800080">View Contact Categories'''</span>==== | ||
| + | ---- | ||
| + | On the Contact '''Profile''' tab, you will be able to view the '''Category Lists''' and the '''Categories''' to which a contact has been assigned. In the example below, the contact is assigned to Computer & Telecomm; Finance & Insurance in the '''Business Category''' list. Notice that the '''Languages Spoken''' category list is also displayed, however no categories have been assigned. Category list that you have configured as required will always be displayed on a members profile tab. | ||
| + | [[File:Categories new 1 2020.jpg|600px|center]] | ||
| + | ===='''<span style="color:#800080">Add Categories to a Contact'''</span>==== | ||
| + | ---- | ||
| + | #Select the contact's '''Profile''' tab. | ||
| + | #In the '''Categories''' section, click the [[File:Orange pencil Icon.jpg]] pencil icon adjacent to '''Categories'''. A list of all categories that are configured in your system will be displayed. '''OR''' If you have previously assigned a contact to a category within a category list, you can click the pencil icon adjacent to that category list to select categories. | ||
#:[[File:Edit Categories CP.jpg|center]] | #:[[File:Edit Categories CP.jpg|center]] | ||
| − | |||
| − | |||
#Click the check-box for those categories to which you wish to associate this contact. | #Click the check-box for those categories to which you wish to associate this contact. | ||
| + | #Click '''Done'''. | ||
| + | {| class="wikitable" | ||
| + | |- | ||
| + | | | ||
| + | [[File:Smallest.png|25px]] | ||
| + | | style="width: 100%"| '''Did you know...''' The '''Contacts Report''' can be used to confirm that all of your contacts have been assigned to categories. Simply use an advanced filter for categories, set to '''Is Empty'''. See '''[https://supportwiki.memberzone.org/Reports#Contacts_Report Contacts Report]''' for further information. | ||
| + | |} | ||
| + | ===='''<span style="color:#800080">Remove Contacts from Categories'''</span>==== | ||
| + | ---- | ||
| + | #Select the contact's '''Profile''' tab. | ||
| + | #:[[File:Remove category 2020.jpg|600px|center]] | ||
| + | #In the '''Categories''' section, click the [[File:Orange pencil Icon.jpg]] pencil icon adjacent to '''Category(ies) you wish to remove'''. A list of all categories, in the category list, will be displayed. | ||
| + | #:[[File:Edit business categories 2020.jpg|600px|center]] | ||
| + | #Deselect the categories that you wish to remove. | ||
#Click '''Done'''. | #Click '''Done'''. | ||
| − | + | ==='''<span style="color:#800080">Assign Staff to a Individual/Organization'''</span>=== | |
| − | + | ---- | |
| − | |||
| − | |||
#On the Contact '''Profile''' tab, click the [[File:Orange plus icon.jpg]] icon adjacent to '''Assigned Staff'''. | #On the Contact '''Profile''' tab, click the [[File:Orange plus icon.jpg]] icon adjacent to '''Assigned Staff'''. | ||
#:[[File:Assigned Staff CP.jpg|center]] | #:[[File:Assigned Staff CP.jpg|center]] | ||
| Line 460: | Line 645: | ||
#Click '''Done'''. | #Click '''Done'''. | ||
| − | ==='''<span style="color:#800080"> | + | {| class="wikitable" |
| + | |- | ||
| + | | | ||
| + | [[File:One Row.png|25px]] | ||
| + | | style="width: 100%"| '''NOTE:''' If it is necessary to reassign staff, perhaps a staff member has left the organization, this can be done under Setup > Staff Users. See '''[[Getting_Started#Reassign_Staff|Reassign Staff]]''' for further information. | ||
| + | |} | ||
| + | |||
| + | ==='''<span style="color:#800080">Manage Parent/Child Relationships'''</span>=== | ||
---- | ---- | ||
| − | |||
If you have organizations that are connected to other organizations, you can configure the system to recognize these relationships. For Example, a Main Bank Branch may be parent to many other branches. A benefit in setting up a Parent/Child relationship is the ability to assign billing for a child organization to the Parent organization. | If you have organizations that are connected to other organizations, you can configure the system to recognize these relationships. For Example, a Main Bank Branch may be parent to many other branches. A benefit in setting up a Parent/Child relationship is the ability to assign billing for a child organization to the Parent organization. | ||
| − | + | ===='''<span style="color:#800080">Add a Parent Relationship to a Business/Organization'''</span>==== | |
| + | ---- | ||
#On the Contact '''Profile''' tab, click the [[File:orange plus icon.jpg]] icon adjacent to '''Parent Businesses'''. | #On the Contact '''Profile''' tab, click the [[File:orange plus icon.jpg]] icon adjacent to '''Parent Businesses'''. | ||
| Line 484: | Line 676: | ||
|} | |} | ||
| − | ==='''<span style="color:#800080">Add a Child Relationship to a Business/Organization'''</span>=== | + | ===='''<span style="color:#800080">Add a Child Relationship to a Business/Organization'''</span>==== |
---- | ---- | ||
| − | |||
| − | |||
| − | |||
| − | |||
#On the Contact '''Profile''' tab, click the [[File:orange plus icon.jpg]] icon adjacent to '''Child Businesses'''. | #On the Contact '''Profile''' tab, click the [[File:orange plus icon.jpg]] icon adjacent to '''Child Businesses'''. | ||
#:[[File:Child Relationship.jpg|700px|center]] | #:[[File:Child Relationship.jpg|700px|center]] | ||
| Line 498: | Line 686: | ||
Once a child relationship has been created, the system will automatically create a parent relationship for the parent contact. | Once a child relationship has been created, the system will automatically create a parent relationship for the parent contact. | ||
| + | |||
| + | {| class="wikitable" | ||
| + | |- | ||
| + | | | ||
| + | [[File:One Row.png|25px]] | ||
| + | | style="width: 100%"| '''IMPORTANT:''' If you wish the child to inherit the parent's membership, you must choose a Contact Relationship Type set to '''System Relationship''' = '''Location'''. This is the trigger that tells the system that the child should inherit the parent's membership. | ||
| + | |} | ||
===='''<span style="color:#800080">Contact Relationship Types'''</span>==== | ===='''<span style="color:#800080">Contact Relationship Types'''</span>==== | ||
| Line 514: | Line 709: | ||
#Select '''Setup''' in the left-hand navigation panel. | #Select '''Setup''' in the left-hand navigation panel. | ||
#Select '''Contact Relationship Types''' in the '''Miscellaneous''' section. | #Select '''Contact Relationship Types''' in the '''Miscellaneous''' section. | ||
| + | #:[[File:Contact Relationship.jpg|600px|center]] | ||
| + | #Click the '''Add''' button. | ||
| + | #:[[File:Add relationship type.jpg|600px|center]] | ||
| + | #Select the desired '''System Relationship Type'''. These relationship types drive where the contact relationship type can be assigned in the software. For example, if you are creating a relationship type for your staff to member, select '''Person to Org'''. | ||
| + | #Enter a '''Name''' for the relationship type. | ||
| + | #(Optional) Enter a '''Description''' for the relationship type. | ||
| + | #Click '''Done'''. | ||
| + | |||
| + | {| class="wikitable" | ||
| + | |- | ||
| + | | | ||
| + | [[File:Smallest.png|25px]] | ||
| + | | style="width: 100%"| '''NOTE:''' Using the System Relationship Type '''location''' will automatically attach the child to the parent's membership. It will count as one membership with multiple records attached. The parent will remain the owner of the membership. | ||
| + | |} | ||
| + | ===='''<span style="color:#800080">Parent/Child Relationship - Consideration'''</span>==== | ||
| + | ---- | ||
| + | ====='''<span style="color:#800080">Do you wish the Child to Inherit the Parent Membership? '''</span>===== | ||
| + | ---- | ||
| + | If the child contact should inherit its membership from the parent: | ||
| + | *Setup a relationship of type '''Location'''. | ||
| + | *Assign this relationship type to the Child | ||
| + | ====='''<span style="color:#800080">Do you wish the Child to have a stand alone membership, paid for by the Parent? '''</span>===== | ||
| + | ---- | ||
| + | *When adding the parent/child relationship, do not select a relationship of type '''Location'''. '''Exception''': If the child is to inherit the membership from the parent AND have a stand alone membership, select a relationship of type '''Location'''. | ||
| + | *When adding a membership to the child, select the parent as the billing contact, the parent email address and the parent address. | ||
| + | *Invoices will still "belong" to the child, but will be delivered to the parent. | ||
| + | Additionally, if you wish the parent to be able to view the child invoices in the Info Hub, enable '''Allow Info Hub Users To Access Related Contacts Invoices''' under '''Setup > Finance > General Settings'''. | ||
| + | ====='''<span style="color:#800080">Do you wish the Child to have a stand alone membership that the child is responsible for paying for? '''</span>===== | ||
| + | ---- | ||
| + | *When adding the parent/child relationship, do not select a relationship of type '''Location'''. '''Exception''': If the child is to inherit the membership from the parent AND have a stand alone membership, select a relationship of type '''Location'''. | ||
| + | *When adding a membership to the child, select the child as the billing contact, the child email address and the child address. | ||
==='''<span style="color:#800080">Add/Update Individual Professional Information'''</span>=== | ==='''<span style="color:#800080">Add/Update Individual Professional Information'''</span>=== | ||
---- | ---- | ||
| + | On an individual's profile tab, you will be able to track professional information, such as license, education, volunteer and work information (Options will vary dependent on your GrowthZone edition). This information can be reported on using the '''Contacts Report'''. | ||
#On the contact's '''Profile''' tab, click the [[File:orange plus icon.jpg]] icon in the '''Professional''' section. | #On the contact's '''Profile''' tab, click the [[File:orange plus icon.jpg]] icon in the '''Professional''' section. | ||
| − | #Entered desired professional information. | + | #:[[File:Add professional 2020.jpg|600px|center]] |
| + | #Entered desired professional information. | ||
#Click '''Done'''. | #Click '''Done'''. | ||
| + | |||
| + | Details about professional credentials are available for reporting using the '''[https://supportwiki.memberzone.org/Reports#Contacts_Report Contacts Report]'''. | ||
=='''<span style="color:#800080">Update Additional Information for an Individual'''</span>== | =='''<span style="color:#800080">Update Additional Information for an Individual'''</span>== | ||
| Line 541: | Line 771: | ||
#Click '''Save'''. | #Click '''Save'''. | ||
| − | + | =='''<span style="color:#800080">Manage Contact Business/Organization Directory Listing'''</span>== | |
| − | |||
| − | |||
| − | |||
| − | |||
| − | |||
| − | |||
| − | |||
| − | |||
| − | |||
| − | |||
| − | |||
| − | |||
| − | |||
| − | |||
| − | |||
| − | |||
| − | |||
| − | |||
| − | |||
| − | |||
| − | =='''<span style="color:#800080"> | ||
---- | ---- | ||
| − | + | ==='''<span style="color:#800080">Add a Directory Listing to a Member'''</span>=== | |
| − | |||
| − | |||
| − | |||
| − | |||
| − | |||
| − | |||
| − | |||
| − | ==='''<span style="color:#800080"> | ||
---- | ---- | ||
| − | + | Some additional configuration of how a contact is displayed on your web-site can be configured and updated on the '''More Info''' tab of a contacts page. You can maintain internal notes, fill in a bio of the contact, and manage custom fields. | |
| − | + | {| class="wikitable" | |
| − | + | |- | |
| − | + | | | |
| − | + | [[File:One Row.png|25px]] | |
| − | + | | style="width: 100%"| '''IMPORTANT''': If you assign a contact to multiple directory listings '''within the same directory''', the contact will be displayed multiple times in that directory. | |
| − | + | |} | |
| − | + | Additional configuration of a contacts directory listing and web content are available on the '''Web Content''' tab of the contact's page. | |
| − | |||
| − | |||
| − | |||
| − | |||
| − | |||
| − | |||
| − | |||
| − | |||
| − | |||
| − | |||
| − | |||
| − | |||
#On the '''Web Content''' tab, click the '''Add Directory Listing''' button. '''NOTE:''' If a directory has already been configured for the contact, you may click the pencil icon in the actions column to edit that directory. | #On the '''Web Content''' tab, click the '''Add Directory Listing''' button. '''NOTE:''' If a directory has already been configured for the contact, you may click the pencil icon in the actions column to edit that directory. | ||
| − | #:[[File: | + | #:[[File:AddEditDirectoryListing.png|center]] |
# On the '''Add/Edit Directory Listing''' screen, configure the following ('''NOTE:''' The options that will be displayed for configuration will be dependent on your directory type listing configuration): | # On the '''Add/Edit Directory Listing''' screen, configure the following ('''NOTE:''' The options that will be displayed for configuration will be dependent on your directory type listing configuration): | ||
#:*'''Directory''' - Select the desired directory from the drop-down list. This list will be populated with the directories that you have configure in your system. | #:*'''Directory''' - Select the desired directory from the drop-down list. This list will be populated with the directories that you have configure in your system. | ||
| − | #:*''' | + | #:*'''Listing Level''' - Select the desired Directory Listing Type from the drop-down list. The list will be populated with the directory listing types you have configured in your system. |
| − | #:*'''Alternative Display Name (Leave Blank if Same as Contact)''' - This option allows you to enter a name other than the contact name to be displayed on the | + | #:*'''Alternative Display Name (Leave Blank if Same as Contact)''' - This option allows you to enter a name other than the contact name to be displayed on the website. You will leave this field blank if you wish to display the contact name that is in the database. |
| − | #:*''' | + | #:*'''Alternative Sort Name (Leave Blank if Same as Contact)''' - This option allows you to enter a name other than the contact name to be used in the sorting function on the website. You will leave this field blank if you wish to display the contact name that is in the database. |
| + | #:*'''Search Description''' - Enter a short description of this contact. This information may be displayed on the website when the contact is first displayed. | ||
#:*'''Description''' - This description is a more complete description of the contact which is displayed when the contact is selected on the web-page. | #:*'''Description''' - This description is a more complete description of the contact which is displayed when the contact is selected on the web-page. | ||
| − | #:*'''Keywords''' - Enter key words which can be used to search for this contact. | + | #:*'''Keywords''' - Enter key words which can be used to search for this contact. Key Words are important! See this article for further information: '''[https://www.growthzone.com/blog/how-to-get-seo-keywords-associations/ What’s an SEO Keyword? Why it Matters and How to Use It]'''. |
#:*'''Categories''' - Enter the directory categories under which this contact will be listed. | #:*'''Categories''' - Enter the directory categories under which this contact will be listed. | ||
| − | #:*'''Highlights (for Directory)''' - Enter highlights for this contact. | + | #:*'''Highlights (for Directory)''' - Enter highlights for this contact. (May not display depending on the settings for the directory listing being added/edited.) |
| − | #:*'''Images''' - You may add images for this directory. | + | #:*'''Images''' - You may add images for this directory. (May not display depending on the settings for the directory listing being added/edited.) |
# Click '''Done'''. | # Click '''Done'''. | ||
| Line 612: | Line 802: | ||
| | | | ||
[[File:Smallest.png|25px]] | [[File:Smallest.png|25px]] | ||
| − | | style="width: 100%"| ''' | + | | style="width: 100%"| '''Did You Know...''' You can view the directory listings assigned to your contacts, or importantly identify those who do not have a listing, using the '''Contacts Report'''. See '''[https://supportwiki.memberzone.org/Reports#View_All_contacts_that_do_not_have_a_directory_listing View All Contacts that do not have a Directory Listing]''' for further information. |
|} | |} | ||
| + | |||
| + | ==='''<span style="color:#800080">Update a Member's Directory Listing Information'''</span>=== | ||
| + | ---- | ||
| + | #On the '''Web Content''' tab, click the hyper-link for the Directory Listing you would like to update. | ||
| + | #Click the [[File:Cp orange pencil.jpg|25px]] for the directory listing you wish to update. | ||
| + | #:[[File:Update listing 2020.jpg|800px|center]] | ||
| + | #Make the desired updates. | ||
| + | #Click '''Done'''. | ||
| + | ==='''<span style="color:#800080">Remove a Directory Listing from a Member'''</span>=== | ||
| + | ---- | ||
| + | #For the desired member, click the '''Web Content''' tab. | ||
| + | #:[[File:Remove directory listing 2020.jpg|1000px|center]] | ||
| + | #In the '''Actions''' column, click the [[File:Cp orange pencil.jpg|25px]] for the directory listing you wish to remove. | ||
| + | #In the '''Edit Directory Listing''' screen, click '''Delete'''. | ||
| + | #Click '''OK''' to confirm. | ||
==Add a Project to a Contact== | ==Add a Project to a Contact== | ||
| Line 630: | Line 835: | ||
---- | ---- | ||
# In the Contact's record, click the '''More Info''' tab. Currently created custom fields will be displayed at the bottom of the page. You can close or expand sections by clicking the drop-down arrows on the right hand side of each section. If you have a large number of custom fields, you can enter text into the filter box to locate a particular field. | # In the Contact's record, click the '''More Info''' tab. Currently created custom fields will be displayed at the bottom of the page. You can close or expand sections by clicking the drop-down arrows on the right hand side of each section. If you have a large number of custom fields, you can enter text into the filter box to locate a particular field. | ||
| − | #:[[File:Contact | + | #:[[File:Contact custom fields 2020.jpg|800px|center]] |
| − | #Click the ''' | + | #Click the '''Edit Custom Fields''' button. |
| − | #:[[File:Edit | + | #:[[File:Edit custom fields 2020.jpg|600px|center]] |
#Click the [[File:Orange plus icon.jpg]] icon. | #Click the [[File:Orange plus icon.jpg]] icon. | ||
| − | #:[[File:Add | + | #:[[File:Add contact custom field 2020.jpg|600px|center]] |
#Configure the following: | #Configure the following: | ||
| − | #:*'''Field Area''' | + | #:*'''Field Area''': The field area will default to '''Business''' and should not be changed. This indicates that this custom field will be available as a contact field. |
| − | #:*'''Name''' | + | #:*'''Name''': Enter a name for the custom field. This will be used internally by the database. |
| − | #:*'''Display Name''' | + | #:*'''Display Name''': Enter a display name. This is the field that will be displayed on screens in your system, as well as on forms presented to the public. |
| − | #:*'''Custom Field Data Type''' | + | #:*'''Custom Field Data Type''': Select the data type for the custom field. '''NOTE:''' Selecting '''Drop-down''' will allow you to setup a list of options, and one option may be chosen. Selecting '''Drop-down with fill-in''' will allow the user to fill in an option. '''Multi-choice''' would allow the user to select more than one option. |
| − | + | #:*'''Group/Section''': (Optional) Select the desired group section of this custom field. The group/section indicates where the field will be displayed on the '''More Info''' tab. You can add additional groupings by clicking the [[File:plus icon.jpg|plus icon.jpg]] icon. | |
| − | + | #:*'''Characters Allowed''': This option would limit the number of characters that could be entered in a text box response. If you have selected a text box option (text or multi-text) you '''MUST''' enter in the number of characters allowed, and the value may not be 0. | |
| − | #:*'''Group/Section''' | + | #:*'''Properties''': Define the properties for the custom field: |
| − | #:*'''Characters Allowed''' | + | #:**'''Public''': Select this check-box if you wish this field to be displayed for the public. For example, if you are creating a custom field for a membership application form, you will want to ensure this checkbox is selected. |
| − | #:*'''Properties''' | + | #:**'''Member Editable''': Select this check-box if you want to allow members to view and edit this field in Info Hub. The Info Hub user must have the appropriate access level to edit the field. |
| − | #:**'''Public''' | + | #:**'''Required''': Select this check-box to make this field required. |
| − | #:**'''Member Editable''' | + | #:**'''Archived''': If you no longer wish to use this custom field, best practice is to archive a custom field to retain the historical data. |
| − | #:**'''Required''' | ||
| − | #:**'''Archived''' | ||
# Click '''Done'''. | # Click '''Done'''. | ||
| Line 660: | Line 863: | ||
---- | ---- | ||
On the contact's '''Communications''' tab, click the '''Send Email''' button. | On the contact's '''Communications''' tab, click the '''Send Email''' button. | ||
| + | |||
| + | See '''[[Communications_Basics#Send_an_Email|Send an Email]]''' for further instructions. | ||
| + | |||
| + | ==='''<span style="color:#800080">Send an Email to ALL Organization Contacts'''</span>=== | ||
| + | ---- | ||
| + | #For the desired organization, click the '''Individuals''' tab. | ||
| + | #:[[File:Email all individuals 2020.jpg|1000px|center]] | ||
| + | #Check the box in the far left side for each individual you would like to send an email to. | ||
| + | #Click the '''Send Email''' button. | ||
See '''[[Communications_Basics#Send_an_Email|Send an Email]]''' for further instructions. | See '''[[Communications_Basics#Send_an_Email|Send an Email]]''' for further instructions. | ||
| Line 686: | Line 898: | ||
#Click '''Done'''. | #Click '''Done'''. | ||
| − | ==Contact Activity== | + | =='''<span style="color:#800080">View Contact Activity'''</span>== |
| − | There are many types of communication and activities that may be happening with a member/contact, which may involve various staff members. The activities tab provides a single place to quickly see a summary of all of these activities. | + | ---- |
| − | + | There are many types of communication and activities that may be happening with a member/contact, which may involve various staff members. The activities tab provides a single place to quickly see a summary of all of these activities. Filter on the specific type of activity you wish to review. | |
| − | + | [[File:Activity tab 2020.jpg|900px|center]] | |
| − | + | {| class="wikitable" | |
| − | + | |- | |
| − | + | | | |
| − | + | [[File:Smallest.png|25px]] | |
| − | + | | style="width: 100%"| '''Did you know...'''When the activity is an event registration, you can click the hyper-link, for that registration, to go directly to the event attendee tab, <br>filtered to that contact. </br> | |
| − | + | |} | |
| − | |||
| + | =='''<span style="color:#800080">Manage Contact's Billing'''</span>== | ||
| + | ---- | ||
On the contact's '''Billing''' tab, multiple billing functions may be performed. | On the contact's '''Billing''' tab, multiple billing functions may be performed. | ||
| − | [[File:Billing | + | [[File:Contact billing tab 2020.jpg|800px|center]] |
| − | + | ==='''<span style="color:#800080">Review Contact's Balance'''</span>=== | |
| − | + | ---- | |
| − | ==='''<span style="color:#800080"> | + | You can view a contact's balance on the '''Billing''' tab. Additionally, if the contact has a balance, this will be displayed on the tab itself. |
| + | [[File:Contact billing tab balance 2020.jpg|800px|center]] | ||
| + | ==='''<span style="color:#800080">Add a Billing Note to a Contact'''</span>=== | ||
| + | ---- | ||
| + | #Select the contact's '''Billing''' tab. | ||
| + | [[File:Billing notes 2020.jpg|800px|center]] | ||
| + | #Click the [[File:orange plus icon.jpg]] in the '''Billing Notes''' section. | ||
| + | #:[[File:Add billing notes 2020.jpg|600px|center]] | ||
| + | #Enter the desired note. | ||
| + | #Click '''Done'''. | ||
| + | ==='''<span style="color:#800080">Store Credit Cards'''</span>=== | ||
---- | ---- | ||
If your payment gateway is GrowthZone Pay or Authorize.Net, credit cards can easily be stored through the back-office for future use. '''NOTE:''' Members may also store credit cards through the Info Hub (See '''[[Info_Hub#Store_Credit_Cards_in_Info_Hub|Store Credit Cards in Info Hub]]''') or anytime they are paying an invoice on-line they may choose to save their card. | If your payment gateway is GrowthZone Pay or Authorize.Net, credit cards can easily be stored through the back-office for future use. '''NOTE:''' Members may also store credit cards through the Info Hub (See '''[[Info_Hub#Store_Credit_Cards_in_Info_Hub|Store Credit Cards in Info Hub]]''') or anytime they are paying an invoice on-line they may choose to save their card. | ||
| − | + | {| class="wikitable" | |
| + | |- | ||
| + | | | ||
| + | [[File:One Row.png|25px]] | ||
| + | | style="width: 100%"| '''IMPORTANT:''' The option to store credit cards will only be displayed if '''Allow Stored Payment Profiles''' is enabled. See '''[[Billing#Setup_GrowthZone_Pay|Setup GrowthZone Pay]]''' for further details. | ||
| + | |} | ||
#On the contact's '''Billing''' tab, click the [[File:orange plus icon.jpg]] in the '''Stored Payment Profiles''' section. | #On the contact's '''Billing''' tab, click the [[File:orange plus icon.jpg]] in the '''Stored Payment Profiles''' section. | ||
| Line 729: | Line 957: | ||
|} | |} | ||
| − | === | + | ===='''<span style="color:#800080">Apply stored Credit Cards/Bank Accounts to recurring fees'''</span>==== |
| − | + | ---- | |
If your member wishes, you can setup your system to automatically charge recurring fee items to a stored credit card or bank account. | If your member wishes, you can setup your system to automatically charge recurring fee items to a stored credit card or bank account. | ||
| − | |||
#On the contact's '''Billing''' tab, click the hyper-link for the item to which you wish to add a stored profile. | #On the contact's '''Billing''' tab, click the hyper-link for the item to which you wish to add a stored profile. | ||
| − | #:[[File:Bill Fee Schedule.jpg|center]] | + | #:[[File:Bill Fee Schedule.jpg|800px|center]] |
#:The '''Edit Recurring Fee Item''' dialog box will be displayed. | #:The '''Edit Recurring Fee Item''' dialog box will be displayed. | ||
#:[[File:Edit Recurring Fee CC.jpg|center]] | #:[[File:Edit Recurring Fee CC.jpg|center]] | ||
#Select the desired '''Payment Profile''' from the drop-down list. | #Select the desired '''Payment Profile''' from the drop-down list. | ||
#Click '''Done'''. | #Click '''Done'''. | ||
| + | {| class="wikitable" | ||
| + | |- | ||
| + | | | ||
| + | [[File:One Row.png|25px]] | ||
| + | | style="width: 100%"| '''NOTE:''' If a bank account or credit card is stored, when the invoice is generated for a recurring fee item, the credit card/bank account will be immediately charged. | ||
| + | |} | ||
| − | < | + | ===='''<span style="color:#800080">Unapply a stored Credit Cards/Bank Accounts from Recurring Fees'''</span>==== |
| − | + | ---- | |
| − | + | #Select the contact's '''Billing''' tab. | |
| − | + | #:[[File:Shceduled billing 2020.jpg|600px|center]] | |
| − | + | #In the '''Scheduled Billing''' section, click the hyper-link for the desired recurring fee item. | |
| − | + | #:[[File:Remove profile 2020.jpg|400px|center]] | |
| − | + | #In the '''Invoice Settings''' section, select '''Select a Payment Profile''' from the '''Payment Profile''' list. | |
| + | #Click '''Done'''. | ||
| + | ==='''<span style="color:#800080">View an Individual Contact Recurring Fee Schedule'''</span>=== | ||
| + | ---- | ||
The recurring fee schedule for an individual contact may be viewed in the '''Billing Fees and Schedule''' section of the contact's '''Billing''' tab. '''[[Membership_Management#Manage_Member_Recurring_Fee_Schedule|Click Here]]''' for further information on setting up the recurring fees schedule. | The recurring fee schedule for an individual contact may be viewed in the '''Billing Fees and Schedule''' section of the contact's '''Billing''' tab. '''[[Membership_Management#Manage_Member_Recurring_Fee_Schedule|Click Here]]''' for further information on setting up the recurring fees schedule. | ||
| − | + | ==='''<span style="color:#800080">View an Individual Contact's Transaction History'''</span>=== | |
| − | === | + | ---- |
| − | |||
Transaction History for an individual contact may be viewed and managed in the '''Billing History''' section of the contacts '''Billing''' tab. From this tab, you will be able to accept cash/check/credit card payments, create write-offs, download or email invoices. | Transaction History for an individual contact may be viewed and managed in the '''Billing History''' section of the contacts '''Billing''' tab. From this tab, you will be able to accept cash/check/credit card payments, create write-offs, download or email invoices. | ||
| − | [[File:Billing | + | [[File:Billing history 2020.jpg|600px|center]] |
| − | ==== | + | ===='''<span style="color:#800080">Schedule a One Time Billing'''</span>==== |
| + | ---- | ||
| + | If you need to assign a one-off billing item that is NOT recurring, but should be billed in the future, you have an option to '''Add One Time Billing'''. | ||
#On the Organization's '''Billing''' tab, click the '''Actions''' button. | #On the Organization's '''Billing''' tab, click the '''Actions''' button. | ||
| − | #:[[File:Add | + | #:[[File:Add one time billing 2020.jpg|800px|center]] |
| − | + | #:Enter the following information: | |
| − | #: | + | #*'''Customer''': The name of the customer will automatically be populated. |
| − | + | #*'''Billing Contact''': Select the desired billing contact. | |
| − | #*''' | + | #*'''Billing Address''': Select the desired billing address. If no addresses are available, or you wish to add a new address, click the [[File:Plus icon.jpg]] to add a new address. |
| − | + | #*'''Billing Email''': Select the desired billing email. If no email address is available, or you wish to add a new email address, click the [[File:Plus icon.jpg]] to add a new email address. | |
| − | + | #*'''Item''': | |
| − | + | #:*Select the desired goods/service from the '''Item''' list. The '''Description''', '''Price''' and '''Quantity''' will automatically populate with the defaults set when the goods/service was created. You can change these if needed. | |
| − | + | #*'''Date Settings''': | |
| − | + | #:*Enter the '''Next Bill Date'''. | |
| − | + | #*'''Discounts''', if you wish to apply a discount to this one time item: | |
| − | + | #:*Select the '''Discount''' you wish to apply. If you have no discounts created, or wish to add a new discount, click the [[File:Plus icon.jpg]] to add a new discount. | |
| − | #*'''Contact''': Select the contact | + | #:*Enter a '''Description'''. The description will default to the description entered when the discount was first created, but you may over-ride it. |
| − | #*'''Address''': Select the address | + | #:*Enter an '''Expiration Date''' for this discount. If this is a recurring goods/service, the discount will only be applied through the expiration date. |
| − | #*'''Email''': Select the email | ||
| − | #*''' | ||
| − | #*''' | ||
| − | |||
| − | |||
| − | |||
| − | |||
| − | |||
| − | |||
| − | #*''' | ||
| − | #*''' | ||
| − | #*''' | ||
| − | |||
| − | |||
| − | #: | ||
| − | |||
| − | #: | ||
| − | #: | ||
#:::Enter a '''Discount Amount'''. This is the dollar value that will be deducted from the item prices. This field will be automatically populated by the discount amount associated to the discount you have selected, but you may over-ride it. | #:::Enter a '''Discount Amount'''. This is the dollar value that will be deducted from the item prices. This field will be automatically populated by the discount amount associated to the discount you have selected, but you may over-ride it. | ||
| − | #: | + | #:*'''OR''' |
#:::Enter a '''Discount Percent'''. This is the percentage by which you will reduce the goods/service price. This field will be automatically populated by the discount percent associated to the discount you have selected, but you may over-ride it. | #:::Enter a '''Discount Percent'''. This is the percentage by which you will reduce the goods/service price. This field will be automatically populated by the discount percent associated to the discount you have selected, but you may over-ride it. | ||
| − | #::: | + | #*'''Invoice Settings''': |
| + | #:*'''Print Invoice''': Select this option if you wish to print the invoice once generated. | ||
| + | #:'''Email Invoice''': Select this option if you wish to email the invoice once generated. | ||
| + | #:*'''Term''': Select the term to be applied to this invoice. | ||
| + | #*'''Payment Profile''': If the contact has a payment profile associated, and wishes to pay this invoice with the profile, select the desired profile. | ||
#Click '''Done'''. | #Click '''Done'''. | ||
| − | + | One time invoices created in this manner will be included on the '''Upcoming Billing''' tab in the '''Billing''' module, and can be generated as described in '''[[Billing#Manage_Invoices_for_Upcoming_.28Recurring.29_Billing|Manage Invoices for Upcoming Billing]]'''. | |
| − | ''' | + | ===='''<span style="color:#800080">Create Contact Billing Transactions'''</span>==== |
| − | + | ---- | |
| − | # | + | ====='''<span style="color:#800080">Create an Invoice'''</span>===== |
| − | + | ---- | |
| − | + | See '''[[Billing#Create_a_Single_Invoice|Create a Single Invoice]]'''. | |
| − | + | ====='''<span style="color:#800080">Accept Payments'''</span>===== | |
| − | # | + | ---- |
| − | + | See '''[[Billing#Accept_Payments|Accepting Payments]]'''. | |
| − | # | + | ====='''<span style="color:#800080">Create A Write-off'''</span>===== |
| − | + | ---- | |
| − | + | See '''[[Billing#Create_a_Write_Off|Create a Write-off]]'''. | |
| − | |||
| − | # | ||
| − | |||
| − | |||
| − | |||
| − | |||
| − | |||
| − | |||
| − | |||
| − | |||
| − | |||
| − | |||
| − | |||
| − | |||
| − | |||
| − | |||
| − | |||
| − | |||
| − | ====Create A Write-off==== | ||
| − | |||
| − | |||
| − | |||
| − | |||
| − | |||
| − | |||
| − | |||
| − | |||
| − | |||
| − | |||
| − | |||
| − | ===='''<span style="color:#800080">Create a Refund'''</span>==== | + | ====='''<span style="color:#800080">Create a Refund'''</span>===== |
---- | ---- | ||
| − | + | See '''[[Billing#Refund_a_Payment|Refund a Payment]]'''. | |
| − | |||
| − | # | ||
| − | |||
| − | |||
| − | |||
| − | |||
| − | |||
| − | |||
| − | ===='''<span style="color:#800080">Print an Individual Statement'''</span>==== | + | ====='''<span style="color:#800080">Print an Individual Statement'''</span>===== |
---- | ---- | ||
| − | You can print a statement for an individual member from the member's '''Billing''' tab. | + | You can print a statement for an individual member from the member's '''Billing''' tab. |
| + | '''Getting Ready''' | ||
| + | *Have you defined your Statement Template? See '''[[Billing#Set_Up_Your_Billing_Templates|View/Modify Templates]]''' | ||
| + | *Have you defined your Cover Letter? See '''[[Billing#Set_Up_Your_Billing_Templates|View/Modify Templates]]''' | ||
| + | '''Print your Statement''' | ||
| + | #For the desired contact, select the '''Billing''' tab. | ||
| + | #:[[File:Print statement 2020.jpg|600px|center]] | ||
#Click the '''Actions''' button. | #Click the '''Actions''' button. | ||
| − | #:[[File: | + | #Select '''Print Statement'''. |
| + | #:[[File:Add print statements 2020.jpg|600px|center]] | ||
| + | #Select the '''File Format''' you wish to use. | ||
| + | #Select the '''Document Generation Template''' you wish to use. | ||
| + | #Select the '''Cover Letter''' you wish to use. | ||
| + | #Select the invoices that you wish to include on the statement. | ||
| + | #Click '''Download'''. Your statement will be downloaded, and you will be able to print it. | ||
=='''<span style="color:#800080">Contact Engagement'''</span>== | =='''<span style="color:#800080">Contact Engagement'''</span>== | ||
| Line 867: | Line 1,064: | ||
The '''Engagement''' tab is divided into several sections: | The '''Engagement''' tab is divided into several sections: | ||
*'''Memberships''': This section will provide information about the contact's membership status, membership type, primary contact, expiration and the start date of the membership. If the contact has multiple memberships, all will be displayed. | *'''Memberships''': This section will provide information about the contact's membership status, membership type, primary contact, expiration and the start date of the membership. If the contact has multiple memberships, all will be displayed. | ||
| − | [[File:Engagement memberships.jpg| | + | [[File:Engagement memberships.jpg|1000px|center]] |
*The '''Directories''' section, displays what information the member has populated within your on-line directory, and provides an indication of whether the member is taking full advantage of opportunities for exposure. If no directories are assigned, '''No directories assigned/applicable''' will be displayed. | *The '''Directories''' section, displays what information the member has populated within your on-line directory, and provides an indication of whether the member is taking full advantage of opportunities for exposure. If no directories are assigned, '''No directories assigned/applicable''' will be displayed. | ||
| − | [[File:Engagement directories.jpg| | + | [[File:Engagement directories.jpg|1000px|center]] |
*The '''Member Contacts/Activity''' section shows graphically how frequently your members are logging into the InfoHub, which provides you with an understanding of whether this member is taking advantage of the InfoHub resource. If you are looking at an organization engagement tab, this shows member logins for all contacts under the membership by month. If you are looking at an individual contact tab, this will display history of that individual contact's logins. | *The '''Member Contacts/Activity''' section shows graphically how frequently your members are logging into the InfoHub, which provides you with an understanding of whether this member is taking advantage of the InfoHub resource. If you are looking at an organization engagement tab, this shows member logins for all contacts under the membership by month. If you are looking at an individual contact tab, this will display history of that individual contact's logins. | ||
| − | [[File:Engagement logins.jpg| | + | [[File:Engagement logins.jpg|1000px|center]] |
*'''Billing''' will display any open balances for the contact. '''NOTE''': This section will only be displayed if the contact has an open balance. | *'''Billing''' will display any open balances for the contact. '''NOTE''': This section will only be displayed if the contact has an open balance. | ||
| − | [[File:Engagement balance.jpg| | + | [[File:Engagement balance.jpg|1000px|center]] |
*The '''Communications''' section, shows you graphically your communications with this member. | *The '''Communications''' section, shows you graphically your communications with this member. | ||
| − | [[File:Engagement coms1.jpg|800px|center]] | + | [[File:Engagement coms1.jpg|1000px|center]] |
| + | *The '''Benefits''' sections will be displayed if the contact's membership type includes benefits. On the engagement tab you will be able to review the benefits available to the members, and the usage of those benefits. | ||
| + | #:[[File:Engagement tab benefits 2020.jpg|800px|center]] | ||
*The '''Events''' section provides a metric of the number of event registration for each month, in the selected date range, as well as event registration comparison, year over year. By dwelling your mouse over the graph, you can see further count of event registrations. | *The '''Events''' section provides a metric of the number of event registration for each month, in the selected date range, as well as event registration comparison, year over year. By dwelling your mouse over the graph, you can see further count of event registrations. | ||
| − | [[File:Engage events.jpg| | + | [[File:Engage events.jpg|1000px|center]] |
:Clicking the numbered links for '''Total Event Registrations in date range''', '''Sponsorships in date range''' or '''Exhibited in date range''' will display the associated details. | :Clicking the numbered links for '''Total Event Registrations in date range''', '''Sponsorships in date range''' or '''Exhibited in date range''' will display the associated details. | ||
| − | [[File:Events registered for.jpg| | + | [[File:Events registered for.jpg|800px|center]] |
*The '''Web Content''' section displays a list of web content opportunities, and the number of content items this member has submitted. The numbered links may be clicked to view a list of the web content items submitted. '''NOTE''': This section will only be displayed if you have purchased the Web Content module. | *The '''Web Content''' section displays a list of web content opportunities, and the number of content items this member has submitted. The numbered links may be clicked to view a list of the web content items submitted. '''NOTE''': This section will only be displayed if you have purchased the Web Content module. | ||
| + | [[File:Web content.jpg|800px|center]] | ||
*The '''Continuing Education''' section provides a list of all continuing education/certification programs this member has completed and/or those that are in progress. '''NOTE''': This section will only be displayed if you have purchased the Continuing Education module. | *The '''Continuing Education''' section provides a list of all continuing education/certification programs this member has completed and/or those that are in progress. '''NOTE''': This section will only be displayed if you have purchased the Continuing Education module. | ||
| + | [[File:Engagement continuing ed.jpg|1000px|center]] | ||
To keep your members up to date, you can easily download the information or send them an email. Click the '''Actions''' button to select '''Download Report''' or '''Email Report'''. | To keep your members up to date, you can easily download the information or send them an email. Click the '''Actions''' button to select '''Download Report''' or '''Email Report'''. | ||
| Line 897: | Line 1,098: | ||
#Enter '''Other Activities Provided as a Benefit'''. This will be displayed on the tab, and, most importantly, is included on printed/emailed reports to provide your members with additional details of the benefits you provide to them. | #Enter '''Other Activities Provided as a Benefit'''. This will be displayed on the tab, and, most importantly, is included on printed/emailed reports to provide your members with additional details of the benefits you provide to them. | ||
#Click '''Save'''. | #Click '''Save'''. | ||
| + | |||
| + | =='''<span style="color:#800080">Delete a Contact'''</span>== | ||
| + | ---- | ||
| + | To delete a contact (organization or individual): | ||
| + | #Select the contact's '''Profile''' tab. | ||
| + | #:[[File:Delete contact 2020.jpg|800px|none]] | ||
| + | #Click the common tasks '''Actions''' button. | ||
| + | #Click '''Delete Contact'''. | ||
| + | #Type '''DELETE''' to confirm that you wish to delete this contact. This process cannot be undone. Should it be necessary for GrowthZone to retrieve this contact, fees may apply. | ||
| + | #Click '''OK'''. The contact is now deleted. | ||
=='''<span style="color:#800080">Contact Management Reports'''</span>== | =='''<span style="color:#800080">Contact Management Reports'''</span>== | ||
---- | ---- | ||
A variety of reports are available for managing and analyzing your contacts. See '''[[Reports#Contact_Management_Reports|Contact Management Reports]]'''. | A variety of reports are available for managing and analyzing your contacts. See '''[[Reports#Contact_Management_Reports|Contact Management Reports]]'''. | ||
Latest revision as of 12:31, 1 April 2021
NEW!! Find all of your answers in the GrowthZone Knowledge Base!
At its core, the membership management system is a sophisticated database with an easy to use interface that allows you to track and summarize all relevant data regarding your contacts and members. Adding contacts and updating information is a snap. You’ll never lose your contact information and you’ll have access to your data anytime, anywhere.
Contents
- 1 Search for a Contact
- 2 Add a New Organization Contact
- 3 Add New Contact - Individual
- 4 Merge Contacts
- 5 View Contacts
- 6 View Contacts - Event Attendees Potential Contacts
- 7 Managing Contacts
- 8 Update a Contact Profile Information
- 8.1 Add Contact Info
- 8.2 Edit Contact Information
- 8.3 Manage Contacts of a Business/Organization
- 8.4 Provide Info Hub Access to Individual Contacts
- 8.5 Add a Business/Organization to Lists/Committees
- 8.6 Remove a Business/Organization from a List/Committee
- 8.7 Contact Categories
- 8.8 Assign Staff to a Individual/Organization
- 8.9 Manage Parent/Child Relationships
- 8.10 Add/Update Individual Professional Information
- 9 Update Additional Information for an Individual
- 10 Manage Contact Business/Organization Directory Listing
- 11 Add a Project to a Contact
- 12 Working with Contact Custom Fields
- 13 Add a Contact Custom Field
- 14 Manage Contact Communications
- 15 View Contact Activity
- 16 Manage Contact's Billing
- 17 Contact Engagement
- 18 Delete a Contact
- 19 Contact Management Reports
Search for a Contact
You can search for any contact in the system by using the global search bar at the top of the window. Matching records- individuals, events, businesses, even files- will appear in the selection box as you type.

|
|
See Viewing & Finding Members in Action! |
Add a New Organization Contact
- Click the Quick Actions button in the header bar.
- Click Contacts - Add Business
- Fill in the Contact Information
- Phone, email or website - once this field is entered, a drop-down list will be displayed to select further details, such as the type of phone number. If you wish to add additional phone numbers, emails or websites, click the + button. NOTE: If you are entering a website, and the web address begins with a number, include www.. If this is not included, the website address is interpreted as a phone number.
- Address Information (optional)
- Individuals (optional) - you may add individuals to associate to this organization. To add additional individuals, click the + button.
- Click Done


The new organization contact is now added to your database. The organization's membership status will be set to the default status you have selected under Setup > Miscellaneous > Contact Status Options.

Add New Contact - Individual
- Click the Quick Actions Button in the header bar.
- Click Contacts - Add Individual.
- Fill in the desired Contact Information: Only First Name and Last Name are required.
- General
- Phone, email or website - once this field is entered, a drop-down list will be displayed to select further details, such as the type of phone number. If you wish to add additional phone numbers, emails or websites, click the + button. NOTE: If you are entering a website, and the web address begins with a number, include www.. If this is not included, the website address is interpreted as a phone number.
- Address
- Organization – you can associate the individual to an existing organization contact, or assign a new organization.
- Click Done.

Merge Contacts
In the event that you have duplicate individual contacts in your database, you can use the Merge Contacts function to combine the contacts together. All information, billing history, communications, activity, etc. will be merged to the destination contact.
|
|
IMPORTANT - REALTOR EDITION: When merging contacts together, you MUST disable the sync process prior to performing the merge. Once you have merged the records, verify and update the NRDS data as needed, then re-enable the sync. |
- Click Contacts in the left-hand navigation panel OR begin typing the name of the contact you wish to merge in the global search box in the header bar.
- Select the individual contact you wish to merge.
- Click the purple Actions button on the far right.

- Select Merge Contact.
- Enter the name of the contact to which you wish to merge this individual.
- Click Done.

Background jobs need to process the merge, so the actual merge may take a few minutes. The message shown below will be displayed in the upper right-hand corner of the screen.

|
|
NOTE:
|
View Contacts
Click Contacts in the left-hand navigation panel.

All contacts in your database are displayed by default. You can view contacts in a card format by clicking the ![]() icon, or in a list view by clicking the
icon, or in a list view by clicking the ![]() icon. By starting to type the name of a contact in the Search box, type ahead functionality will filter the list of contacts as you type. NOTE: Accented letters, for example: á vs. a, are considered two different characters and their use would return different results.
icon. By starting to type the name of a contact in the Search box, type ahead functionality will filter the list of contacts as you type. NOTE: Accented letters, for example: á vs. a, are considered two different characters and their use would return different results.
Additional filtering options are available in the Show Only drop-down list. These options are described in the table below. NOTE: If you have changed system terminology, the filter options displayed will be the terminology you have selected.
| Show Only Option | Description |
|---|---|
| Businesses | Select this option to filter the list to only business type contacts. |
| Individuals | Select this option to filter the list to only individual type contacts. |
| Staff | Select this option to filter the list to only your staff members. |
| Owe Money | Select this option to filter the list to only those members who have open invoices. |
| Assigned to Me | If you assign members to specific staff members, this option will allow the staff member logged in to view only the members to which he/she is assigned. |
| Active | Select this option to filter the list to only active members |
| Task Due/Overdue | If using the projects/tasks module, select this option to display only members for which your staff has due or overdue tasks |
| Task Due/Overdue Assigned to me | This option will allow the staff member logged in to view only the members to which he/she is assigned for whom he/she has task that are due or overdue. |
| Event Attendees Potential Contacts | Select this option to view individual who have attended your events. This is a way to identify potential prospective members; or associate individuals to appropriate organizations. |
You may also filter the results by clicking the Customize Results button, and selecting additional options.

View Contacts - Event Attendees Potential Contacts
In the Contacts module, you can filter the list to event attendees, who are not currently contacts in your database by selecting Event Attendees Potential Contacts.

If you wish to add this contact to your database, click into the contact's name, then you will be able to select Convert to Contact using the purple common tasks action button.

Managing Contacts
|
|
See Managing Contacts in Action! |
Update Contact/Organization Logo/Image
You can easily upload a contacts logo to the database from the contact's page.
- Click the image icon to the left of the contact name.

- The Image Manager dialog box will open. For a contact/organization photo, the recommended size is 400x400 pixels in a 1:1 ratio.
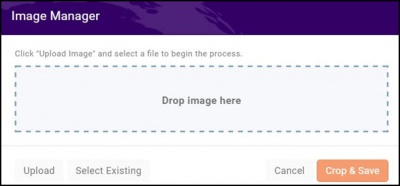
- Drag and drop the desired image or click Upload to browse and select the desired file. NOTE: If you have previously uploaded the desired image, you can click Select Existing to choose the image from the Cloud.
- Crop the image as desired and click Crop and Save.

Add/Update Contact/Organization Account Number
If you wish to assign account numbers to your contacts:
- Click Account Number beneath the contact's name.
- Enter the account number.
- Click the
 icon. Your account number is saved.

|
|
NOTE: Your system may be configured to automatically assign account and membership numbers to new contact. See Manage Account and Membership Number Assignment for instructions. |
Add Tags to an Organization/Individual
You can add tags to your Organization/Individuals to make it easy to track something specific about that organization/individual. For example, if an individual has expressed interest in volunteering, you could add "volunteer" as a tag. The Contacts Report may be used to generate a report based on specific tags.

Tags should be used in the following situations:
- If the information is intended to be for “internal use” only and is used to segment records into groups. For example: Minority owned, Hot Prospect, Volunteers
- If you wish to track information “temporarily”. For example: You may have a tag called “Hot Prospect”, but would remove this tag if the contact because a member.
To add a tag:
- Type the tag name in the Add Tags text box. If you have previously used the tag, the type ahead functionality will find the tag name.
- Click enter on your keyboard.
You can add as many tags as you wish. To remove a tag, click the x next to the tag name.
|
|
NOTE: Your GrowthZone software allows you to use tags, custom fields and categories. To guide your decision in which to use, see a comparison list here. |
View/Manage Tags
Under Setup > Miscellaneous > Tags you can see a list of all tags and how they are being used in your system. You can also edit the name of a tag or globally delete a tag.
- Click Setup in the left-hand navigation panel.
- Click Tags in the Miscellaneous section.

A list of all current tags and the number of usage (by module) will be displayed.
Edit a Tag Globally
- Click Setup in the left-hand navigation panel.
- Click Tags in the Miscellaneous section.
- Click the tag that you wish to edit.
- Edit the name of the tag.
- Click Done.

Delete a Tag Globally
- Click Setup in the left-hand navigation panel.
- Click Tags in the Miscellaneous section.
- Click the tag that you wish to delete.
- Click Delete.
- Click OK to confirm the delete.

Assign Individual Contact Designations
Designations may be assigned to individual contacts in your database.
- On the individual's contact page, click the
 icon, adjacent to the contact's name, in the header.
- Select the desired designation(s) from the Designations list.
- Click Done.

|
|
NOTE: Designations are configured under Setup > Miscellaneous. See Configure Designations for instructions. |
View Contact History
To view historical contact relationship history:
- For the desired contact, click the common tasks Actions button.
- Click Contact History.


Send Member an Email to Contact(s) to Update their Profile
Make it easy for your contacts to keep their own contact and directory information up to date. On the Contacts module main page, you have the ability to send a Member Profile Update email to selected contacts. Within this email is a link that will take the contact to a page where they can review and change their information. This option does not require the contact to access the Info Hub.
NOTE: The email will be sent to the primary contact on the membership. If there is not an email available for the primary contact, the email will be sent to the organization.
- Click Contacts in the left-hand navigation panel.
- Click the
 button.
 - Select Email Member Profile Update.
- Select any desired filtering options, to limit the contacts to whom you are sending the email:
- Renewal Month: Select a renewal month if you wish to limit recipients to a specific renewal month.
- Membership Type: Select a membership type if you wish to limit recipients to a specific membership type.
- Contact: Enter a specific contact if you wish to email just that contact.
- Enter a Subject. This will default to Update/Verify Your Profile but you can change if you wish.
- Select a From address.
- Click Send.


The email message sent is displayed below.

Your contacts can click the Verify/Update your Contact and Directory Information to view and update their own information. Once the contact clicks the Submit button, your database will be updated with these changes.
|
|
IMPORTANT While this option gives members an easy way to update their data, it also has the potential to overwrite backoffice data. Meaning, the data the member changes will also change in the backoffice. |
Incomplete Contact Records
You may see records in your Contacts module that are not clickable; these records are incomplete, and are generally created when data is imported into the system. While not directly editable, there is a way they can be accessed.

|
|
See Fixing Incomplete Contact Records in Action! |
- Go to Reports and open a Contacts Report.
- Add "ContactID" to the Fields to Display, and run the report. Those "empty" contact records will be at the top (if not, you can sort by the Contact Name column to bring them to the top).
- Select one of the ContactIDs and copy it.
- In your browser, right click your open GrowthZone tab and select "Duplicate".
- In the new tab, navigate to the Contacts module and open any accessible contact.
- Highlight the numbers in the address bar, and paste the ContactID of the "empty" record you just copied.

You should now be able to see the incomplete contact record- most often the record is missing a first or last name, preventing it from displaying fully in the system. Determine if the record should be deleted or updated, and perform those steps.

|
|
MORE THAN 100 INCOMPLETE RECORDS: Please contact GrowthZone Support for assistance. |
Update a Contact Profile Information
The Profile tab for a contact provides the ability to update a variety of information about a business/organization.
Click Contacts in the Navigation Panel to view and search for the contact OR type the name of the contact in the header search box.
On the profile tab, you may update the following information:
Add Contact Info
- Click the
 icon in the Contact Info section.
 - On the Add Contact Info screen you may add additional phone numbers, email addresses, address information, etc. The system will recognize what type of information you are entering, and allow you to further classify it. For example, if you are entering a phone number, you will be able to select Toll Free, Main, etc. NOTE: If you are entering a website, and the web address begins with a number, include www.. If this is not included, the website address is interpreted as a phone number.
- Click Done when completed.
|
|
NOTE: In cases where the billing address is different than a physical or mailing address, you can differentiate that detail in an organizations profile. When adding address information, you can select the Usage of the address. This provides the ability to identify an address as shipping or billing. This is helpful when processing invoices, as the usage (as well as any notes you may have provided for the address) will be display in the address drop-down. |
Add Social Site Information to a Contact
Social sites, such as Twitter, Facebook, etc. may be added to a contact's information.
- For the desired contact, click the icon in the Contact Info section, on the Profile Tab.
- On the Add Contact Info screen enter the web address for the networking site, in the Phone, email, or website text box. NOTE: The social site web address must include www, as shown in the image above.
- Select Social Site from the Type drop-down list.
- Click Done.

Send an Email asking the Contact to validate/update their profile information via the Info Hub
An email template Verify Business Contact Information has been designed for you to easily send the information that is currently stored in your database. The email includes a link for the member to log into the Info Hub, so that they can update their own information, saving your chamber/association staff time.

See Communications Basics for further information on working with email templates.

Download/Email Census
The Download Census/Email Census action allows you to create a report of all information regarding your memberships organizations and their contacts. This is a great way to send out an annual census report allowing members to see the information the database has, and make edits if needed. You can filter the contacts included in the census by renewal month and/or membership type.
|
|
Pre-requisite: A Census Document must be setup prior to downloading or emailing your census. A default document is provided in your software, and can be viewed under Setup > Document Generation Templates. See Setup your Document Templates for instructions. |
- Click Contacts in the left-hand navigation panel.
- Click the orange action button.
- Select Download Census or Email Census.
- Select desired filtering options (Note: :
- If you wish to limit the contacts to specific Membership Types, select the desired types from the drop-down list.
- If you wish to limit the contacts to a specific Renewal Month, select the month from the drop-down list.
- Alternately, the census can be sent to an individual contact by entering the Contact name. Only one contact may be entered.
- Select the Document Generation Template you wish to use for the census.
- Click Done. Depending on the size of document, the download could take up to an hour to generate. Best practice would be to select smaller segments of members. Emailing will attach a unique pdf for each member and send to the membership owner.


Edit Contact Information
Contact Info that has been previously entered may be edited by clicking the pencil icon adjacent to the item to be edited.

|
|
NOTE: When editing address information, you will be prompted to select whether the address should be updated for for other Contacts that have this same address. This is enabled by default. Deselect the check-box if you do not wish the address to be changed for all contacts. |

|
|
NOTE: When editing an email address, and additional field is displayed Assistant Email Address. If this field is populated with an email address all emails sent to the main contact email will also be copied to the Assistant Email Address. |

Managing Invalid Email Address
If a users email address has been noted as invalid, a red yield sign ![]() will be displayed in the contact info section next to the email. NOTE: You can use the Invalid Email Addresses report to generate a list of all contacts with invalid email addresses. See Invalid Email Addresses Report for instructions.
will be displayed in the contact info section next to the email. NOTE: You can use the Invalid Email Addresses report to generate a list of all contacts with invalid email addresses. See Invalid Email Addresses Report for instructions.

The software provides you the ability to recheck the email, mark an invalid email as valid or edit email address and recheck.
- On the contact's Profile tab, click the invalid email.
- Select the desired action:
- None - select this option to simply leave the email address as invalid.
- Mark as valid - select this option to mark the email as valid. If you've personally verified this address is good even though the verification system indicates it is not, we've given you an option to mark it as good and remove it from the Quarantine list. Please do not abuse this option; we want to protect your email sender reputation. NOTE: If the email address is still invalid, the next time the process runs to check for invalid emails, this email will once again be flagged.
- Recheck address - select this option to recheck the email address. If the address is found to be valid, will be removed from the invalid list. If the address is found to be invalid, it will remain on the invalid list. NOTE: After you have chosen to recheck the email address, reload the profile page to verify that the email is no longer flagged as invalid.
- Edit email address and recheck - selecting this option will open a text box for you to enter a new email address. This system will check the new email address, and if valid the email will no longer be marked as invalid. NOTE: After editing and rechecking the email address, reload the profile page to verify that the email is no longer flagged as invalid.
- Click Close.

|
|
NOTE: If you see an email address that is marked as invalid and you are unable to validate or flag them as valid, check and if you have an integration with Constant Contact or Mailchimp set up, they may be marked as invalid with that service, and you will not be able to change it in GrowthZone. |
Manage Contacts of a Business/Organization
View Individual Contacts of an Organization/Business
Individuals associated to your business/organization contacts can be viewed on the Organization's Profile tab. The list is limited to 20, but an indication of the total number of contacts is displayed and you can click on the
![]() to view the complete list on the Individuals tab.
to view the complete list on the Individuals tab.

Add Individual Contacts to an Organization/Business
|
|
See Adding/Editing Contacts to a Business in Action! |
You may add/edit contacts to an organization in the Contacts section of the organization's Profile tab. The Contacts section displays the last 20 updated contacts sorted by last update date. To view a full list of the contacts for this organization, click the ![]() to view the full list of contacts for this organization.
to view the full list of contacts for this organization.
To add a new contact:
- On the Contact Profile tab, click the icon adjacent to Contacts. The Add New Contact screen will display.
- Configure the following:
- First Name and Last Name.
- Common Name - This is an optional field which may be used for a nickname, or similar. This will be stored in the database and may be used as a database field in emails.
- Mark As Primary - Select this check-box if this contact is to be the primary contact for the organization. Reports may be filtered by primary contacts.
- Show as Related Contact in Directory - This setting is enabled by default. By enabling this setting, if the organization has directory display settings that include Show Related Contacts this contact will automatically be displayed. If the contact is not to be displayed, disable this check-box. See Directory Display Settings for further information on displaying related contacts.
- Title - Optional
- Role Start - Optional, you may enter when the contact started in their role.
- Role End - Optional, you may enter when the contact's role ended.
- Phones / Emails / Websites
- Addresses
- Click Done.

Provide Info Hub Access to Individual Contacts
Once you have setup a new individual contact in the database, you will need to send the log-in instructions to the Info Hub. NOTE: You must be on the individual's page not the business page to follow these instructions.
- Click the Actions button to view common tasks.
- Click User Login.
- Select the access level you wish to assign to this individual.
- In the User Access level drop-down at the top of the dialog box, you are selecting the access level that the user has if they are not associated to an organization. By default, this will be set to the access level you have set in the Log-in settings. Additionally, if you offer individual memberships, this is the
- The User Access level selected in the Access Level with Associated Organizations section is the permissions that the user will have as a part of the associated organization. Users may be associated to multiple organizations, and have different permission levels for each.
- NOTE: The access level provided here must be equal to or greater than the access level set at the user level. If this user should not have access to the organization information, do not select an access level. When the user logs into the Info Hub, the system will grant them the higher of the two access levels
- Login Info
- Username - this is the user name for the individual. If no user name is listed, the individual has never logged in.
- Password Reset Email - This field will be populated with the email address entered when the individual was added to the system. You may change this if needed.
- Send Login Instructions Email - Click this check-box to send an email to the individual which will provide the instructions to setup their log-in credentials.
- Set Temporary Password - If the user already has log-in credentials, but has forgotten their password and wishes you to set a temporary password, enter the password here. The user would then be able to change their password in the Info Hub.
- Click Done.

An automated email (example show below) will be sent to the individual. The email template used by default is the New Member Access template, we recommend that you edit this template to suit your specific needs. See Edit a Default Email Template.

The individual will be able to step through setting up access to the Info Hub.
Send Reset an Info Hub Password email to a User
If an Info Hub user has forgotten his/her password, you can send a reset password email from the individual's page.
- Click the Actions button to view common tasks.
- Click User Login.
- Click the Send Password Reset Email check-box.
- Click Done.

An email will be sent with instructions for resetting the password:

|
|
NOTE: A Forgot your Username or Password? link is displayed on the Info Hub log-in page, this allows the user to use his/her user name or email address to reset own password. |
Change a Users Info Hub Access Level
- For the desired representative, click the purple Actions tab.
- Click User Login.
- Make the desired changes to access level.
- Click Done.


Set a Temporary Password for an Info Hub User
- Click the purple Actions button to view common tasks.
- Click User Login.
- Enter a temporary password in the Manually Set Password text box.
- Click Done.
There is no automation when you manually reset the password from the back-office, you must communicate the new password to the member. The password is only temporary, when the user logs into the Info Hub with a manually reset password, the user is immediately presented with the change username/password screen.
|
|
NOTE: A Forgot your Username or Password? link is displayed on the Info Hub log-in page, this allows the user to use his/her user name or email address to reset own password. |
Send Password Reset Email
- Click the purple Actions button to view common tasks.
- Click User Login.
- Select Send Password Reset Email.
- Click Done.
The email sent to the member will include the member's user name, and a link to reset their password.
Add an Individual to an Existing Business
- On the individual's Profile tab, click the orange plus button in the Businesses section.
- Enter the name of the organization. If the organization exists in your database, select the organization, and organization information will be populated.. If the organization does not exist, you will create a new organization record.
- Click Done.

The individual is now associated to the new organization.
Deactivate an Individual Contact with a Business
If an individual contact is no longer a part of a business organization, you may deactivate them. NOTE: It is not recommended that you delete individuals, as the database maintains historical information about you individuals.
- On the Business Contact's Profile tab, click the pencil icon adjacent to the individual you wish to deactivate.
- De-select the Active check-box. The End Date will automatically be populated with the current date.
- Click Done.


The de-activated individual will no longer be associated to the business, however, an individual record will be maintained and the individual will have a status of non-member. NOTE: The individual's access to the info hub is not automatically revoked.
Move an Individual to a Different Business
When individuals move from one business to another, follow these steps:
- Delete the individual's Info Hub access as described in Delete an Individual's Info Hub Access.
- De-activate the individual as described in Deactivate an Individual Contact with a Business.
- Associate the individual to the new organization as described in Add Individuals to Business/Organization.
- Resend login instructions to the individual as described in Set up Individual's Info Hub Access.
(Staff) Impersonate a Member in the Info Hub
Staff may “impersonate” a representative in order to see what the rep would see in the Info Hub and perform tasks on their behalf. This may be useful if a member is having difficulty using the Info Hub, and you wish to view the Info Hub as they are seeing it to assist them.
|
|
NOTE: When staff impersonates the member, the staff member has the same rights granted to the member. If the member does NOT have an Info Hub account, the access level granted to staff is the default level of access configured under Setup > Users > Login Settings. |
- On the Individual's Profile tab, click the
 in the Contact Info section.
- The Info Hub will open.

Add a Business/Organization to Lists/Committees
- Click the contact's Profile tab.
- Click the icon adjacent to Lists/Committees. A list of the lists/committees that are configured in your system will be displayed. Those lists/committees to which the contact already belongs will be selected.
- Click the check-box for the list/committees to which you wish to associate this contact.
- Click Done.


|
|
NOTE: If you have a very long list of lists/committees, you can filter the list by selecting a Category. |
Remove a Business/Organization from a List/Committee
- On the Contact Profile tab, click the pencil icon adjacent to Lists/Committees from which you wish to remove the organization/individual.
- Select Do Not Contact to maintain the organization/individual within the group, but prevent the system from sending emails to the associated email address OR
- Click Remove from Group to completely remove from the group.
Contact Categories
It is recommended that you use categories:
- If they are intended for public or internal use and you wish to segment records into groups
- If you wish to allow visitors to your directory, web content, events, etc. ability to filter to specific categories
- If you wish to display the information publicly and in the Info Hub
- If you wish to track specific information about a contact, and have it visible on the Profile tab. Similar to custom fields, but better visibility.
View Contact Categories
On the Contact Profile tab, you will be able to view the Category Lists and the Categories to which a contact has been assigned. In the example below, the contact is assigned to Computer & Telecomm; Finance & Insurance in the Business Category list. Notice that the Languages Spoken category list is also displayed, however no categories have been assigned. Category list that you have configured as required will always be displayed on a members profile tab.

Add Categories to a Contact
- Select the contact's Profile tab.
- In the Categories section, click the
 pencil icon adjacent to Categories. A list of all categories that are configured in your system will be displayed. OR If you have previously assigned a contact to a category within a category list, you can click the pencil icon adjacent to that category list to select categories.
- Click the check-box for those categories to which you wish to associate this contact.
- Click Done.

|
|
Did you know... The Contacts Report can be used to confirm that all of your contacts have been assigned to categories. Simply use an advanced filter for categories, set to Is Empty. See Contacts Report for further information. |
Remove Contacts from Categories
- Select the contact's Profile tab.
- In the Categories section, click the pencil icon adjacent to Category(ies) you wish to remove. A list of all categories, in the category list, will be displayed.
- Deselect the categories that you wish to remove.
- Click Done.


Assign Staff to a Individual/Organization
- On the Contact Profile tab, click the icon adjacent to Assigned Staff.
- On the Assigned Staff screen:
- Select a Related Person from the drop-down list. All of your staff members will be displayed in the list. You may add additional related persons by clicking the
 icon.
icon. - Select a Relationship Type from the drop-down list. You may add additional relationships by clicking the icon.
- Select a Related Person from the drop-down list. All of your staff members will be displayed in the list. You may add additional related persons by clicking the
- Click Done.

|
|
NOTE: If it is necessary to reassign staff, perhaps a staff member has left the organization, this can be done under Setup > Staff Users. See Reassign Staff for further information. |
Manage Parent/Child Relationships
If you have organizations that are connected to other organizations, you can configure the system to recognize these relationships. For Example, a Main Bank Branch may be parent to many other branches. A benefit in setting up a Parent/Child relationship is the ability to assign billing for a child organization to the Parent organization.
Add a Parent Relationship to a Business/Organization
- On the Contact Profile tab, click the icon adjacent to Parent Businesses.
- On the Add Related Organization screen:
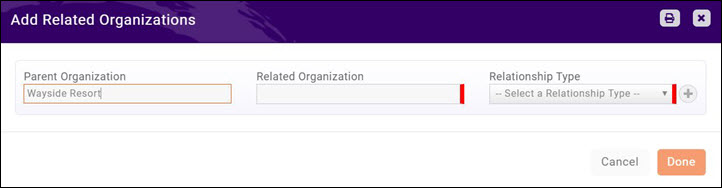
- Type in the Parent name. If the parent organization exists in the database, the field will automatically populate. If the related organization does not exist in the database, you will first need to set it up as a contact prior to setting up the relationship.
- Select the desired 'Relationship Type from the drop-down list, or click the icon to add a new relationship type. See Contact Relationship Types for information on setting up relationship types.
- Click Done.


Once a parent relationship has been created, the system will automatically create a child relationship for the child contact.
|
|
NOTE: When creating a Parent/Child relationship, the parent will be available for selection when creating invoices for the child |
Add a Child Relationship to a Business/Organization
- On the Contact Profile tab, click the icon adjacent to Child Businesses.
- On the Add Related Organization screen:
- Type in the Related Organization name. If the related organization exists in the database, the field will automatically populate. If the related organization does not exist in the database, you will first need to set it up as a contact prior to setting up the relationship.
- Select the desired Relationship Type from the drop-down list, or click the icon to add a new relationship type. See Contact Relationship Types for information on setting up relationship types.
- Select the desired Relationship Type from the drop-down list, or click the
- Click Done.

Once a child relationship has been created, the system will automatically create a parent relationship for the parent contact.
|
|
IMPORTANT: If you wish the child to inherit the parent's membership, you must choose a Contact Relationship Type set to System Relationship = Location. This is the trigger that tells the system that the child should inherit the parent's membership. |
Contact Relationship Types
Contact relationships are used through-out the software to identify connections between organizations, individuals or even to your staff. For example, when working to on-board a new member, you may setup a relationship between that member and your on-boarding staff.
The system provides several relationship types, which are displayed for selection when you are working with your contacts.:
- Org to Org: This relationship type is used to relate two organizations. For Example: You may have a main Bank, related to multiple branches. This type of relationship is assigned in Related Organizations on an organization's Profile tab.
- Person to Person: This relationship type allows you to relate individuals. For Example: You may wish to assign an existing individual as an ambassador to a new individual contact. This type of relationship is assigned on the Related Individuals section on the individual contact Profile tab.
- Person to Org: This type of relationship is used to assign staff members to new organizations or contacts. You may assign this relationship on both the Organization and Individual profiles.
To create new relationship type:
- Select Setup in the left-hand navigation panel.
- Select Contact Relationship Types in the Miscellaneous section.
- Click the Add button.
- Select the desired System Relationship Type. These relationship types drive where the contact relationship type can be assigned in the software. For example, if you are creating a relationship type for your staff to member, select Person to Org.
- Enter a Name for the relationship type.
- (Optional) Enter a Description for the relationship type.
- Click Done.


|
|
NOTE: Using the System Relationship Type location will automatically attach the child to the parent's membership. It will count as one membership with multiple records attached. The parent will remain the owner of the membership. |
Parent/Child Relationship - Consideration
Do you wish the Child to Inherit the Parent Membership?
If the child contact should inherit its membership from the parent:
- Setup a relationship of type Location.
- Assign this relationship type to the Child
Do you wish the Child to have a stand alone membership, paid for by the Parent?
- When adding the parent/child relationship, do not select a relationship of type Location. Exception: If the child is to inherit the membership from the parent AND have a stand alone membership, select a relationship of type Location.
- When adding a membership to the child, select the parent as the billing contact, the parent email address and the parent address.
- Invoices will still "belong" to the child, but will be delivered to the parent.
Additionally, if you wish the parent to be able to view the child invoices in the Info Hub, enable Allow Info Hub Users To Access Related Contacts Invoices under Setup > Finance > General Settings.
Do you wish the Child to have a stand alone membership that the child is responsible for paying for?
- When adding the parent/child relationship, do not select a relationship of type Location. Exception: If the child is to inherit the membership from the parent AND have a stand alone membership, select a relationship of type Location.
- When adding a membership to the child, select the child as the billing contact, the child email address and the child address.
Add/Update Individual Professional Information
On an individual's profile tab, you will be able to track professional information, such as license, education, volunteer and work information (Options will vary dependent on your GrowthZone edition). This information can be reported on using the Contacts Report.
- On the contact's Profile tab, click the icon in the Professional section.
- Entered desired professional information.
- Click Done.

Details about professional credentials are available for reporting using the Contacts Report.
Update Additional Information for an Individual
On an individual's More Info tab, you will be able to update custom fields, add/edit an individual's bio, and add internal notes.

Add/Update an Individual's Bio
|
|
NOTE: An individual's bio is only visible when the individual belongs to a group that you have chosen to add to your public pages. |
- Select the individual's More Info tab.
- In the Directory Info section, enter or edit the individual's Bio information.
- Click Save.
Manage Contact Business/Organization Directory Listing
Add a Directory Listing to a Member
Some additional configuration of how a contact is displayed on your web-site can be configured and updated on the More Info tab of a contacts page. You can maintain internal notes, fill in a bio of the contact, and manage custom fields.
|
|
IMPORTANT: If you assign a contact to multiple directory listings within the same directory, the contact will be displayed multiple times in that directory. |
Additional configuration of a contacts directory listing and web content are available on the Web Content tab of the contact's page.
- On the Web Content tab, click the Add Directory Listing button. NOTE: If a directory has already been configured for the contact, you may click the pencil icon in the actions column to edit that directory.
- On the Add/Edit Directory Listing screen, configure the following (NOTE: The options that will be displayed for configuration will be dependent on your directory type listing configuration):
- Directory - Select the desired directory from the drop-down list. This list will be populated with the directories that you have configure in your system.
- Listing Level - Select the desired Directory Listing Type from the drop-down list. The list will be populated with the directory listing types you have configured in your system.
- Alternative Display Name (Leave Blank if Same as Contact) - This option allows you to enter a name other than the contact name to be displayed on the website. You will leave this field blank if you wish to display the contact name that is in the database.
- Alternative Sort Name (Leave Blank if Same as Contact) - This option allows you to enter a name other than the contact name to be used in the sorting function on the website. You will leave this field blank if you wish to display the contact name that is in the database.
- Search Description - Enter a short description of this contact. This information may be displayed on the website when the contact is first displayed.
- Description - This description is a more complete description of the contact which is displayed when the contact is selected on the web-page.
- Keywords - Enter key words which can be used to search for this contact. Key Words are important! See this article for further information: What’s an SEO Keyword? Why it Matters and How to Use It.
- Categories - Enter the directory categories under which this contact will be listed.
- Highlights (for Directory) - Enter highlights for this contact. (May not display depending on the settings for the directory listing being added/edited.)
- Images - You may add images for this directory. (May not display depending on the settings for the directory listing being added/edited.)
- Click Done.

|
|
Did You Know... You can view the directory listings assigned to your contacts, or importantly identify those who do not have a listing, using the Contacts Report. See View All Contacts that do not have a Directory Listing for further information. |
Update a Member's Directory Listing Information
- On the Web Content tab, click the hyper-link for the Directory Listing you would like to update.
- Click the for the directory listing you wish to update.
- Make the desired updates.
- Click Done.

Remove a Directory Listing from a Member
- For the desired member, click the Web Content tab.
- In the Actions column, click the for the directory listing you wish to remove.
- In the Edit Directory Listing screen, click Delete.
- Click OK to confirm.

Add a Project to a Contact
Projects may be beneficial when you are managing a prospect, or during the new member on-boarding process. To add a project:
- Select the desired contact.
- Click the in the Projects section on the contact's General tab.
- See Create a New Project for further instructions on creating the project.

Working with Contact Custom Fields
Custom Fields are designed to give ultimate flexibility in managing your data. When adding a custom field, you will create a database field that is available for tracking additional desired information about the contact.
Add a Contact Custom Field
- In the Contact's record, click the More Info tab. Currently created custom fields will be displayed at the bottom of the page. You can close or expand sections by clicking the drop-down arrows on the right hand side of each section. If you have a large number of custom fields, you can enter text into the filter box to locate a particular field.
- Click the Edit Custom Fields button.
- Click the icon.
- Configure the following:
- Field Area: The field area will default to Business and should not be changed. This indicates that this custom field will be available as a contact field.
- Name: Enter a name for the custom field. This will be used internally by the database.
- Display Name: Enter a display name. This is the field that will be displayed on screens in your system, as well as on forms presented to the public.
- Custom Field Data Type: Select the data type for the custom field. NOTE: Selecting Drop-down will allow you to setup a list of options, and one option may be chosen. Selecting Drop-down with fill-in will allow the user to fill in an option. Multi-choice would allow the user to select more than one option.
- Group/Section: (Optional) Select the desired group section of this custom field. The group/section indicates where the field will be displayed on the More Info tab. You can add additional groupings by clicking the icon.
- Characters Allowed: This option would limit the number of characters that could be entered in a text box response. If you have selected a text box option (text or multi-text) you MUST enter in the number of characters allowed, and the value may not be 0.
- Properties: Define the properties for the custom field:
- Public: Select this check-box if you wish this field to be displayed for the public. For example, if you are creating a custom field for a membership application form, you will want to ensure this checkbox is selected.
- Member Editable: Select this check-box if you want to allow members to view and edit this field in Info Hub. The Info Hub user must have the appropriate access level to edit the field.
- Required: Select this check-box to make this field required.
- Archived: If you no longer wish to use this custom field, best practice is to archive a custom field to retain the historical data.
- Click Done.


Manage Contact Communications
All communications with a contact are logged on the contact's Communications tab.

Send Email to Contact
On the contact's Communications tab, click the Send Email button.
See Send an Email for further instructions.
Send an Email to ALL Organization Contacts
- For the desired organization, click the Individuals tab.
- Check the box in the far left side for each individual you would like to send an email to.
- Click the Send Email button.

See Send an Email for further instructions.
Log Notes/Phone Calls
The GrowthZone software may be used as one location to keep track of all interactions with your contacts.
- On the contact's Communications tab, click the Log Note button.
- Select a Category from the drop-down. Categorizing your notes will make it easy for you to search and filter your notes. If needed click the to add a new category.
- Enter the Date of the interaction with your contact. Date will default to the current date.
- Select a Contact. This is the name of the person you interacted with. All individuals associated to the contact will be displayed in the drop-down.
- Enter a Subject.
- Enter Notes/Message.
- If this note is relevant to a Project, begin typing the name of the project in the text box. Type ahead functionality will populate a list of your projects from which you cna select the desired project.
- Select a Type from the drop-down. Types are a way by which you will be able to easily search and filter your notes.
- If you wish to create a follow-up reminder, click the Create Follow Up Reminder check box.
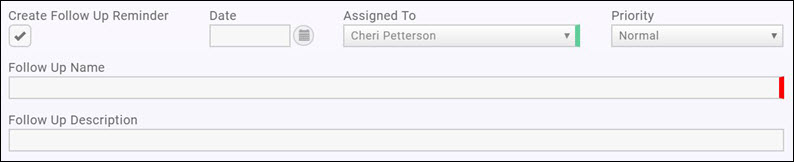
- Enter the Date by which the follow-up should occur.
- Select the staff member to which you wish to assign this reminder from the Assigned To drop-down. All active staff members in your database will be displayed. When assigning a reminder to another staff member, they will be able to see their tasks by clicking into the task list in the header bar.
- Select a Priority from the list.
- Enter a Follow-up Name.
- Enter a Follow-up Description.
- (Optional) You may add files to the note by clicking the Attach Files button.
- Click Done.


View Contact Activity
There are many types of communication and activities that may be happening with a member/contact, which may involve various staff members. The activities tab provides a single place to quickly see a summary of all of these activities. Filter on the specific type of activity you wish to review.

|
|
Did you know...When the activity is an event registration, you can click the hyper-link, for that registration, to go directly to the event attendee tab, filtered to that contact. |
Manage Contact's Billing
On the contact's Billing tab, multiple billing functions may be performed.

Review Contact's Balance
You can view a contact's balance on the Billing tab. Additionally, if the contact has a balance, this will be displayed on the tab itself.

Add a Billing Note to a Contact
- Select the contact's Billing tab.

- Click the in the Billing Notes section.
- Enter the desired note.
- Click Done.

Store Credit Cards
If your payment gateway is GrowthZone Pay or Authorize.Net, credit cards can easily be stored through the back-office for future use. NOTE: Members may also store credit cards through the Info Hub (See Store Credit Cards in Info Hub) or anytime they are paying an invoice on-line they may choose to save their card.
|
|
IMPORTANT: The option to store credit cards will only be displayed if Allow Stored Payment Profiles is enabled. See Setup GrowthZone Pay for further details. |
- On the contact's Billing tab, click the in the Stored Payment Profiles section.

- The Add Payment Profile dialog box will open.
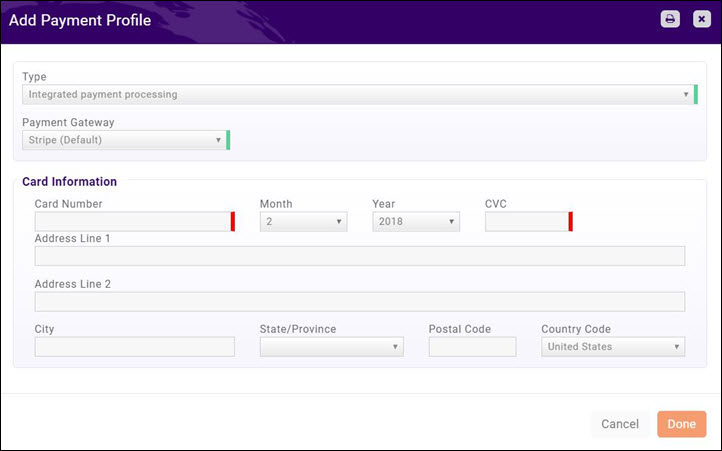
- Select a payment gateway Type from the drop down list.
- Select the desired Payment Gateway.
- Enter all required Card Information.
- Click Done.


See Invoice Processing for Stored Payment Profiles for further details on how automated payment processing works.
|
|
NOTE: ACH Bank Account information may also be stored, but the member must enter the information. Staff can not store bank information through the back office. See Store Bank Account Profile in Info Hub for further information. |

Apply stored Credit Cards/Bank Accounts to recurring fees
If your member wishes, you can setup your system to automatically charge recurring fee items to a stored credit card or bank account.
- On the contact's Billing tab, click the hyper-link for the item to which you wish to add a stored profile.

- The Edit Recurring Fee Item dialog box will be displayed.
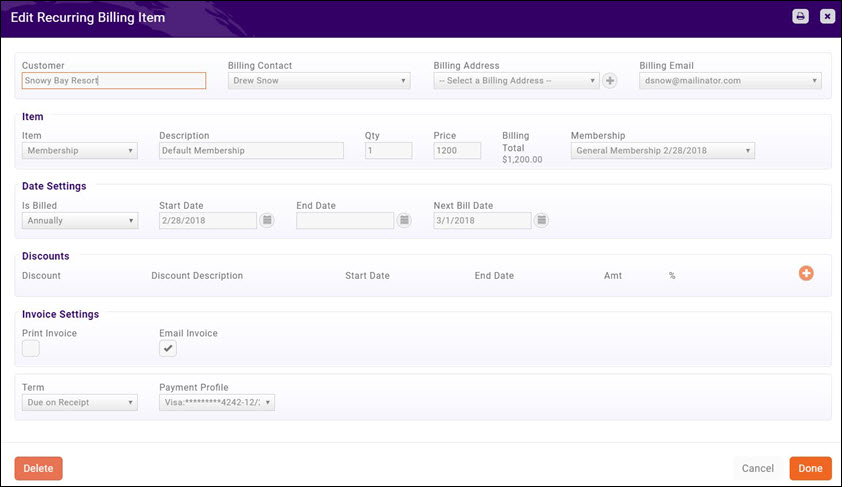
- Select the desired Payment Profile from the drop-down list.
- Click Done.


|
|
NOTE: If a bank account or credit card is stored, when the invoice is generated for a recurring fee item, the credit card/bank account will be immediately charged. |
Unapply a stored Credit Cards/Bank Accounts from Recurring Fees
- Select the contact's Billing tab.
- In the Scheduled Billing section, click the hyper-link for the desired recurring fee item.
- In the Invoice Settings section, select Select a Payment Profile from the Payment Profile list.
- Click Done.


View an Individual Contact Recurring Fee Schedule
The recurring fee schedule for an individual contact may be viewed in the Billing Fees and Schedule section of the contact's Billing tab. Click Here for further information on setting up the recurring fees schedule.
View an Individual Contact's Transaction History
Transaction History for an individual contact may be viewed and managed in the Billing History section of the contacts Billing tab. From this tab, you will be able to accept cash/check/credit card payments, create write-offs, download or email invoices.

Schedule a One Time Billing
If you need to assign a one-off billing item that is NOT recurring, but should be billed in the future, you have an option to Add One Time Billing.
- On the Organization's Billing tab, click the Actions button.
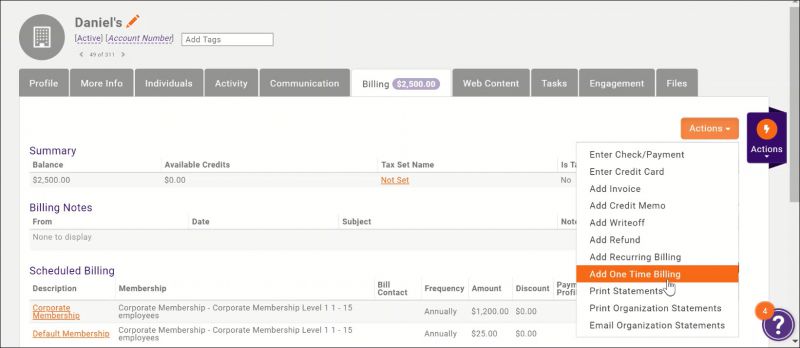
- Enter the following information:
- Customer: The name of the customer will automatically be populated.
- Billing Contact: Select the desired billing contact.
- Billing Address: Select the desired billing address. If no addresses are available, or you wish to add a new address, click the to add a new address.
- Billing Email: Select the desired billing email. If no email address is available, or you wish to add a new email address, click the to add a new email address.
- Item:
- Select the desired goods/service from the Item list. The Description, Price and Quantity will automatically populate with the defaults set when the goods/service was created. You can change these if needed.
- Date Settings:
- Enter the Next Bill Date.
- Discounts, if you wish to apply a discount to this one time item:
- Select the Discount you wish to apply. If you have no discounts created, or wish to add a new discount, click the to add a new discount.
- Enter a Description. The description will default to the description entered when the discount was first created, but you may over-ride it.
- Enter an Expiration Date for this discount. If this is a recurring goods/service, the discount will only be applied through the expiration date.
- Enter a Discount Amount. This is the dollar value that will be deducted from the item prices. This field will be automatically populated by the discount amount associated to the discount you have selected, but you may over-ride it.
- OR
- Enter a Discount Percent. This is the percentage by which you will reduce the goods/service price. This field will be automatically populated by the discount percent associated to the discount you have selected, but you may over-ride it.
- Select the Discount you wish to apply. If you have no discounts created, or wish to add a new discount, click the
- Invoice Settings:
- Print Invoice: Select this option if you wish to print the invoice once generated.
- Email Invoice: Select this option if you wish to email the invoice once generated.
- Term: Select the term to be applied to this invoice.
- Payment Profile: If the contact has a payment profile associated, and wishes to pay this invoice with the profile, select the desired profile.
- Click Done.

One time invoices created in this manner will be included on the Upcoming Billing tab in the Billing module, and can be generated as described in Manage Invoices for Upcoming Billing.
Create Contact Billing Transactions
Create an Invoice
Accept Payments
See Accepting Payments.
Create A Write-off
See Create a Write-off.
Create a Refund
See Refund a Payment.
Print an Individual Statement
You can print a statement for an individual member from the member's Billing tab.
Getting Ready
- Have you defined your Statement Template? See View/Modify Templates
- Have you defined your Cover Letter? See View/Modify Templates
Print your Statement
- For the desired contact, select the Billing tab.
- Click the Actions button.
- Select Print Statement.
- Select the File Format you wish to use.
- Select the Document Generation Template you wish to use.
- Select the Cover Letter you wish to use.
- Select the invoices that you wish to include on the statement.
- Click Download. Your statement will be downloaded, and you will be able to print it.


Contact Engagement
The Engagement tab, is designed to give your staff a comprehensive and visual overview of some of the key activities of your members. We understand that it is critical that your members feel they are receiving value for their membership. The Engagement tab helps you to show your members a clear picture of what points of value they are taking advantage of with their membership. The information on this tab also gives you details to help your members see where there may be benefits available to them that they are not leveraging. NOTE: The dates of engagement can either be a Rolling Year or Current Year. This change can be made under Setup, see Contact Engagement Report Settings for more information.
The Engagement tab is divided into several sections:
- Memberships: This section will provide information about the contact's membership status, membership type, primary contact, expiration and the start date of the membership. If the contact has multiple memberships, all will be displayed.

- The Directories section, displays what information the member has populated within your on-line directory, and provides an indication of whether the member is taking full advantage of opportunities for exposure. If no directories are assigned, No directories assigned/applicable will be displayed.

- The Member Contacts/Activity section shows graphically how frequently your members are logging into the InfoHub, which provides you with an understanding of whether this member is taking advantage of the InfoHub resource. If you are looking at an organization engagement tab, this shows member logins for all contacts under the membership by month. If you are looking at an individual contact tab, this will display history of that individual contact's logins.

- Billing will display any open balances for the contact. NOTE: This section will only be displayed if the contact has an open balance.

- The Communications section, shows you graphically your communications with this member.

- The Benefits sections will be displayed if the contact's membership type includes benefits. On the engagement tab you will be able to review the benefits available to the members, and the usage of those benefits.

- The Events section provides a metric of the number of event registration for each month, in the selected date range, as well as event registration comparison, year over year. By dwelling your mouse over the graph, you can see further count of event registrations.

- Clicking the numbered links for Total Event Registrations in date range, Sponsorships in date range or Exhibited in date range will display the associated details.

- The Web Content section displays a list of web content opportunities, and the number of content items this member has submitted. The numbered links may be clicked to view a list of the web content items submitted. NOTE: This section will only be displayed if you have purchased the Web Content module.

- The Continuing Education section provides a list of all continuing education/certification programs this member has completed and/or those that are in progress. NOTE: This section will only be displayed if you have purchased the Continuing Education module.

To keep your members up to date, you can easily download the information or send them an email. Click the Actions button to select Download Report or Email Report.
Contact Engagement Report Settings
By completing some initial setup under Setup > Contact Engagement Report Settings you can configure the date range for statistics displayed on the report, as well as Introductory Text/Images, as well as add a list of the additional actions or initiatives you provide for your members.
Click Setup in the left-hand navigation panel.
- Click Contact Engagement Report Settings in the Miscellaneoussection.

- Choose the desired Date Range to be used for the statistics on the Engagement tab. You can select a Rolling Year or Current Year.
- Enter Optional Intro Text and/or Images you wish to include on the Engagement tab. This is displayed on the tab, and, most importantly, is included on printed/emailed reports to serve as a nice introduction for your members to the engagement report.
- Enter Other Activities Provided as a Benefit. This will be displayed on the tab, and, most importantly, is included on printed/emailed reports to provide your members with additional details of the benefits you provide to them.
- Click Save.
Delete a Contact
To delete a contact (organization or individual):
- Select the contact's Profile tab.
- Click the common tasks Actions button.
- Click Delete Contact.
- Type DELETE to confirm that you wish to delete this contact. This process cannot be undone. Should it be necessary for GrowthZone to retrieve this contact, fees may apply.
- Click OK. The contact is now deleted.

Contact Management Reports
A variety of reports are available for managing and analyzing your contacts. See Contact Management Reports.