Difference between revisions of "Membership Management"
Cpetterson (talk | contribs) |
Cpetterson (talk | contribs) |
||
| Line 373: | Line 373: | ||
#Click '''Done'''. | #Click '''Done'''. | ||
| − | <div class='note'>'''NOTE:''' The '''Membership | + | <div class='note'>'''NOTE:''' The '''Dropped Membership Report''' may be used to view and analyze all membership changes. '''[[Dropped_Membership_Report|Click Here]]''' for instructions on running the report.</div> |
| − | |||
===Adjust Membership=== | ===Adjust Membership=== | ||
Revision as of 14:42, 27 November 2017
Contents
- 1 Understanding Membership Types
- 2 Adding Members in the Database
- 3 Viewing/Updating Member Information
- 4 Membership Reports
- 5 FAQ's
Understanding Membership Types
Membership Types allow you to define the membership packages you wish to provide to your members. Membership Types encompass the following:
- Membership Policies: Membership Policies allow you to define whether you want to allow on-line sign-up, allow invoicing, the required fields, what fields you want to display, and so on, on your Membership Application form. A default Standard Membership Policy is defined when the database is installed. This policy may be used as designed, customized, or you may create new policies to meet your business needs. The standard membership policy default is described below:
- Allow On-line Payment is enabled
- Allow Invoicing is enabled
- Required fields on the Membership Application form are: Membership Type, First and Last Name, Email Address. All other fields are displayed as optional.

Adding a New Membership Type
- Click Membership in the Navigation panel.
- Click the Membership Types tab. A list of membership types currently setup in your system will be displayed.
- Click the Add button.
- On the Add/Edit Membership Type screen, configure the following:
- Name - Enter a name for the new membership type. This is the name that will appear on you member application, as well as within in the database where you may choose a membership type, filter by membership type, report on membership type, etc.
- Description - Provide description of the membership type. This description may be displayed on your web-site. You may use the standard word processing icons (i.e. bolding, italicizing, etc.) to format the text. You may also add images and/or links to the description.
- Recurring Fees - Recurring fees would include, for example, the annual membership fee. Click the + button to add a recurring fee to this membership type. You may as many recurring fees as needed.
- Select a good/service from the Item drop-down list.
- Enter a Description of the item.
- Enter the Default Price.
- Select the Billing Schedule for this item. You may choose annually, semi-annually, quarterly or monthly. A custom option is also available. This may be useful if you wish to define what the price would be for each frequency option. In this case, the user would be able to select which option they would like to go with and Scheduled Billing would be set up appropriately.
- Select the Hide on Invoice check-box if you do not wish to display this item on the invoice.
- Setup/One Time Fees - If there are one time fees, such as a setup fee, associated with this membership, you may add them by clicking the + button.
- Select a good/service from the Item drop-down list.
- Enter a Description of the item.
- Enter the Default Price.
- Select the Hide on Invoice check-box if you do not wish to display this item on the invoice.
- Click Done to save the new Membership Type.

Membership Type Advanced Options
When you create membership types, additional information about the membership type may be setup by clicking the Advanced Options check-box.
- Duration (Months) - this field allows you to define the renewal frequency for the membership. The default is 12 months, however if you have renewals that occur more than or less than 12 months, you may change the duration.
- Active Until - This field dictates when a membership ends. You may select Manually Ended if membership does not end until you have actually dropped the membership OR you may select Membership Duration Expires if you wish the membership to end after the membership duration period, if the member has not renewed. The default is Membership Duration Expires. The *Activation & Renewal settings allow you to define the following if you have selected "When No Longer Renewing":
- Grace Period Days - This setting defines the number of days past the invoice due date that a member may continue to receive membership benefits. After this period, the member will be automatically de-activated. NOTE: This option will only be displayed if Membership Duration Expires is selected for Active Until.
- Renewal Notice Days - This setting drives the number of days prior to the end of a membership that an automated renewal notice will be sent to members. NOTE: This option will only be displayed if Membership Duration Expires is selected for Active Until.
- Invoice Template - You may select an invoice template. If no invoice template is selected, the invoice template associated to the fee items will be used.
- Payment Terms - The default payment terms are selected, and you may select alternate payment terms. You can add new payment terms by clicking the
 icon.
icon. - Terms/Conditions - The default payment terms are selected, and you may select alternate payment terms. You can add new terms and conditions by clicking the icon.
- Membership Policies - Membership policies allow you to define what information you will gather on the Membership Application form. Select the membership policies to associate to this Membership Type. Click the
 to view and/or edit an existing policy, or click the icon to add a new Membership Policy set. Standard Membership Policies is the default.
 - Directory Listing - The Directory Listing option allows you to assign the directory and directory display settings to be assigned to this membership type. Click the
 icon to configure the directory and type. Click Here for further information on Directory Display Settings. NO Directory Listing is configured by default.
 - Universal Renewal - These options allow you to manage when your renewals will occur and manage prorating your fees.
- Renew Everyone In - This setting allows you to establish the renewal month to be applied to all members.
- Prorate Partial Years - Selecting this check-box will automate the process of adjusting the membership fees, based on the month that the member joined.
- Membership Contacts
- Organization Limit - This setting establishes the number of people within an business/organization who may use the membership benefits. By default this is set to 0 which means it is unlimited.
- Individual Limit - This setting establishes the number of people associated to an individual membership who may use the membership benefits. By default this is set to 0 which means it is unlimited.
- Owned By - This setting allows you to set this membership type as either organization or individual level; this will drive whether the system uses the Organization Limit or the Individual Limit.
- Graduated Membership - This option allows a membership structure where members automatically move through Membership Types based on specific time frames. This may be used in cases where a member is brought on with a rate for the first year, and then a different rate in subsequent years. Graduated Membership allows you to assign a membership to a new member and have it automatically update to the appropriate pre-determined pricing and membership type.
- Number Of Activations Before Upgrading - enter the number of activations required before upgrade.
- Upgrade Membership To: - select the membership to which this membership type will be upgraded.
Understanding Membership Policies
Membership policies allow you to define what information you will gather on the Membership Application form. Standard Membership Policies are setup by default on installation of the GrowthZone database. You may use the default as it is designed, modify the default, or create a new set of membership policies.

The following settings may be configured for your membership policies:
- Name - The name of the policy is displayed internally only, and is available for selection when creating membership types.
- Allow On-line Payment - Select this option to allow applicants to pay for their membership application by credit card on-line.
- Allow Invoicing - Select this option to allow an applicant to request to be billed for their membership application.
- Customize Standard Questions - Click the Customize Standard Questions link to select which questions you wish to display (either required or optional) on the membership application.

- Custom Fields - You may add additional fields to your application by clicking the icon. Click Here for further information on configuring custom fields.

- Category List - the Minimum and Maximum fields allow you to set the number of categories allowed for this membership policy. Click the icon to configure the minimum and maximum values.
- Category List - the Minimum and Maximum fields allow you to set the number of categories allowed for this membership policy. Click the
Understanding Directory Display Settings
Directory Display Settings control what information about a business or individual is displayed if you choose to publish a directory of members to your website. You may, perhaps, have different levels of listings based on membership type. A basic level might include just a business name and a logo, where as an enhanced listing may include photo galleries, videos, maps, etc.
- Name - Provide a name for the Directory Display Settings.
- Description - Provide a description of the Directory Display Settings.
- Show Individual Details - Select which details for your individuals will be displayed when this directory display setting is used.
- NOTE: When address, email and phone are selected, you can then choose which address type (i.e. mailing, physical, etc.), which email type (work, personal, etc.) and which phone type (main, toll, etc.) you will display with this listing type.
- Show Custom Fields - Select the custom fields you want to display in the directory.
- Options - select the additional options to display in the directory:
- Show Membership Type - If selected the member's membership type will be displayed in the directory.
- Show Search Logo - If selected the member's primary image will be displayed when the directory is searched.
- Show Highlights If selected, a highlights section will be displayed on the web-page.
- Show Related Contacts
- Show Search Description
- Show Gallery - If selected, the member may display a gallery of photos on the web-page.
- Show Video - if selected, the member may display a video on the web-page.
- Show Map - if selected, the location of the organization will be displayed on map on the web-page.
- Show Primary Contact - if selected, the name of the primary contact will be displayed on the web-page.
- Use Contacts Website for Listing page - If selected, clicking on the member on your public web-page will lead to the contacts website, instead of your page. Applicable only when assigned to a public directory (not available in the Hub).
- Retargeting
- Google Tag Manager Container ID - Enter the Container Id you were provided on installation of Google Tag Manager. Google Tag Manager is a free tool that makes it easy for marketers to add and update website tags -- including conversion tracking, site analytics, remarketing, and more—with just a few clicks, and without needing to edit your website code.
Understanding Directories
You system will contain a default directory, Active Member Directory. This directory is tied to your Business Category and may contain all of your valued members. It also is configured with the Standard Listing directory listing type. Advanced options, including searching by custom field may be configured for the default. If needed, you may create additional directories. Click Here for information on creating a new directory
Modifying a Membership Type
- Click Membership in the Navigation panel.
- Click the Membership Types tab. A list of membership types currently setup in your system will be displayed.
- Click the link for the Membership Type you wish to modify.
- On the Add/Edit Membership Type screen, make the desired modifications.
- Click Done to save your changes.
View/Create your Membership Application Form
A default application form is setup in your system. You may use it as it is configured, or you may customize to better meet your needs.
- Click Membership in the Navigation panel.
- Click the Membership Application Forms tab. A list of Membership Application Forms currently setup in your system will be displayed.
- Click the link for the default application form
- On the Add/Edit Membership Application Form screen, you may choose to customize the following:
- Name - Provide a name for the application form. This name is used internally.
- Description - Provide a description of the application form. This description is used internally.
- Options - Select the desired options for this application form:
- Allow Invoicing - Select this check-box to allow applicants to request to be invoiced for their membership fee/one time setup fees.
- Collect Donations - Select this check-box if you would like to collect donations from the individuals completing the application form.
- Display Membership Type Description - Select this check-box if you would like the membership type description to be displayed on the application form.
- Allow Online Payment - Select this check-box to allow for credit card payment when an applicant is completing the application form.
- Allow Chapter Selection - If you are using Chapters, select this check-box to allow applicants to select their chapter when filling in the application form.
- Display Membership Benefit Description - Select this check-box is you would like to display benefit package information on the application.
- Automatically Approve Applications - Select this check-box if you want to automatically approve on-line applications. If this is not selected, the new applicant will be available in your database, but their membership status will be listed as Pending Approval until a staff member has approved.
- Order Memberships Lowest Price First (if not selected, the order will be highest price to lowest) - Select this option if you wish to order your memberships from lowest price to highest price when displayed on your web-site. If not selected, the order will be highest to lowest.
- Email To Send On Completion - An email will be automatically sent to the applicant when the complete the application. Select the email you wish to send from the drop-down list. A default Membership Application Confirmation Email template is select, however, you may select a different template. Click here Communications Basics - Create and Manage Email Templates for further details on working with email templates.
- Instructions - Enter the instructions that you would like to display on the application form. You may use the standard word processing icons (i.e. bolding, italicizing, etc.) to format the text. You may also add images and/or links to the instructions.
- Completion Message - Enter the message you would like to appear when the applicant completes the application. You may use the standard word processing icons (i.e. bolding, italicizing, etc.) to format the text. You may also add images and/or links to the message.
- Additional settings for the Member Application Form may be displayed by clicking the Advanced Options check-box.
- Payment Gateway - Select the appropriate payment gateway from the drop-down list. Selecting this option will allow for paying on-line.
- Display Only These Memberships - This option allows you to select which memberships to display on-line. By default, all memberships will be displayed, but you may change this if you wish to not display all memberships.
- Completion Page Url (Ex: http://www.msn.com) - Enter the URL of the page you would like the applicant to be sent to after completing the application.
- OR
- After completion send user into Hub - Select this checkbox if you would like to send the applicant to the Info Hub.
- Destination Url within Hub (empty if Home) - You may enter a page specific URL for the Info Hub. For example, if you would like them to land on the account tab. If this is left blank, the page will open on the home page.
- URL - The URL for the membership application form is displayed. You make click on it to preview our application form.
- Click Done to save the application form.
Approving On-line Membership Applications
Once a membership application form is submitted on-line, an automated email will be sent to those who have subscribed to the Membership Application Submitted notification. The default email notification is shown below.

Click Here to learn how to setup your Membership Applications for automated approval.
If you have chosen to not automatically approve on-line membership applications, you will need to approve the applications when they are submitted. You can approve the new membership application on the contact's Profile tab. The status of the application will be displayed as Pending Approval in the Membership section.
- Click the down arrow on the Actions button in the Membership section.
- Click Approve Membership

The status of the membership on the profile tab will change to Active. The active date will reflect the day the application was submitted.
View all Membership Applications Awaiting Approval
On the Membership tab, in the Membership module, filter results on Waiting for Approval, as shown below:

By clicking on the member name, you can view further details of the member, and approve the membership application by clicking the Actions button and selecting Approve Membership.

Adding Members in the Database
While most of your prospective members may apply on-line, you can also add members directly in the database.
- Click Membership in the Navigation Panel. On the Memberships tab you will see a list of your current members.
- NOTE: This list may be displayed as 'cards' or as a list by clicking the View as Cards or View as List/Table icons.
- Click the Add button.
- Configure the following:
- Contact - If the new member already exists in your database as a contact, type in the contact name and select the contact. The existing information about this contact will be populated. If the new member does not already exist as a contact, click the + button to add as a contact.
- Membership Type - Select the desired membership type from the drop-down list.
- Start Date - Select the start date for this new membership.
- Billing Start Date - Select the first billing date for the new membership.
- Is Courtesy - Select this check-box if this is a courtesy membership.
- Sales Rep - (Optional) Select the Sales Rep for this new member.
- Join Reason (Optional) Select a Join Reason from the drop-down list. You can add a new Join reason by clicking the + button. Reports can be generated based on Join Reason, to help you in understanding what you new members are looking for from your organization.
- Chapter - If you organization uses chapters, select the chapter of the new member from the drop-down list.
- Referred By - If this new member was referred by an existing contact, you can enter the contact's name here. The referral will be noted on the members profile, as well as listed on the Activity tab of the person who referred. NOTE: You can use the Membership Referral Report to view and analyze all referrals. Click Here for information on generating this report.
- Fees - The fees section will be automatically populated with the fees that you have associated to the Membership Type. You may over-ride the fees as necessary.
- Invoice Options
- Print - Email - Select how the new member wishes to be invoiced. You may select one or both options. The option selected will be the default used when invoices are delivered.
- Billing Address - Select a billing address. The drop-down list will be populated with addresses associated to the new member, or you may enter a new address by clicking the + button.
- Billing Email - Select a billing email. The drop-down list will be populated with emails associated to the new members, or you may enter a new email address by clicking the + button.
- Contact - Select a billing contact from the drop-down list, it will be populated with contacts associated with the new member.
- Invoice Terms - The Invoice Terms associated to the membership type will populate by default. You may select different terms from the drop-down list if needed.
- Invoice Message - Enter the message you would like included on the invoice.
- Click the Advanced Options check-box to add Actions (Optional). If you are using the project management module, you can associate a previously defined project template:
- Click the Create New Member Project check-box.
- Select a Project Template.
- Click Done to save the new member.

Viewing/Updating Member Information
The easiest way to view a member's profile is to type the member name in the Search box in the header, and selecting the desired member. A membership profile is made up of the following:
- Profile
- More Info
- Individuals
- Activity
- Communication
- Billing
- Web Content
- Files
- Tasks
Update Member Profile
Update Member Contact Info
Search for and select the member in the header Search field. You may add additional or edit existing Phones/Emails/Sites/Addresses in the Contact Info section of the profile page.
- Click the + icon to add new contact information
- Click the pencil icon adjacent to a contact to edit existing information.
Update Member Lists/Committee Participation
Search for and select the member in the header Search field. You may add or remove a member from lists and/or committees in the Lists/Committees section of theProfile tab.
Add Member to List/Committee
- On the member Profile tab, click the pencil icon next to Lists/Committees.
- On the Lists/Committees screen, click the check-box for each list/committee to which you want to add this member.
- NOTE: Lists/Committees to which this member currently belongs will already be selected. You could also remove a member from a list on this screen.
- Click Done when you have selected all the lists/committees needed.

Remove Member from List/Committee
- On the member Profile tab, click the pencil icon next to the list/committee you wish to remove.
- On the Add/Edit List Member screen you have the following options:
- Role - You may define a role for this member on the list/committee.
- Email - You may select an alternate email for the member on the list/committee.
- Do Not Contact - Select this check-box if you wish to keep the member on the list/committee, but they do not wish to be contacted.
- Disable contact from group - Select this check-box to remove the member from the list/commmittee.
- Click Done to save your changes.
Update Member Categories
Categories are used to categorized your users effectively, which can be important for things like business directories, filtering and reporting. Search for and select the member in the header Search field. You may add or remove categories in the Categories section of theProfile tab.
Add/Remove a Member to a Category
- Click the pencil icon adjacent to Categories.
- On the Edit Categories screen you will see a list of all available categories. You may add an additional category by selecting the + icon.
- Click the check-box for each category to which you would like to add the member or deselect the check-box for the categories from which you wish to remove this member.
- Click Done when complete.
Update Member Directory Information (More Info)
On the Member More Info tab, you can update the information that will be displayed in the directory on your web-site.

The following information can be viewed and/or updated on the More Info tab:
- Notes for internal use.
- Directory Info
- Short Description - The short description will be displayed on the search page in your directory.
- Description - This is a longer description displayed for the members individual page in your directory.
- Key Words - Key words are used to search your directory.
- Highlights (for Directory) - Additional description of the member displayed on the members individual page in your directory.
- Bio - If you are displaying individuals associated to your business members, bio information may be displayed in your directory.
- Established Date - You may include the date a business was established in your directory.
- Custom Fields - Custom Fields that you have previously associated to your businesses will automatically be displayed. Click the Manage Custom Fields button to add or remove additional custom fields.

Click Here for further information on creating custom fields.
Update Member Directory Listing (Web Content)
Directory Listing Types are included in your membership packages. You can view what type of listing a member has on the member's Web Content page. Click Here for further information on setting up directory listing types.

Edit a Member's Directory Listing Type
- On the member's Web Content page, click the pencil icon for the directory listing type you wish to edit.
- Edit the following settings as needed:
- Directory - If you wish to change the directory in which this member will be displayed, select the desired directory from the list.
- Listing Level - If you wish to change the directory listing type for this member, select the desired listing from the list.
- Alternative Display Name - If you wish to display an alternate name for this member in your directory, you can enter the name here. Leave this field blank if the display name is the same a the contact name.
- Short Description - The short description will be displayed on the search page in your directory.
- Description - This is a longer description displayed for the members individual page in your directory.
- Key Words - Enter the key words that can be used to search for this member in your directory.
- Categories - Select the categories in which this member will be displayed in your directory.
- Images - the images option will be available if the directory listing type selected includes this option. Click on the Add button to add new images. You may add multiple images.
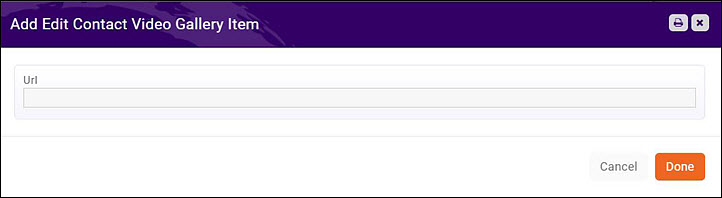
- Video - the video option will be available if the directory listing type selected includes this display option. Click on the the + icon to enter the URL to your video. You may add multiple videos.
- Custom Fields - If you have included custom fields, they will be displayed for you to edit.
- Click Done.


Manage Membership Change
You can easily upgrade, downgrade, drop memberships, etc. from the member's Profile tab. Click the Actions button in the Memberships section.

Upgrade a Membership
- On the member's Profile tab, click the Actions button in the Memberships section.
- Click Upgrade Membership. The Membership screen will be displayed.
- Configure the following as needed:
- Membership Type - Select the membership type to which the member is upgrading.
- Change Date - Enter the date the upgrade will take effect.
- Staff - Optional, select the staff member handling this upgrade.
- Next Bill Date - If needed update the next bill date.
- Fees - The fee items associated with the new membership will automatically be populated. You may update these as needed.
- Invoice Options - The invoice options will automatically be populated based on this members history. You may update as needed.
- Click Done. Evaluate what billing adjustments may be necessary, and adjust those on the member's account tab.
Downgrade a Membership
- On the member's Profile tab, click the actions button in the Memberships section.
- Click Downgrade Membership. The Membership screen will be displayed.
- Configure the following as needed:
- Membership Type - Select the membership type to which the member is downgrading.
- Change Date - Enter the date the upgrade will take effect.
- Staff - Optional, select the staff member handling this downgrade.
- Next Bill Date - If needed update the next bill date.
- Fees - The fee items associated with the new membership type will automatically be populated. You may update these as needed.
- Invoice Options - The invoice options will automatically be populated based on this members history. You may update as needed.
- Click Done.
Drop Membership
- On the member's Profile tab, click the actions button in the Memberships section.
- Click Drop Membership.
- Configure the following as needed:
- End Date - Enter the date the drop will take effect.
- Drop Reason - Select a drop reason. You may select a drop reason from the list, or you may dynamically add a drop reason by clicking the + button.
- Notes - These notes are for internal use. This field is required.
- Invoices to Write Off - Any outstanding invoices for this member will be displayed. You may choose to write-off all, some or none of the invoices based on your business processes.
- Update Access Level for all Contacts - This setting allows you to define what access to the Info Hub ALL contacts of this membership will retain after the drop. Alternately, a list of all contacts is displayed, and you may define for each individual what access they will retain.
- Click Done.

Adjust Membership
The Adjust Membership action allows you to adjust the membership fees associated to a member.
- On the member's Profile tab, click the actions button in the Memberships section.
- Click Adjust Membership. The Membership screen will be displayed.
- Update the 'Fees as needed.
- NOTE: The changes you make here will only impact billing on a go forward, any fees that have already been invoiced will not be changed. If an adjustment (credit or refund is required) go to the member's account tab.
- Click Done.
Delete Membership
While it is possible, it is NOT recommended to delete a member. When deleting a member, you will delete all historical data associated to that membership.
- On the member's Profile tab, click the actions button in the Memberships section.
- Click Delete Membership.
Reactivate Membership
If a membership expired and was deactivated, or if a member dropped, the membership be easily reactivated on the members profile tab.
- On the member's Profile tab, click the actions button in the Memberships section.
- Click Re-activate Membership.
- The Membership page will be displayed to select membership type and associate fees.

Membership Reports
Membership Change Report
The Membership Chamber Report provides you with a way to view and analyze membership type changes, as well a fee changes. For example, if you have had a major marketing campaign to upgrade members to a higher membership level, you can generate this report based on the Membership Purchase Type and a specified change date range. You could also include Sales contact in your report, if you want to see which sales person was responsible for the upgrade.
The report may be filtered on the following standard criteria:
- Sales Contact
- Membership Purchase Type (New, Upgrade, Downgrade, Renewal, Adjustment, Re-activated)
- Membership Type
- Change Date Range
- Click Reports in the Navigation Panel
- Select Membership Change Report.
- Select your search filtering criteria.
- Click Run Report.

You can perform the following actions with the report by clicking the down arrow on the Run Report button:
- Export as PDF
- Export as Excel.
- Export Summary as PDF
- Export Summary as Excel
- Email Report
- Add to List - This option will allow you to add the members to an existing list, or create a new list (by clicking the + button on the Add Contacts to list screen). This can help you in sending emails to this group as necessary.

- Save as New Report - If you want to use this report with the same filtering options in the future, you can save the report.

- Add as a Favorite Report - you may save the report as a favorite, then easily identify it when filtering reports in the Reports module.
Membership Referral Report
The Membership Referral Report allows you to generate a list of members, and the contact who referred them to your organization.
- Click Reports in the Navigation Panel
- Select Membership Referral Report.
- Select your search filtering criteria.
- Select desired display options. The system is setup with default display options. Click the drop down arrow on Fields to Display to add or removed display options.
- Select Summarize By. This is an optional setting that will allow you to group the results of your report. For example, if you wish to group the report by the contact who referred a member, you would select Contact Name.
- Click Run Report.

In the example above, the report is filtered on contacts who referred members, i.e. Edibles referred Antiques on Main.
You can perform the following actions with the report by clicking the down arrow on the Run Report button:
- Export as PDF
- Export as Excel.
- Export Summary as PDF
- Export Summary as Excel
- Email Report
- Add to List - This option will allow you to add the members to an existing list, or create a new list (by clicking the + button on the Add Contacts to list screen). This can help you in sending emails to this group as necessary.
- Save as New Report - If you want to use this report with the same filtering options in the future, you can save the report.
- Add as a Favorite Report - you may save the report as a favorite, then easily identify it when filtering reports in the Reports module.
Membership Report
The Membership Report allows you to generate a list of all of your members based on membership type. You can filter this report to a specific membership type and membership status, or by custom filter criteria. For example, if you want to generate a list of members renewing in a specific month, you can select Renewal Month as Criteria/Filters.
- Click Reports in the Navigation Panel
- Select Membership Report.
- Select your search filtering criteria.
- Add additional Criteria/Filters - optional.
- Select desired display options. The system is setup with default display options. Click the drop down arrow on Fields to Display to add or removed display options.
- Select Summarize By. This is an optional setting that will allow you to group the results of your report. For example, if you wish to group the report by membership, you would select Membership.
- Click Run Report.


The report shown above is filtered on all memberships, renewing in February. The report is summarized by membership type.
You can perform the following actions with the report by clicking the down arrow on the Run Report button:
- Export as PDF
- Export as Excel.
- Export Summary as PDF
- Export Summary as Excel
- Email Report
- Add to List - This option will allow you to add the members to an existing list, or create a new list (by clicking the + button on the Add Contacts to list screen). This can help you in sending emails to this group as necessary.
- Save as New Report - If you want to use this report with the same filtering options in the future, you can save the report.
- Add as a Favorite Report - you may save the report as a favorite, then easily identify it when filtering reports in the Reports module.
New Membership Report
Renewal Membership Report
The Renewal Membership Report allows you to generate a list of all members, with the associated renewal month. You may choose specific renewal months to narrow report results.
- Click Reports in the Navigation Panel
- Select Renewal Membership Report.
- Select your search filtering criteria.
- Click Run Report.

You can perform the following actions with the report by clicking the down arrow on the Run Report button:
- Export as PDF
- Export as Excel.
- Export Summary as PDF
- Export Summary as Excel
- Email Report
- Add to List - This option will allow you to add the members to an existing list, or create a new list (by clicking the + button on the Add Contacts to list screen). This can help you in sending emails to this group as necessary.
- Save as New Report - If you want to use this report with the same filtering options in the future, you can save the report.
- Add as a Favorite Report - you may save the report as a favorite, then easily identify it when filtering reports in the Reports module.
Dropped Membership Report
The Dropped Membership Report allows you to generate a report of dropped members based on date range, membership type and sales person. The report can help you in identifying the reason members drop, as well as view the annualized revenue loss due to the drop.
- Click Reports in the Navigation Panel
- Select Dropped Membership Report.
- Select your search filtering criteria.
- Optional - enter additional Criteria/Filters. For example, if you have a drop reason called Too Expensive, you could filter on that specific Drop Reason to analyze the number of members who have dropped due to cost.
- Select Display Options. They system is setup with default fields to display in your report. You may add or remove fields by clicking on the Fields to Display drop-down arrow.
- Select Summarize By criteria. This optional field allows you to select how you wish report results grouped. For example, you may choose to group results by drop reason.
- Click the Run Report button.


You can perform the following actions with the report by clicking the down arrow on the Run Report button:
- Export as PDF
- Export as Excel.
- Export Summary as PDF
- Export Summary as Excel
- Email Report
- Add to List - This option will allow you to add the members to an existing list, or create a new list (by clicking the + button on the Add Contacts to list screen). This can help you in sending emails to this group as necessary.
- Save as New Report - If you want to use this report with the same filtering options in the future, you can save the report.
- Add as a Favorite Report - you may save the report as a favorite, then easily identify it when filtering reports in the Reports module.
FAQ's
Where can I change the questions that are asked on my Membership Application form?
- The questions included on your membership application form are driven by the Membership Policies you have associated to your membership types. See Understanding Membership Policies for further information.