Difference between revisions of "Sponsors/Ads"
| (14 intermediate revisions by 3 users not shown) | |||
| Line 1: | Line 1: | ||
| + | <p style="font-size:30px">'''Please note that the setup for Ads has changed. All the new instructions can be found on [https://helpdesk.growthzone.com/kb/article/1840-contents-sponsors-ads/ the new GrowthZone Knowledge Base]!'''</p> | ||
| + | |||
=Working with Banner Ads= | =Working with Banner Ads= | ||
The Sponsors/Ads module provides options for offering advertising opportunities to your members. This will give them additional exposure, as well as bring in additional revenue to your association. Through the back office you can upload and manage member advertisements. This includes the ability to select which module page the ads should appear on, which member the ad runs for, and what size of ad should display (the software provides you with a list of common advertising sizes, so you can easily place these on your web-site). | The Sponsors/Ads module provides options for offering advertising opportunities to your members. This will give them additional exposure, as well as bring in additional revenue to your association. Through the back office you can upload and manage member advertisements. This includes the ability to select which module page the ads should appear on, which member the ad runs for, and what size of ad should display (the software provides you with a list of common advertising sizes, so you can easily place these on your web-site). | ||
| − | ==Setting up | + | ==Setting up Website Ad Types (Styles)== |
When preparing to sell/display ads on your web-site, you must specify the ad sizes you wish to use. You can create specific advertising types, and select from a pre-populated list of common ad sizes. This will give you a starting point that will help in easily working with advertisers. | When preparing to sell/display ads on your web-site, you must specify the ad sizes you wish to use. You can create specific advertising types, and select from a pre-populated list of common ad sizes. This will give you a starting point that will help in easily working with advertisers. | ||
| Line 18: | Line 20: | ||
#Click '''Done''' | #Click '''Done''' | ||
| − | == | + | ==Enabling pages for Ads== |
| − | #On the '''Advertisement Types''' tab, click the '''Enable/Disable on Pages''' button. A list of pages on which your advertisements can be included will be displayed. | + | #On the '''Advertisement Types''' tab, click the '''Enable/Disable on Pages''' button. A list of pages on which your advertisements can be included will be displayed. <div class='note'>'''NOTE:''' Only the module pages that are active will show in this list. For example, ad can be placed on a List/Committee page, but that does not show in the image above because that module is not active in the database. [http://supportwiki.memberzone.org/index.php?title=Web_Content#Adding_Content_Types_to_your_Web-site '''Click here'''] to see how to activate a module.</div> |
| − | <div class='note'>'''NOTE:''' Only the module pages that are active will show in this list. For example, ad can be placed on a List/Committee page, but that does not show in the image above because that module is not active in the database. [http://supportwiki.memberzone.org/index.php?title=Web_Content#Adding_Content_Types_to_your_Web-site '''Click here'''] to see how to activate a module.</div> | ||
#:[[File:Bulk Placement.jpg|center]] | #:[[File:Bulk Placement.jpg|center]] | ||
| − | |||
| − | |||
#To change the placement of an ad, click the drop down arrow for the '''Top of Page''' and '''Bottom of Page''' options. | #To change the placement of an ad, click the drop down arrow for the '''Top of Page''' and '''Bottom of Page''' options. | ||
#Click '''Done'''. | #Click '''Done'''. | ||
| Line 33: | Line 32: | ||
The module pages currently supported are: | The module pages currently supported are: | ||
| − | *Directory | + | :*Directory |
| − | *Event Calendar | + | :*Event Calendar |
| − | *Application to Join | + | :*Application to Join |
| − | *Contact Us | + | :*Contact Us |
| − | *Content | + | :*Content |
| − | *Map | + | :*Map |
| − | *List/Committees | + | :*List/Committees |
| − | *Form | + | :*Form |
| − | *Chapter Home Page | + | :*Chapter Home Page |
<div class='note'>'''NOTE:''' Top of Page and Bottom of Page are available on the module pages listed above. Using a widget, ads can be placed in other locations on any page, whether they are module pages or not. Contact your Onboarding Specialist or Customer Support representative for help setting up a widget.</div> | <div class='note'>'''NOTE:''' Top of Page and Bottom of Page are available on the module pages listed above. Using a widget, ads can be placed in other locations on any page, whether they are module pages or not. Contact your Onboarding Specialist or Customer Support representative for help setting up a widget.</div> | ||
| Line 70: | Line 69: | ||
=Working with Sponsorships= | =Working with Sponsorships= | ||
| − | While you need to have the Sponsors/Ads module activated in order to manage sponsors within GrowthZone, you will actually do all of the setup and management within Setup and the Event module. | + | While you need to have the Sponsors/Ads module activated in order to manage sponsors within GrowthZone, you will actually do all of the setup and management within Setup and the Event module. |
| − | + | See '''[[Event_Management#Event_Sponsor_Management|Event Sponsor Management]]''' for details. | |
| − | |||
| − | |||
| − | |||
| − | |||
| − | |||
| − | |||
| − | |||
| − | |||
| − | |||
| − | |||
| − | |||
Latest revision as of 15:20, 9 July 2021
Please note that the setup for Ads has changed. All the new instructions can be found on the new GrowthZone Knowledge Base!
Contents
Working with Banner Ads
The Sponsors/Ads module provides options for offering advertising opportunities to your members. This will give them additional exposure, as well as bring in additional revenue to your association. Through the back office you can upload and manage member advertisements. This includes the ability to select which module page the ads should appear on, which member the ad runs for, and what size of ad should display (the software provides you with a list of common advertising sizes, so you can easily place these on your web-site).
Setting up Website Ad Types (Styles)
When preparing to sell/display ads on your web-site, you must specify the ad sizes you wish to use. You can create specific advertising types, and select from a pre-populated list of common ad sizes. This will give you a starting point that will help in easily working with advertisers.
- Select Sponsors/Ads in the left hand navigation panel.
- Click the Advertising Types tab. A list of available advertising types is displayed.
- Click the Add Type button.
- Select the Ad Style from the drop-down list. The list is pre-populated with industry standard styles (Click Here for further information on industry standard ad styles). Once you have selected an ad size, the system will automatically populate the name and size (height and width) of the ad.
- The name of the ad will default to the type. It's a good idea to give it a name based on where you are going to place it--this will help you keep things straight as you add ads later.
- If you choose to you can resize the ad by editing the width and height fields
- Checking the Active box will make this Type available for use.
- Click Done


Enabling pages for Ads
- On the Advertisement Types tab, click the Enable/Disable on Pages button. A list of pages on which your advertisements can be included will be displayed. NOTE: Only the module pages that are active will show in this list. For example, ad can be placed on a List/Committee page, but that does not show in the image above because that module is not active in the database. Click here to see how to activate a module.
- To change the placement of an ad, click the drop down arrow for the Top of Page and Bottom of Page options.
- Click Done.

The module pages currently supported are:
- Directory
- Event Calendar
- Application to Join
- Contact Us
- Content
- Map
- List/Committees
- Form
- Chapter Home Page
Adding Advertisements
- Select Sponsors/Ads in the left hand navigation panel.
- Click the Advertisements tab. A list of all previously added advertisements will be displayed.
- Click the Add button.
- Configure the following settings:
- Contact: Enter the name of the contact for this advertisement. This field will not be displayed on your web-site.
- Description: Enter a description of the advertisement. This field will not be displayed on your web-site.
- Start Date: Select the date this advertisement will begin to display on your web-site. Today's date will be the default,
- End Date: Select the date this advertisement will no longer be displayed on your website--this will default to one year from today
- Advertisement Url: Enter the url to which you want to direct the user from the ad.
- Open In New Window: Select the check-box if you want the the ad to open in a new window (best practice).
- Advertisement List: Click the
 icon to configure the new advertisement.

- Select an Advertisement Type from the drop-down list (Click Here for information on setting up your advertisement types). The Image Manager dialog box will be displayed.
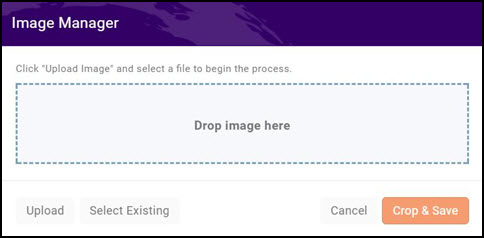
- Click the Upload button to upload the advertisement.
- Click Crop & Save.
- NOTE: You can add additional advertisement by clicking the icon, and repeating the steps above.
- Once you have added all the advertisements you wish, click Done


Working with Sponsorships
While you need to have the Sponsors/Ads module activated in order to manage sponsors within GrowthZone, you will actually do all of the setup and management within Setup and the Event module. See Event Sponsor Management for details.