Exhibitors
Contents
VERSION 2 COMING SOON
|
|
See an Overview of Exhibitors Version 2! |
Manage your Exhibitors
If you are using the Expo module, you can add and manage exhibitors to your events on the Event page. The Expo module allows you to easily manage every expect, including:
- Creating your exhibitor registration and booth options
- Accept on-line exhibitor registrations
- Manage payments for exhibitors
- Assign booths, and other exhibitor needs
- Manage communications with exhibitors

With the release of Exhibitors Version 2, we have greatly simplified the process of setting up exhibitors in an event. Be default, any new event will automatically use Exhibitors Version 2. Existing events will have the option to switch from Version 1 to Version 2 as shown below. Switching an event from Version 1 to Version 2 will integrate exhibitor registrations onto the event registration page, as well as updating the Exhibitor Setup tab to the new version as detailed below.
Switching to Exhibitor Version 2
To utilize the new Exhibitors functionality in an existing event, you can switch your Exhibitors Version to Version 2.
|
|
IMPORTANT: If you switch an event from Exhibitor Version 1 to Version 2, IT CANNOT BE SWITCHED BACK. |
- To switch from Version 1 to Version 2, go to the event's Overview tab and click the orange pencil icon
 for the General Information section.

|
|
NOTE: The event must be using Registration Form Version 2; you will not see the option to switch Exhibitor Version if Registration Form is set to Version 1. |
- In the Exhibitor Version dropdown, select "Version 2".
- Click "Done".
Exhibitors - Registration Options
Set up exhibitor-specific registration options.
- Click the Exhibitor Setup tab
- Click the pencil icon
 for the Exhibitor Registrations Options section. These selections are optional; if no options are set, exhibitor registrations will use the Attendee Setup options.
- The following options are available:
- Registration Start Date (Optional)
- Registration End Date (Optional)
- Exhibitor Directory: You can select an existing directory, or create a new one by clicking the grey plus icon
 . (Optional)
 - Terms/Conditions: You can select an existing terms and conditions, or create a new one by clicking the grey plus icon . (Optional) (NOTE: if Terms/Conditions are selected, they are required to be accepted by the exhibitor before registration can proceed)
- Enable Online Registration: this will add your Exhibitor registration types/options to your overall event registration page. (Optional) Leaving this unselected will only allow exhibitors to be added via the back office by staff.
- Venue Floor Plan: You can upload an image file (.jpeg, .jpg, .png, .gif, or .bmp) of your venue layout. Recommended size of 1000 pixels wide and 72dpi minimum. (Optional)
- Make any adjustments/selections as needed and click Done.

Exhibitor Types
Here you set up your exhibitor registration types. Similar to Attendee Registration Type.
- Click the orange plus icon
 .
. - In the Add Exhibitor Type window, complete the following:
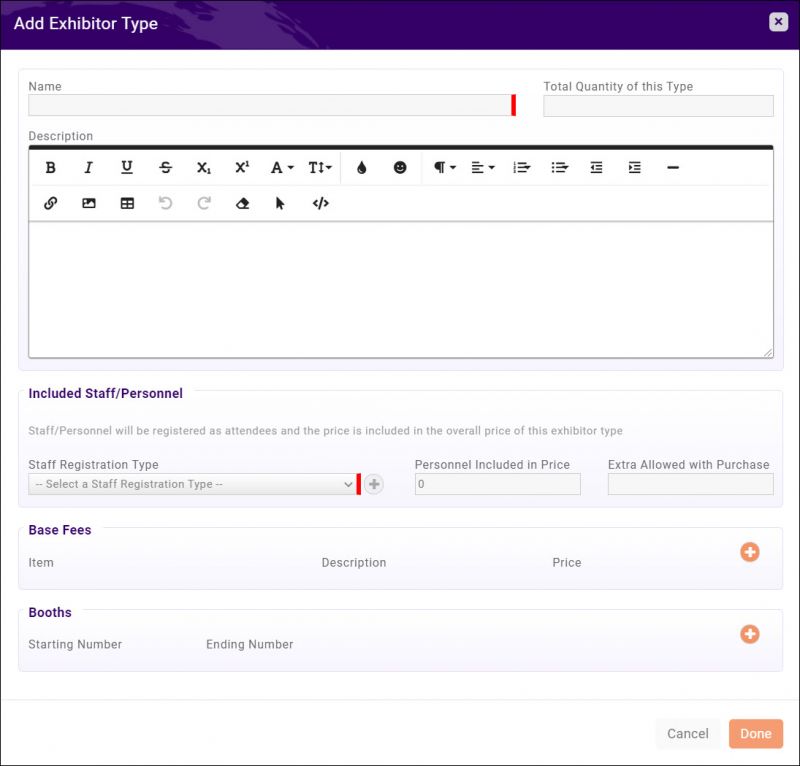
- Name (Required)
- Total Quantity of this Type: this allows you to limit the number of booths of this type available. (Optional)
- Description: additional description of the booth/exhibitor type. (Optional)
- Staff Registration Type: Select the registration type used to register booth staff as attendees. Click the grey plus icon to create a new registration type if needed. (Required)
- Personnel Included in Price: Specify how many attendees are to be included in the exhibitor registration. (Required)
- Base Fees: Click the orange plus icon and select the good/service item(s) for the exhibitor registration. Adjust the pricing if needed. (Required)
- Booths: Click the orange plus icon to specify the booth number(s) for the exhibitor registration type here. Single booth numbers can be entered by using the same number for both "Starting Number" and "Ending Number". When registering, exhibitors will have the ability to look at a venue map and select a booth number from the range specified here. When a booth number is taken, it is removed from the available range so no two exhibitors may register for the same booth.
- Complete all required fields and click Done.

Custom Fields
If you have additional questions or options for your exhibitors to select, you can set up custom fields to include in their registration.
- Click the orange plus icon .
- In the "Add Event Exhibitor Custom Field" window, complete the following:
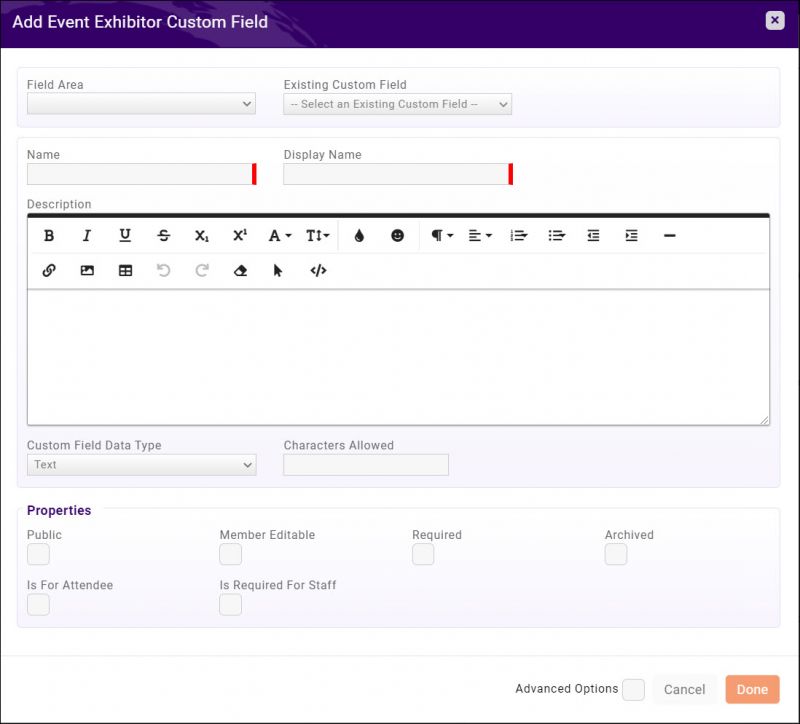
- Field Area: if setting up a new custom field for this event, select "Event Exhibitor". (Required)
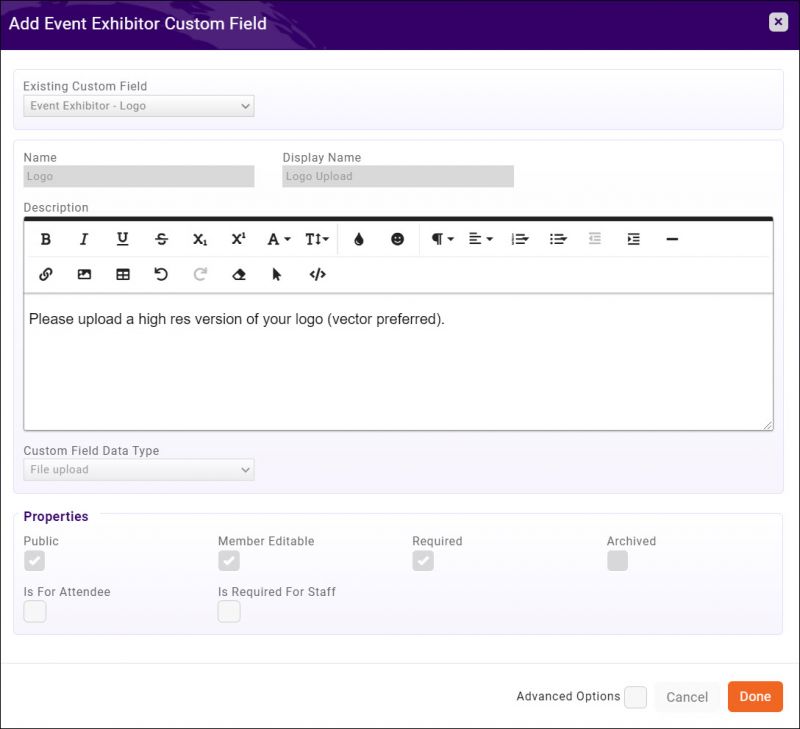
- Existing Custom Field: if you are using an existing custom field, make your selection here. (NOTE: only custom fields of type Event Exhibitor are available to select.) Selecting an existing field will remove the "Field Area" option from the window and will populate the remainder of the fields with the selected field's properties , greying out any changes to the options as shown below:
- Name (Required if adding a new custom field)
- Display Name: this is what will display out on the exhibitor registration form. (Required if adding a new custom field)
- Description: Any additional information you wish to display about this field on the exhibitor registration form. (Optional)
- Custom Field Data Type: Select the type of data you wish to collect in this field. For more information on custom field data types, see Custom Fields. NOTE: you cannot change a custom field's data type once the custom field has been saved/after you click "Done". Be sure to select the correct data type! (Required if adding a new custom field)
- Characters Allowed: Limit the number of characters input when using a Text or Multi line Text data type. If you select a different data type, this field is no longer displayed. (Optional)
- Properties - Define the properties for the custom field:
- Public: Select this check-box if you wish this field to be displayed for the public. This will allow the field to be displayed in the InfoHub, Directories and for use in membership applications.
- Member Editable: Select this check-box to allow users to edit this custom field in their hub profile. If a custom field is to appear in the hub, but is not to be editable, you need only check the property Public.
- Required: Select this check-box to make this field required.
- Archived: If you no longer wish to use this custom field, selecting this check-box will hide the field from being used in the back office, but historical data will be maintained.
- Is for Attendee: If you wish to include this on your registration form, tick this check-box.
- Is Required for Staff: Enable this option if staff is required to complete this field when registering someone from the back-office.
- Click Advanced Options to display the Applies to Exhibitor Type (Version 2 Only) option. This allows you to restrict the custom field to a specific exhibitor registration type if needed. (Optional)
- Click Done.


Additional Items
If you wish to sell additional items during the event registration process (for example you may wish to be able to sell wifi access, or need to charge for hardwired internet drops to a booth), these items may be added in the Additional Items section on the event's Exhibitor Setup tab.
- Click the Add Item button in the Additional Items section
- Enter a Name for the additional exhibitor item. (Required)
- Enter a Description of the item. (Optional)
- Select the desired Goods/Service from the drop-down list. (Required)
- Enter, edit, or accept the default Price. (Required)
- If you wish to limit the number of additional items you have available to be sold, enter the number in the Items Available (0 if unlimited - Version 2 Only). Each additional item can have its own specific limit set. Once the limit is reached, the item will be marked with “sold out” in the exhibitor registration. (Optional)
- Select the For Members check box to allow members to purchase this item.
- Select the For Non Members check box to allow non-members to purchase this item.
- Select the Is Active check-box to allow the item to be displayed on the event registration form.
- Select Sell Item as Yes/No option to only allow the ability to select or deselect the additional item on the exhibitor registration (will not allow a quantity selection).
- Click Done.

Instructions and Confirmation Messaging
If you have exhibitor-specific registration instructions, or wish to customize the confirmation page after exhibitor registration, you can click the orange pencil icon ![]() to customize those messages.
to customize those messages.

- Exhibitor Registration Instructions: these instructions will display right above the Exhibitor Registration options on the event registration form.

- Exhibitor Confirmation Message: (figuring out where this is supposed to display, as it currently doesn't in my test db)