|
|
| Line 1: |
Line 1: |
| − | =='''<span style="color:#800080">Certification Overview'''</span>== | + | =Certification Overview= |
| − | ----
| |
| − | | |
| | Using the Certifications Module within GrowthZone allows associations to administer, track, and report on the professional certifications of their members. With the proper setup, associations can save themselves and their members time in managing the courses, exams, and other tasks necessary to gain or maintain a certification. The module is built so that both simple and complex scenarios can be accommodated. It is important to note that the Certification Module does not deliver instruction or coursework, rather, it keeps track of necessary elements and the completion date of each. | | Using the Certifications Module within GrowthZone allows associations to administer, track, and report on the professional certifications of their members. With the proper setup, associations can save themselves and their members time in managing the courses, exams, and other tasks necessary to gain or maintain a certification. The module is built so that both simple and complex scenarios can be accommodated. It is important to note that the Certification Module does not deliver instruction or coursework, rather, it keeps track of necessary elements and the completion date of each. |
| − | | + | ==Definitions== |
| − | ==='''<span style="color:#800080">Certification Definitions'''</span>=== | |
| − | ----
| |
| − | | |
| | *'''Certification''' a collection of components that, when completed, attest to a person’s knowledge, skill, or level of achievement in a particular area. | | *'''Certification''' a collection of components that, when completed, attest to a person’s knowledge, skill, or level of achievement in a particular area. |
| | | | |
| Line 17: |
Line 12: |
| | *'''Objective''' what it is you want a person to know, understand, or be able to do; a specific result that a person aims to achieve. In GZ, objectives are assigned to components, following the logic that if you complete the component you will likely meet the objective. | | *'''Objective''' what it is you want a person to know, understand, or be able to do; a specific result that a person aims to achieve. In GZ, objectives are assigned to components, following the logic that if you complete the component you will likely meet the objective. |
| | | | |
| − | A Certification is made up a X number of Components. It can be as simple as taking a single Exam, or as complex as a series of courses, exams, and tasks which must be taken in a specific order with minimum scores achieved. | + | A Certification is made up a X number of Components. It can be as simple as taking a single Exam, or as complex as a series of courses, exams, and tasks which must be taken in a specific order with minimum scores achieved. |
| | | | |
| − | ==='''<span style="color:#800080">Certification Statuses'''</span>=== | + | ==Setting up a Certification== |
| − | ----
| + | While you technically do not need to create the parts of a certification in a specific order, it does make some sense to do some things first so you don’t have to go back after the fact and add them. |
| | + | :*'''Certification Category''' Creating Certification Categories allows for better organization and more granular reporting. This can created on the fly, but it’s nice to have them ready to go |
| | + | :*'''Fee Items''' If you will be charging for the Certification through GrowthZone you will need a fee item. If you do not have permissions to the Finance area you will need to work with someone who does to have this created ahead of time |
| | + | :*'''Terms & Conditions''' You can have multiple Terms & Conditions and display the appropriate/relevant one on each Certification. Depending on your permissions you may need someone else to create these for you ahead of time. |
| | | | |
| − | *'''In progress''': Contacts currently working towards a certification. The status may be automatically set when a contact applies to the certification program, and participation in the certification program does not '''Require Approval''', or this may be manually set when staff adds a contact to a certification program from the back-office.
| + | ::<div class='note'> ('''NOTE:''' There is no built-in checkbox an end user must check to verify they have read and understand the Terms & Conditions before they can move on. The Terms & Conditions are simply displayed for the user.): </div> |
| − | *'''Applied''': Contacts who have applied for a certification, but have not yet been approved. Only those certifications set to '''Require Approval''' will be included in this list. If a Certification is not set to '''Require Approval''' the status will automatically be set to '''In progress'''.
| |
| − | *'''Declined''': Contacts who have applied for a certification, but the application was denied. This would be manually set by staff.
| |
| − | *'''Active''': Contacts you have active certifications. This is automatically set when a certification has been completed (whether by system logic, that all components of a certification have been completed '''OR''' manually by staff if the certification completion requires approval).
| |
| − | *'''Inactive''': This status may be manually set by staff, for example, if someone has signed up for a certification program, but has not been working towards its completion.
| |
| − | *'''Expired''': Contacts whose certifications have expired. Expiration dates for certifications are configured at the certification program level.
| |
| − | *'''Not Completed''': Contacts who did not complete the necessary certification work in the time allotted. This would be manually set by staff, there is no automated logic behind this status.
| |
| − | *'''Admin Review''': Contacts who have completed the necessary work, but whose certification must be approved by an administrator.
| |
| − | *'''Expiring''': Contacts whose certification is nearing expiration. Contacts will be marked as expiring base on the '''Send 'Certification Expiring' Emails n Days Before Expiration''' setting you have configured under '''Setup > Certification > General Settings'''.
| |
| − | *'''Cancelled''': Contacts whose certification has been cancelled. This would be manually set by staff, there is no automated logic behind this status.
| |
| | | | |
| − | =='''<span style="color:#800080">Certification Initial Setup'''</span>== | + | |
| − | ----
| + | ==Adding a Certification== |
| | + | #Click on the '''Certifications''' tab within the Certifications Module |
| | + | #:[[File:CertificationTab.png|center]] |
| | + | #Click on the ''Add Certifications'' button |
| | + | #:[[File:AddCertButton.png|center]] |
| | + | #Enter the appropriate information in the fields on the ''Add Certification'' screen |
| | + | #Click Done |
| | + | [[File:AddCertificationScreen.png|center]] |
| | | | |
| − | ==='''<span style="color:#800080">Configure Certification General Settings'''</span>===
| + | ::*'''Name''' Name of Certification. Required |
| − | ----
| + | ::*'''Code''' free form. |
| | + | ::*'''Version''' Version of this Certification--very helpful when requirements change from year to year. |
| | + | ::*'''Description''' Description of Certification. Not required, but helpful for your members. |
| | + | ::*'''Certification Category''' Category of this certification. Helpful for sorting, finding, and reporting. |
| | + | ::*'''Certificate Template''' If providing a certificate upon completion, select the template here. |
| | + | ::*'''Credits/Units/Hours''' |
| | + | :::*'''Credits Required/Hours Required''' How many credits or hours are needed to be certified (Best practice is to use either credits OR hours. The system does not compute one to create the other and will only use one) |
| | + | :::*'''Credits To Maintain/Hours to Maintain''' How many credits or hours are needed to maintain the certification. Again, use either credits OR hours, not both. |
| | + | ::*'''Prerequisites''' Certifications that must be completed ''before'' this Certification can be started |
| | + | ::*'''Availability''' |
| | + | :::*'''Enrollment Start Date/Enrollment End Date''' The start and end dates of the ''enrollment period'' of the certification. |
| | + | :::*'''Requires Approval''' Creates a checkbox in the Tracking area and requires a staff member to check the box before the member is allowed to proceed. |
| | + | :::*'''Is Active''' When checked the certification is available and will be available in the Info Hub for enrollment |
| | + | ::*'''Pricing''' |
| | + | :::*'''Fee Item''' Select the Fee Item being used if charging for this Certification |
| | + | :::*'''Short Description''' Will default to the description of the fee item. Edit if necessary. Will be the line item on the invoice |
| | + | :::*'''Member Price''' Will default to the price set for the fee item. Edit if necessary. |
| | + | :::*'''Allow Invoicing''' If checked allows member to sign up and be invoiced later. If not checked, member must pay with a credit card at the time of enrollment. |
| | + | ::*'''Objectives''' Objectives are actually assigned at the component level and are simply displayed here |
| | + | ::*'''Terms/Conditions''' Will provide a link to display any legal language related to the certification |
| | | | |
| − | The '''Certification General Settings''' allow you to define the number of days prior to the expiration of a certification that an automated email will be sent, and which or your lists/committees will receive a notification when final certification requires administrative review.
| + | =Components= |
| | + | Components are individual items that count towards a Certification. A Component may be be a course, an exam, or a task. You may choose to have objectives for components and you have the option of setting a prerequisite for a Component, though prerequisites at the Component level should be used judiciously. |
| | | | |
| − | #Click '''Setup''' in the left-hand navigation panel.
| + | The Components screen within the Certification Module will contain all of the Components for all of the Certifications and could grow to be quite large. Search, Preset Filters, Custom filters, and Sort options are all available to make it easier to find what you are looking for. |
| − | #Click '''General Settings''' in the '''Certification''' section.
| |
| − | #:[[File:Certification General Settings.jpg|1200px|center]]
| |
| − | #Configure the following:
| |
| − | #*'''Send 'Certification Expiring' Emails n Days Before Expiration''': Enter the number of days, prior to the expiration of a certification, that you wish to send an automated email will be sent to the certified individual.
| |
| − | #*'''List/Committee that receives Admin Review Required email''': You may setup final certification to require approval. Select the list/committee that should receive the notification when an approval is needed.
| |
| − | #Click '''Save'''.
| |
| − | | |
| − | ==='''<span style="color:#800080">Configure Certification Categories'''</span>===
| |
| − | ----
| |
| − | | |
| − | Certification categories allow you to divide your certifications into "buckets" of share characteristics.
| |
| | | | |
| − | #Click '''Setup''' in the left-hand navigation panel.
| + | =Objectives= |
| − | #Click '''Category Lists''' in the '''Categories''' section.
| + | Often set by a national or governing organization, Objectives are attached to components such that if a person successfully completes the component they meet the objective. Objectives are not required for Components or Certifications. |
| − | #:[[File:1Category Lists CP.jpg|1000px|center]]
| + | <div class='note'> NOTE: If Objectives are part of a Component it is helpful to set them up first, though you can go back later and add them.: </div> |
| − | #Click the '''Add''' button. Setting up your category lists is a two step process. First you will add your list, then you will at the actual categories to that list.
| |
| − | #:[[File:Add Cert List.jpg|600px|center]]
| |
| − | #*Enter a '''Name''' for the category list.
| |
| − | #*Enter an optional '''Description''' of the list.
| |
| − | #*Enable '''Can Be Used Publicly?''' if you wish to display the category list publicly.
| |
| − | #*'''Is Active''' is enabled by default.
| |
| − | #Click '''Done'''.
| |
| − | #Next you will add the category items to your list. Click the hyper-link for the category list you just created.
| |
| − | #:[[File:Cat Lists.jpg|800px|center]]
| |
| − | #:The '''Category Items''' dialog box will be displayed.
| |
| − | #:[[File:Cat Items CP.jpg|800px|center]]
| |
| − | #*Click '''Add''' to add an individual category '''OR''' click '''Add Multiple''' to add a list of items (shown below).
| |
| − | #:[[File:Add multiple1.jpg|500px|center]]
| |
| − | #Enter the names of your category items (one per line). If you have selected to add an individual item, you will only enter one item.
| |
| − | #Click '''Done'''.
| |
| − | | |
| − | =='''<span style="color:#800080">Set up a Certification'''</span>==
| |
| − | ----
| |
| − | | |
| − | While you technically do not need to create the parts of a certification in a specific order, it does make some sense to do some things first so you don’t have to go back after the fact and add them.
| |
| − | :*'''Certification Category''' Creating Certification Categories allows for better organization and more granular reporting. This can created on the fly, but it’s nice to have them ready to go when setting up your certification programs. See '''[[Certification#Configure_Certification_Categories|Configure Certification Categories]]''' for instructions.
| |
| − | :*'''Fee Items''' If you will be charging for the Certification, through the GrowthZone software, you will need a fee item. If you do not have permissions to the Finance area you will need to work with someone who does to have this created ahead of time. Fee Items must be setup of type '''Educational Registration''' to be available in the Certification module. See '''[[Billing#Setup_Goods.2FServices|Setup Goods/Services]]''' for instructions.
| |
| − | :*'''Terms & Conditions''' You can have multiple Terms & Conditions and display the appropriate/relevant one on each Certification. '''NOTE:''' There is no built-in checkbox an end user must check to verify they have read and understand the Terms & Conditions before they can move on. The Terms & Conditions are simply displayed for the user.
| |
| − | | |
| − | [[File:AddCertificationScreen.png|center]]
| |
| − | | |
| − | =='''<span style="color:#800080">Setup Objectives'''</span>==
| |
| − | ----
| |
| − | | |
| − | Often set by a national or governing organization, objectives are attached to components such that if a person successfully completes the component they meet the objective. Objectives are not required for Components or Certifications. | |
| − | | |
| − | {| class="wikitable"
| |
| − | |-
| |
| − | |
| |
| − | [[File:Smallest.png|25px]]
| |
| − | | style="width: 100%"| '''NOTE:''' If Objectives are part of a Component it is helpful to set them up first, though you can go back later and add them.
| |
| − | |}
| |
| | | | |
| | The Objectives area includes '''Objective Collections''', '''Objective Categories & Sub-Categories''', and the actual '''Objectives.''' | | The Objectives area includes '''Objective Collections''', '''Objective Categories & Sub-Categories''', and the actual '''Objectives.''' |
| | | | |
| − | ==='''<span style="color:#800080">Add Objective Collections'''</span>=== | + | ==Objective Collections== |
| − | ----
| |
| | | | |
| − | Individual objectives must live in a “bucket” of related objectives. In GrowthZone, these buckets are called '''Collections''' and they are displayed on the Objectives tab of the Certification module. Objectives are also displayed in the Info Hub when certifications are included. | + | Individual objectives must live in a “bucket” of related objectives. In GrowthZone, these buckets are called ''Collections'' and they are displayed on the Objectives tab of the Certification module. |
| | | | |
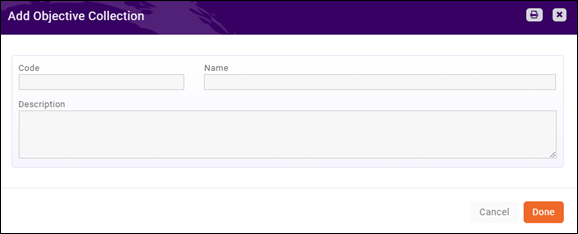
| − | To add an Objective Collection: | + | To add an Objective Collection, |
| | #Click on the '''Objectives''' tab within the Certifications module | | #Click on the '''Objectives''' tab within the Certifications module |
| | #Click on the '''Add Objectives Collection'''' button | | #Click on the '''Add Objectives Collection'''' button |
| Line 113: |
Line 80: |
| | #Click '''Done''' | | #Click '''Done''' |
| | | | |
| − | ==='''<span style="color:#800080">Objective Categories'''</span>=== | + | ==Objective Categories== |
| − | ----
| + | An '''Objective Category''' is a division of a ''Collection'' into which ''Objectives'' (or other Objective Categories, called ''Sub-Categories'') are entered. They are not required but can be helpful to associations that have a narrow collection of objectives that go fairly deep. Categories can have sub-categories, and sub-categories can also have sub-categories, allowing for very granular organization. |
| − | An '''Objective Category''' is a division of a '''Collection''' into which '''Objectives''' (or other Objective Categories, called '''Sub-Categories''') are entered. They are not required but can be helpful to associations that have a narrow collection of objectives that go fairly deep. Categories can have sub-categories, and sub-categories can also have sub-categories, allowing for very granular organization. | |
| | [[File:ListOfObjectives.png|center]] | | [[File:ListOfObjectives.png|center]] |
| − | Visually you can distinguish between Categories/Sub-Categories and Objectives by the indenting (Objectives will be indented below their Category), as well as the icons along the right hand side. Categories/Sub-Categories have 4 icons whereas Objectives have only 2. | + | Visually you can distinquish between Categories/Sub-Categories and Objectives by the indenting (Objectives will be indented below their Category), as well as the icons along the right hand side. Categories/Sub-Categories have 4 icons whereas Objectives have only 2. |
| | [[File:ObjectivesIcons.png|center]] | | [[File:ObjectivesIcons.png|center]] |
| | | | |
| − | ==='''<span style="color:#800080">Add an Objective Category'''</span>===
| + | To add an Objective Category/Sub-Category, |
| − | ----
| + | #Click on the Collection Name on the Objectives tab within the Certifications module |
| − | | + | #Click on the ''Add Objective Category'' button in the top right corner |
| − | #On the '''Objectives''' tab, click on the Collection Name. | + | #Enter the appropriate information in the ''Add Objective Category" window |
| − | #:[[File:Objective Collections.jpg|1200px|center]]
| |
| − | #Click on the '''Add Objective Category''' button in the top right corner. | |
| − | #:[[File:AddObjectiveCategory.png|center]]
| |
| − | #Configure the following:
| |
| − | #*'''Category Name''': This option is used when creating sub-categories. Leave blank when creating a top-level category.
| |
| − | #*'''Category Code''': This will display the '''Code''' of the Category Name if one is selected. | |
| − | #*'''Code''' Similar in function to the Collection Code, used for organization and reporting
| |
| − | #*'''Name''' Name of the Category
| |
| − | #*'''Description''' Description of the Category
| |
| | #Click '''Done''' | | #Click '''Done''' |
| | + | [[File:AddObjectiveCategory.png|center]] |
| | + | :*'''Category Name''' Use to select the parent category '''''if''' you are adding a sub-category (see Note below about a second way to add Sub-Categories) |
| | + | :*'''Category Code''' Will display the Code of the Category Name if one is selected |
| | + | :*'''Code''' Similar in function to the Collection Code, used for organization and reporting |
| | + | :*'''Name''' Name of the Category |
| | + | :*'''Description''' Description of the Category |
| | + | <div class='note'> (NOTE: You can add Sub-categories directly to a Category or other Sub-category by clicking on the Folder icon ([[File:FolderIcon.png|25px]]) in the Actions column of the Category/Sub-Category ): </div> |
| | | | |
| − | ==='''<span style="color:#800080">Add an Objective Sub-category'''</span>=== | + | ==Objectives== |
| − | ----
| |
| − | | |
| − | #On the '''Objectives''' tab, clicking on the Folder icon ([[File:FolderIcon.png|25px]]) in the Actions column of the Category/Sub-Category to which you wish to add a sub-category.
| |
| − | #:[[File:Sub Cat.jpg|1000px|center]]
| |
| − | #Configure the following:
| |
| − | #:[[File:Sub Cat Dialog.jpg|600px|center]]
| |
| − | #'''Category Name''': The category name will be set to the category/sub category selected.
| |
| − | #*'''Code''' Similar in function to the Collection Code, used for organization and reporting
| |
| − | #*'''Name''' Name of the Category
| |
| − | #*'''Description''' Description of the Category
| |
| − | #Click '''Done'''.
| |
| − | | |
| − | {| class="wikitable"
| |
| − | |-
| |
| − | |
| |
| − | [[File:Smallest.png|25px]]
| |
| − | | style="width: 100%"| '''NOTE:''' You can add Sub-categories to other Sub-category by clicking on the Folder icon ([[File:FolderIcon.png|25px]]) in the Actions column of the /Sub-Category and complete the steps above.
| |
| − | |}
| |
| − | | |
| − | ==='''<span style="color:#800080">Add Objectives'''</span>===
| |
| − | ----
| |
| − | | |
| | Objectives are the skills/knowledge that is required. They are added to Collections and can be “stand alone” or assigned to a Category. | | Objectives are the skills/knowledge that is required. They are added to Collections and can be “stand alone” or assigned to a Category. |
| − | ===='''<span style="color:#800080">Add a Stand Alone Objective'''</span>====
| |
| − | ----
| |
| | | | |
| − | #On the '''Objectives''' tab, click on the Collection Name. | + | To add an Objective as a "stand alone", |
| − | #:[[File:Objective Collections.jpg|1200px|center]]
| + | #Click on the Collection Name on the Objectives tab within the Certifications module |
| − | #Click on the '''Add Objective''' button in the top right corner. | + | #Click on the ''Add Objective'' button in the top right corner |
| − | #:[[File:Add Objective.jpg|600px|center]] | + | #Enter the appropriate information in the ''Add Objective" window (see below for notes on this) |
| − | #'''Category Name''' Use this drop down to assign the Objective to a Category if you want to assign it to a Category.
| + | #Click '''Done''' |
| − | #'''Category Code''' Will display the Code of the Category Name when one is selected
| |
| − | #'''Code''' Similar in function to the Collection and Category Codes, used for organization and reporting
| |
| − | #'''Name''' Name of the Objective
| |
| − | #Click '''Done'''. | |
| | | | |
| − | ===='''<span style="color:#800080">Add an Objective to a Category/Sub-category'''</span>====
| + | To add an Objective to a Category/Sub-Category, |
| − | ----
| + | #Click on the Collection Name on the Objectives tab within the Certifications module |
| − | | + | #Click on the Plus icon ([[File:PlusIcon.png|25px]]) in the Actions column of the Category/Sub-Category to which you want to add the Objective |
| − | #On the '''Objectives''' tab, click on the desired '''Collection Name'''.
| + | #Enter the appropriate information in the ''Add Objective" window (see below for notes on this) |
| − | #:[[File:Objective Collections.jpg|1200px|center]]
| + | #Click '''Done''' |
| − | #Click on the [[File:PlusIcon.png|25px]] icon in the '''Actions''' column of the Category/Sub-Category to which you want to add the Objective. | |
| − | #:[[File:Add Obj Cat.jpg|1200px|center]]
| |
| − | #Enter the appropriate information in the ''Add Objective" dialog box:
| |
| − | #:[[File:Add Obj Dialog.jpg|600px|center]]
| |
| − | #'''Category Name''': The category name will automatically be populated with the category to which you chose to add the objective.
| |
| − | #'''Category Code''' Will display the Code of the Category Name selected.
| |
| − | #'''Code''' Similar in function to the Collection and Category Codes, used for organization and reporting.
| |
| − | #'''Name''' Name of the Objective.
| |
| − | #Click '''Done'''.
| |
| − | | |
| − | | |
| − | ==='''<span style="color:#800080">Add a Certification'''</span>===
| |
| − | ----
| |
| − | | |
| − | #Click on the '''Certifications''' tab within the Certifications Module
| |
| − | #:[[File:Certification Main Page.jpg|1200px|center]]
| |
| − | #Click the '''Add Certifications''' button
| |
| − | #:[[File:Add a certification.jpg|600px|center]]
| |
| − | #Configure the following:
| |
| − | #*'''Name''': Provide a name for the certification. This name will be used publicly when you display certification opportunities in the Info Hub. Name of Certification. Required.
| |
| − | #*'''Code''': Optional field, may be used for codes associated to your certifications.
| |
| − | #*'''Version''': Enter the version of this certificate. This is useful if requirements for certifications change from year to year.
| |
| − | #*'''Description''': Enter a description of the certification. This is not required, but will be displayed publicly and may be helpful for your members.
| |
| − | #*'''Certification Category''': Select the category for this certification. This can be useful in sorting, finding and reporting certifications. See '''[[Certification#Configure_Certification_Categories|Configure Certification Categories]]''' for information on setting up your categories.
| |
| − | #*'''Certificate Template''': If you will provide a certificate on completion, select the desired template from the drop-down list. See '''[[Getting_Started#Setting_up_Document_Templates|Setting Up Document Templates]]''' for information on setting up your certificates.
| |
| − | #*'''Determine Certification completion via''': Select the method by which certification completion will be identified. Choices are: '''All Components Completed''' or '''Hours/Credits'''. If Hours/Credits is select, configure the following:
| |
| − | #:*'''Credits/Units/Hours''':
| |
| − | #::*'''Credits Required/Hours Required''': Enter the number of credits/hours that are needed to be certified. Best practice is to use either credits '''OR''' hours. The system does not compute one to create the other and will only use one.
| |
| − | #::*'''Credits To Maintain/Hours to Maintain''': Enter the number of credits or hours that are needed to maintain the certification. Again, use either credits OR hours, not both.
| |
| − | #*'''Require Admin Review''':
| |
| − | #*'''Prerequisites''': Optional - select certifications that must be completed '''before''' this certification can be started. Click the [[File:Orangeplus.jpg|25px]]. Enter the name of the certification in the text box. Type ahead functionality will find the certification and populate any associated code or version information. Repeat this step to add additional pre-requisites.
| |
| − | #*'''Availability''':
| |
| − | #:*'''Enrollment Start Date/Enrollment End Date''': Select the start and end dates of the ''enrollment period'' for this certification.
| |
| − | #:*'''Requires Approval''' Creates a checkbox in the Tracking area and requires a staff member to check the box before the member is allowed to proceed.
| |
| − | #:*'''Expires (in months after completion/activation)''': Enter the number of months after certification completion that the certification expires.
| |
| − | #:*'''Is Active''': When checked the certification is available and will be available in the Info Hub for enrollment
| |
| − | #*'''Pricing'''
| |
| − | #:*'''Fee Item''': Select the Fee Item being used if charging for this Certification
| |
| − | #:*'''Short Description''': Will default to the description of the fee item. Edit if necessary. Will be the line item on the invoice
| |
| − | #:*'''Member Price''': Will default to the price set for the fee item. Edit if necessary.
| |
| − | #:*'''Allow Invoicing''' If checked allows member to sign up and be invoiced later. If not checked, member must pay with a credit card at the time of enrollment.
| |
| − | #*'''Objectives''' Objectives are actually assigned at the component level and are simply displayed here
| |
| − | #*'''Terms/Conditions''': Select the terms and conditions that apply to this certification from the drop-down list. This will provide a link to display any legal language related to the certification. To create new terms and conditions, click the [[File:Grayplus.jpg|25px]] icon.
| |
| − | #Click Done
| |
| − | | |
| − | ==='''<span style="color:#800080">Create Certification Components'''</span>===
| |
| − | ----
| |
| − | | |
| − | '''Components''' are individual items that count towards a Certification. A component may be be a course, an exam, or a task. You may choose to have objectives for components and you have the option of setting a prerequisite for a Component, though prerequisites at the Component level should be used judiciously.
| |
| − | | |
| − | The Components screen within the Certification Module will contain all of the Components for all of the Certifications and could grow to be quite large. Search, Preset Filters, Custom filters, and Sort options are all available to make it easier to find what you are looking for.
| |
| − | | |
| − | {| class="wikitable"
| |
| − | |-
| |
| − | |
| |
| − | [[File:Smallest.png|25px]]
| |
| − | | style="width: 100%"| '''NOTE:''' If you wish to include objectives, exams and tasks in a course configure these first.
| |
| − | |}
| |
| − | /or
| |
| − | | |
| − | ===='''<span style="color:#800080">Add a Certification Component - Exam'''</span>====
| |
| − | ----
| |
| − | | |
| − | #In the '''Certifications''' module, select the '''Components''' tab.
| |
| − | #:[[File:Add Exam.jpg|1200px|center]]
| |
| − | #Click the '''Actions''' button. | |
| − | #Select '''Add Exam'''.
| |
| − | #:[[File:Add exam dialog.jpg|600px|center]]
| |
| − | #Enter a '''Name''' for the exam.
| |
| − | #Enter a '''Code''' for the course (optional).
| |
| − | #Enter a '''Description''' of the exam.
| |
| − | #Enter the '''Availability Opens''' date. This indicates when the exam will open.
| |
| − | #Enter the '''Availability Closes''' date. This indicates when the exam will close.
| |
| − | #Enable the '''Is Active''' check-box to make this exam active. Best practice, when a course is no longer active, is to de-activate the exam.
| |
| − | #Enable '''Requires Approval'''.
| |
| − | #Enter the '''Instructor'''. This is useful if you need to track who proctored the exam.
| |
| − | #Configure the '''Upon Completion''' options (optional) :
| |
| − | #*'''Hours Earned'''.
| |
| − | #*'''Credits Earned'''.
| |
| − | #Configure the following '''Exam Info''':
| |
| − | #*'''System Certification Exam Type''': Select the exam type from the drop-down list.
| |
| − | #*'''System Certification Scoring Type''': Select the scoring type from the drop-down list. Options include '''Passed/Failed''' and '''Scored'''.
| |
| − | #*'''Max Score''': If '''System Certification Scoring Type''' is set to '''Scored''', enter the maximum that can be scored on the exam.
| |
| − | #*'''Passing Score''': If '''System Certification Scoring Type''' is set to '''Scored''', enter the passing score for the exam.
| |
| − | #Add any '''Objectives'''. Click the to add objectives. Add all objectives as needed.
| |
| − | #Add any '''Prerequisites''' needed prior to taking this exam. Logic in the system will prevent the applicant from taking the exam if the pre-requisite(s) has not been met. Click the [[File:Orange plus icon]] to add all needed pre-requisites.
| |
| − | #Configure the fees for this exam (optional):
| |
| − | #*Select the '''Fee Item''' from the drop-down list. The '''Price''' set for this fee item will automatically be populated. This may be over-ridden as needed.
| |
| − | #Click '''Done'''.
| |
| − | | |
| − | ===='''<span style="color:#800080">Add a Certification Component - Task'''</span>====
| |
| − | ----
| |
| − | | |
| − | {| class="wikitable"
| |
| − | |-
| |
| − | |
| |
| − | [[File:Smallest.png|25px]] | |
| − | | style="width: 100%"| '''NOTE:''' Task components may include pre-requisites and objectives. If they are needed, best practice is to setup the pre-requisites and objectives prior to setting up tasks.
| |
| − | |}
| |
| − | | |
| − | | |
| − | #In the '''Certifications''' module, select the '''Components''' tab.
| |
| − | #:[[File:Add task.jpg|1200px|center]]
| |
| − | #Click the '''Actions''' button.
| |
| − | #Select '''Add Task'''.
| |
| − | #:[[File:Add task dialog.jpg|800px|center]]
| |
| − | #Enter a '''Name''' for the task.
| |
| − | #Enter a '''Code''' for the task (optional).
| |
| − | #Enter a '''Description''' of the task.
| |
| − | #Enter the '''Availability Opens''' date. This indicates when the task will open.
| |
| − | #Enter the '''Availability Closes''' date. This indicates when the task will close.
| |
| − | #Enable the '''Is Active''' check-box to make this task active. Best practice, when a task is no longer active, is to de-activate the task.
| |
| − | #Enable '''Requires Approval'''.
| |
| − | #Enter the '''Instructor'''. This is useful if you need to track who proctored the exam.
| |
| − | #Configure the '''Upon Completion''' options (optional) :
| |
| − | #*'''Hours Earned'''.
| |
| − | #*'''Credits Earned'''.
| |
| − | #Add any '''Objectives'''. Click the [[File:Orange plus icon]] to add objectives. Add all objectives as needed.
| |
| − | #Add any '''Prerequisites''' needed prior to completing this task. Logic in the system will prevent the applicant from completing this task if the pre-requisite(s) has not been met. Click the [[File:Orange plus icon]] to add all needed pre-requisites.
| |
| − | #Configure the fees for this task (optional):
| |
| − | #*Select the '''Fee Item''' from the drop-down list. The '''Price''' set for this fee item will automatically be populated. This may be over-ridden as needed.
| |
| − | #Configure the '''Requirements''' for this task.
| |
| − | #*'''Hours Required for Completion'''.
| |
| − | #*'''Credits Required for Completion'''.
| |
| − | #Click '''Done''' to save the new task.
| |
| − | | |
| − | ===='''<span style="color:#800080">Add a Certification Component - Course'''</span>====
| |
| − | ----
| |
| − | | |
| − | #In the '''Certifications''' module, select the '''Components''' tab.
| |
| − | #:[[File:Add Course.jpg|1200px|center]]
| |
| − | #Click the '''Actions''' button.
| |
| − | #Select '''Add Course'''.
| |
| − | #:[[File:Add Course Dialog|600px|center]]
| |
| − | #Enter a '''Name''' for the course.
| |
| − | #Enter a '''Code''' for the course (optional).
| |
| − | #Enter a '''Description''' of the course.
| |
| − | #Enter the '''Availability Opens''' date. This indicates when the course will open.
| |
| − | #Enter the '''Availability Closes''' date. This indicates when the course will close.
| |
| − | #Enable the '''Is Active''' check-box to make this course active. Best practice, when a course is no longer active, is to de-activate the course.
| |
| − | #Enable '''Requires Approval'''.
| |
| − | #Enter the '''Instructor'''. This is useful if you need to track who was the instructor for the course.
| |
| − | #Configure the '''Upon Completion''' options (optional) :
| |
| − | #*'''Hours Earned'''.
| |
| − | #*'''Credits Earned'''.
| |
| − | #Add any '''Objectives'''. Click the [[File:Orange plus icon]] to add objectives. Add all objectives as needed.
| |
| − | #Add any '''Prerequisites''' needed prior to completing this task. Logic in the system will prevent the applicant from completing this task if the pre-requisite(s) has not been met. Click the [[File:Orange plus icon]] to add all needed pre-requisites.
| |
| − | #Configure the fees for this task (optional):
| |
| − | #*Select the '''Fee Item''' from the drop-down list. The '''Price''' set for this fee item will automatically be populated. This may be over-ridden as needed.
| |
| − | #Configure the '''Requirements''' for this task.
| |
| − | #*'''Hours Required for Completion'''.
| |
| − | #*'''Credits Required for Completion'''.
| |
| − | #Click '''Done''' to save the new course.
| |
| − | | |
| − | ==='''<span style="color:#800080">Add Components to a Certification'''</span>===
| |
| − | ----
| |
| − | | |
| − | #Click the '''Certifications''' tab in the '''Certifications''' module.
| |
| − | #:[[File:Add components to certification.jpg|1200px|center]]
| |
| − | #Click the hyper-link in the '''Total Components''' column. If no components have been added to this certification '''No Total Components''' will be displayed. If components have been previously added, the number of components will be displayed.
| |
| − | #:[[File:Add components to certification1.jpg|800px|center]]
| |
| − | #Click the [[File:Orangeplus.jpg|25px]] to add a new component.
| |
| − | #:[[File:New component.jpg|800px|center]]
| |
| − | #Begin typing the '''Name''' of the component. Type ahead functionality will find the component, and populate the '''Type''' and '''Code'''. Repeat this step to add additional components.
| |
| − | #Click '''Done'''.
| |
| − | | |
| − | {| class="wikitable"
| |
| − | |-
| |
| − | |
| |
| − | [[File:Smallest.png|25px]]
| |
| − | | style="width: 100%"| '''NOTE:''' You can re-order the components by clicking the [[File:Move.jpg|30px]] icon and moving the components into the correct order.
| |
| − | |}
| |
| − | | |
| − | =='''<span style="color:#800080">Certification Enrollment'''</span>==
| |
| − | ---- | |
| − | | |
| − | Contacts may be enrolled in a certification in one of the following ways:
| |
| − | *Register for a Certification event.
| |
| − | *Register via the Info Hub
| |
| − | *Staff enrollment from the back-office.
| |
| − | | |
| − | ==='''<span style="color:#800080">Enroll a Contact in a Certification from the Certifications module'''</span>===
| |
| − | ----
| |
| − | #Click the Certification '''Tracking''' tab.
| |
| − | [[File:Cert tracking tab1.jpg|1000px|center]]
| |
| − | #Click the '''+Add''' button in the upper right corner.
| |
| − | #:[[File:Add enrollment.jpg|800px|center]]
| |
| − | #Enter the '''Contact Name'''. Type ahead functionality will show matching contacts. The contact must exist in your database.
| |
| − | #Select the desired '''Certification Program''' from the drop-down list '''OR''' click the [[File:Grayplus.jpg|25px]] to add a new certification program.
| |
| − | #Select the desired '''Certification Status''' from the drop-down list.
| |
| − | #Enter the '''Started''' date. This is the date that the contact began the certification program.
| |
| − | #If applicable, enter the '''Completed''' date. This is the date the contact completed the certification program.
| |
| − | #Once the certification is active, the '''Expires''' date will be automatically calculated based on the '''Expires (in months after completion/activation)''' setting configured for the certification program.
| |
| − | #*'''Fee''' - this section will be displayed once a '''Certification Program''' has been selected:
| |
| − | #:[[File:Cert Fee.jpg|800px|center]]
| |
| − | #*The '''Fee Item''' will automatically be populated with the fee item configured when the certification program was set up. You may over-ride this if needed, by selecting a different fee item from the list.
| |
| − | #*The '''Description''' will be automatically populated with the description configured for the fee item. You may over-ride this if needed.
| |
| − | #*The '''Price''' will be automatically populated with the price configured for the fee item. You may over-ride this.
| |
| − | #*Invoice Options''' - this section will be displayed once a '''Certification Program''' has been selected:
| |
| − | #:*Select the desired invoice delivery option: '''Print'' or '''Email'''.
| |
| − | #:*Select the desired '''Billing Contact''', '''Billing Address''', '''Billing Email''' for the invoice.
| |
| − | #:*(Optional) Select '''Invoice Terms'''. If no terms are selected, the default configured in your '''Finance Settings''' will be used.
| |
| − | #:*(Optional) Enter a '''Invoice Message''' to be included on the invoice.
| |
| − | #'''% Complete''' and '''Hours/Credits Earned''' will be automatically updated by the system, dependent on status of this contact's certification.
| |
| − | #Click '''Done'''.
| |
| − | | |
| − | ==='''<span style="color:#800080">Enroll a Contact in a Certification from the Contact's Profile'''</span>===
| |
| − | ----
| |
| − | | |
| − | #On the Contact's '''Profile''' tab, click the orange plus sign in the '''Certifications''' section.
| |
| − | #:[[File:Add enrollment.jpg|800px|center]]
| |
| − | #Select the desired '''Certification Program''' from the drop-down list '''OR''' click the [[File:Grayplus.jpg|25px]] to add a new certification program.
| |
| − | #Select '''In Progress''' from the '''Certification Status''' drop-down list.
| |
| − | #Enter the '''Started''' date. This is the date that the contact began the certification program.
| |
| − | #If applicable, enter the '''Completed''' date. This is the date the contact completed the certification program.
| |
| − | #Once the certification is active, the '''Expires''' date will be calculated based on the '''Expires (in months after completion/activation)''' setting configured for the certification program.
| |
| − | #*'''Fee''' - this section will be displayed once a '''Certification Program''' has been selected:
| |
| − | #:[[File:Cert Fee.jpg|800px|center]]
| |
| − | #*The '''Fee Item''' will automatically be populated with the fee item configured when the certification program was set up. You may over-ride this if needed, by selecting a different fee item from the list.
| |
| − | #*The '''Description''' will be automatically populated with the description configured for the fee item. You may over-ride this if needed.
| |
| − | #*The '''Price''' will be automatically populated with the price configured for the fee item. You may over-ride this.
| |
| − | #*Invoice Options''' - this section will be displayed once a '''Certification Program''' has been selected:
| |
| − | #:*Select the desired invoice delivery option: '''Print'' or '''Email'''.
| |
| − | #:*Select the desired '''Billing Contact''', '''Billing Address''', '''Billing Email''' for the invoice.
| |
| − | #:*(Optional) Select '''Invoice Terms'''. If no terms are selected, the default configured in your '''Finance Settings''' will be used.
| |
| − | #:*(Optional) Enter a '''Invoice Message''' to be included on the invoice.
| |
| − | #'''% Complete''' and '''Hours/Credits Earned''' will be automatically updated by the system, dependent on status of this contact's certification.
| |
| − | #Click '''Done'''.
| |
| − | | |
| − | ==='''<span style="color:#800080">Member Enrollment via the Info Hub'''</span>===
| |
| − | ----
| |
| − | | |
| − | You members can easily view available certification programs, and enroll via the Info Hub. See '''[[Info_Hub#Enroll_in_a_Certification_Program_from_the_Info_Hub|Enroll in a Certification Program from the Info Hub]]''' for further details.
| |
| − | | |
| − | [[File:Search Cert Catalog2.jpg|1000px|center]]
| |
| − | | |
| − | ==='''<span style="color:#800080">Approve Certification Enrollments'''</span>===
| |
| − | ----
| |
| − | | |
| − | You may configure your certification programs to require approval when a contact enrolls. Until approved, the contact's certification status will be listed as '''Applied'''. Those staff members who have subscribed to the '''New Certification Application''' notification will receive an email (shown below) when a new application is submitted.
| |
| − | [[File:Approve Cert.jpg|800px|center]]
| |
| − | | |
| − | You may click the link in the email, to open the Certification '''Tracking''' tab and follow the instructions below (or access the '''Tracking''' tab through the back office).
| |
| − | | |
| − | #Select '''Applied''' in the '''Show Only''' drop-down list.
| |
| − | #For the desired individual, click the linked name in the '''Certification Name''' column.
| |
| − | #Select '''In progress''' from the '''Certification Status''' drop-down list.
| |
| − | #Click '''Done'''.
| |
| − | | |
| − | ==='''<span style="color:#800080">Decline a Certification Enrollment'''</span>===
| |
| − | ----
| |
| − | | |
| − | You may configure your certification programs to require approval when a contact enrolls. Until approved, the contact's certification status will be listed as '''Applied'''. Those staff members who have subscribed to the '''New Certification Application''' notification will receive an email (shown below) when a new application is submitted.
| |
| − | | |
| − | [[File:Approve Cert.jpg|800px|center]]
| |
| − | | |
| − | You may click the link in the email, to open the Certification '''Tracking''' tab and follow the instructions below (or access the '''Tracking''' tab through the back office).
| |
| − | | |
| − | #Select '''Applied''' in the '''Show Only''' drop-down list.
| |
| − | #For the desired individual, click the linked name in the '''Certification Name''' column.
| |
| − | #Select '''Declined''' from the '''Certification Status''' drop-down list.
| |
| − | #Click '''Done'''.
| |
| − | | |
| − | =='''<span style="color:#800080">Associating Certification Components to Events'''</span>==
| |
| − | ----
| |
| − | | |
| − | You can easily offer your certification courses using the Events Module. These types of events will display on the calendars you select, and also display as '''Upcoming Certification Events''' in the Info Hub.
| |
| − | | |
| − | #For the desired event, select the '''General''' tab.
| |
| − | #In the '''Certification''' section, click the [[File:orange plus icon.jpg]] icon.
| |
| − | #:[[File:Add event cert component.jpg|700px|center]]
| |
| − | #On the '''Add Event Certification Component''' screen, begin typing the name of the desired component '''OR''' click the [[File:Grayplus.jpg|25px]] to add a new component. See '''[[Certification#Create_Certification_Components|Create Certification Components]]''' for instructions.
| |
| − | #(Optional) Enter '''Hours Earned''' or '''Credits Earned'''. If these have been configured when the component was created, they will be automatically populated.
| |
| − | #Click '''Done'''. | |
| − | | |
| − | If you wish to add additional components, repeat steps 2 - 5 above.
| |
| − | | |
| − | {| class="wikitable"
| |
| − | |-
| |
| − | |
| |
| − | [[File:One Row.png|25px]]
| |
| − | | style="width: 100%"| '''Caution:'''
| |
| − | *For event registrants who have already enrolled in the associated certification program, the event registration will automatically update the certification progress, for that registrant.
| |
| − | *For event registrants, who are '''NOT''' enrolled in the associated certification program, you will need to enroll the registrant in the program to ensure that the registration in the course is tied to the contact, and associated certification program. See '''[[Certification#Certification_Enrollment|Certification Enrollment]]''' for details.
| |
| − | |}
| |
| − | | |
| − | =='''<span style="color:#800080">Tracking Certification'''</span>==
| |
| − | ----
| |
| − | | |
| − | You can track contacts certifications on the '''Tracking''' tab within the Certifications module.
| |
| − | [[File:Cert tracking tab1.jpg|1000px|center]]
| |
| − | | |
| − | By clicking the '''Show Only''' drop-down list, the '''Tracking''' tab may be filtered by the following criteria:
| |
| − | *'''In progress''': Contacts currently working towards a certification. The status may be automatically set when a contact applies to the certification program, and participation in the certification program does not '''Require Approval''', or this may be manually set when staff adds a contact to a certification program from the back-office.
| |
| − | *'''Applied''': Contacts who have applied for a certification, but have not yet been approved. Only those certifications set to '''Require Approval''' will be included in this list. If a Certification is not set to '''Require Approval''' the status will automatically be set to '''In progress'''.
| |
| − | *'''Declined''': Contacts who have applied for a certification, but the application was denied. This would be manually set by staff.
| |
| − | *'''Active''': Contacts you have active certifications. This is automatically set when a certification has been completed (whether by system logic, that all components of a certification have been completed '''OR''' manually by staff if the certification completion requires approval).
| |
| − | *'''Inactive''': This status may be manually set by staff, for example, if someone has signed up for a certification program, but has not been working towards its completion.
| |
| − | *'''Expired''': Contacts whose certifications have expired. Expiration dates for certifications are configured at the certification program level.
| |
| − | *'''Not Completed''': Contacts who did not complete the necessary certification work in the time allotted. This would be manually set by staff, there is no automated logic behind this status.
| |
| − | *'''Admin Review''': Contacts who have completed the necessary work, but whose certification must be approved by an administrator.
| |
| − | *'''Expiring''': Contacts whose certification is nearing expiration. Contacts will be marked as expiring base on the '''Send 'Certification Expiring' Emails n Days Before Expiration''' setting you have configured under '''Setup > Certification > General Settings'''.
| |
| − | *'''Cancelled''': Contacts whose certification has been cancelled. This would be manually set by staff, there is no automated logic behind this status.
| |
| − | *Or a specific certification: A list of all of your certifications will be available for selection.
| |
| − | | |
| − | Additional filtering criteria may be added by clicking the '''Customize Results''' button.
| |
| − | [[File:Cert Contact Filter.jpg|800px|center]]
| |
| − | | |
| − | ==='''<span style="color:#800080">Enter Certification Results'''</span>===
| |
| − | ----
| |
| − | | |
| − | #Select the Certification '''Tracking''' tab.
| |
| − | #:[[File:Cert tracking tab.jpg|1200px|center]]
| |
| − | #Click the [[File:Check.jpg|25px]] for the person, for whom, you wish to enter results.
| |
| − | #:[[File:Progress Tracker.jpg|1000px|center]]
| |
| − | #The '''Edit Progress Tracker''' dialog box will display a list of all components necessary to complete the certification. Tick the check-box for those components that have been completed or click the '''Mark All Completed''' button, to tick all components. Enter hours/credits if necessary.
| |
| − | #Click '''Done'''.
| |
| − | | |
| − | ==='''<span style="color:#800080">Enter Certification Results - Bulk Entry'''</span>===
| |
| − | ----
| |
| − | | |
| − | To quickly arrive at a subset of those you wish to mark for completion of a certification, the '''Bulk Entry''' tab allows you to select contacts, certification types, and components. For example, if a class was just help for a particular component, you can filter the list to just that component. Once you have made the appropriate selections, you can mark all as completed.
| |
| − | | |
| − | #Click the '''Bulk Entry''' tab. The tab will display all contacts currently in certification programs.
| |
| − | #:[[File:Bulk Entry.jpg|1200px|center]]
| |
| − | #If needed, click '''Customize Results''' to select the desired filters:
| |
| − | #*'''Add Contacts''': If you wish to filter to specific contacts, begin typing in the names of those contact. You may enter as many contacts as you wish.
| |
| − | #*'''Certifications''': Select one or multiple certifications to filter to just those certifications.
| |
| − | #*'''Components''': Select one or multiple components to filter results to just those components.
| |
| − | #:[[File:Cert Bulk Entry Filter.jpg|800px|center]]
| |
| − | #*Click '''Done'''.
| |
| − | #:[[File:Bulk Entry screen.jpg|1200px|center]]
| |
| − | #All contacts that match your filtering criteria will be displayed in the list, and selected by default. You may deselect any as needed.
| |
| − | #Once you have selected/deselected the appropriate contacts, click '''Mark as Completed'''.
| |
| − | #:[[File:Edit Cert Bulk Entry.jpg|800px|center]]
| |
| − | #On the '''Edit Certification Bulk Entry''' screen, update the following if needed:
| |
| − | #*'''Completed On''': The date will default to the current date, you may update as needed.
| |
| − | #*'''Hours Earned''': This will default to the hours configured for the component, you may update as needed.
| |
| − | #*'''Credits Earned''': This will default to the credits configured for the component, you may update as needed.
| |
| − | #Click '''Done'''.
| |
| − | | |
| − | =='''<span style="color:#800080">Certification Reports'''</span>==
| |
| − | ----
| |
| − | Reports to help you view and analyze status of your certifications are available on the Certifications '''Overview''' tab.
| |
| − | | |
| − | [[File:Cert Overview Tab1.jpg|1000px|center]]
| |
| − | | |
| − | ==='''<span style="color:#800080">Certification Progress Report'''</span>===
| |
| − | ----
| |
| − | | |
| − | The '''Certification Progress Report''' will provide an understanding of how an individual contact, or multiple contacts are progressing towards certification. The report may be filtered to a specific certification program, certification component, status, etc.
| |
| − | | |
| − | #In the '''Certification''' Module, select the '''Overview''' tab.
| |
| − | #In the '''Reports''' section, click '''Certification Progress Report'''.
| |
| − | #Select the desired filtering criteria:
| |
| − | #*'''Certification Type Name''': Enter a specific certification program. Type ahead functionality will search for the desired program. This option is useful is you wish to generate the report for an individual certification program. If blank, all certification programs will be included in the report.
| |
| − | #*'''Status''': If you wish to filter the report to a specific status (for example, you wish to see all contacts with active certifications), select the status from the drop-down list.
| |
| − | | |
| − | ==='''<span style="color:#800080">Certification Summary Report'''</span>===
| |
| − | ----
| |
| − | | |
| − | Using the Certification Summary Report, you can generate a list of all of your certifications and their associated settings (i.e. fees associated to the certification, whether the certification requires approval, and so on). This report is not used to view participants, but to view your catalog of certifications and associated settings. This report may be filtered to specific certification types, categories, components, objectives, or your custom filter criteria.
| |
| − | | |
| − | #Click the certifications '''Overview''' tab.
| |
| − | #Click '''Certification Summary Report''' in the '''Reports''' section.
| |
| − | #:[[File:Cert Summary Report.jpg|1000px|center]]
| |
| − | | |
| − | | |
| − | ==='''<span style="color:#800080">Certification Roster Report'''</span>===
| |
| − | ----
| |
| − | | |
| − | The '''Certification Roster Report''' may be used by by staff person,holding a certification training event, to create a roster '''OR''' sign in sheet. The roster may be generated for all components or a single certification component, as well as for a specific date range. A default Certification Roster documentation template is provided in your database so that you can easily create a sign in sheet. You may view and/or edit this template via the '''Documentation Generation''' functions. See '''[[Getting_Started#Setting_up_Document_Templates|Setting Up Document Templates]]''' for further information on configuring and uploading templates.
| |
| − | | |
| − | #Click the Certifications '''Overview''' tab.
| |
| − | #Click '''Roster''' in the '''Reports''' section.
| |
| − | #:[[File:Roster Report.jpg|800px|center]]
| |
| − | #Select from the following filtering criteria:
| |
| − | #*'''Certification Item''': Begin typing the name of the component. Type ahead functionality will allow you to select the desired component. This selection is required.
| |
| − | #*'''Start Date Between''': Select a date range, if you wish to generate the report for specific dates.
| |
| − | #*'''Additional Criteria / Filters''': Select additional filters as needed.
| |
| − | #*'''Display Options''': Add or remove display options as needed. '''NOTE''': If you wish to use the Mail Merge functionality, you must include all of the fields you wish to merge. Additionally, if you wish to use the roster as a sign in sheet, add the '''Sign In''' and '''Sign Out''' fields to include blank columns for this purpose in your output.
| |
| − | #*Select any desired '''Summarize by''' options.
| |
| − | #Click '''Run Report'''.
| |
| − | #To create the mail merged roster, click the down arrow on the '''Run Report''' button.
| |
| − | #Click '''Mail Merge'''.
| |
| − | #Select the desired template from the list. '''NOTE:''' Only templates designed as '''Certification Roster''' type will be available for selection. If needed, click the [[File:Grayplus.jpg|25px]] to upload a new template. See '''[[Getting_Started#Setting_up_Document_Templates|Setting Up Document Templates]]''' for further information on configuring and uploading templates.
| |
| − | #Select the desired output format: PDF or Word Document.
| |
| − | #Click '''Done'''. | |
| − | | |
| − | The file will download, and you can make any necessary changes prior to printing out your roster.
| |
| | | | |
| − | See '''[[Reports#Common_Report_Functions|Common Report Functions]]''' for performing the following:
| + | [[File:AddObjective.png|center]] |
| | | | |
| − | *'''Export as PDF''' | + | :*'''Category Name''' Use this drop down to assign the Objective to a Category if you clicked on the Add Objective button and you want to assign it to a Category. If using the Plus Sign icon this will be pre-populated accordingly. |
| − | *'''Export as Excel'''.
| + | :*'''Category Code''' Will display the Code of the Category Name when one is selected |
| − | *'''Export Summary as PDF''' | + | :*'''Code''' Similar in function to the Collection and Category Codes, used for organization and reporting |
| − | *'''Export Summary as Excel''' | + | :*'''Name''' Name of the Objective |
| − | *'''Email Report''' | + | :*'''Description''' Description of the Objective |
| − | *'''Add to List''' | + | =Components= |
| − | *'''Save as New Report'''
| |
| − | *'''Add as Favorite Report'''
| |


 ) in the Actions column of the Category/Sub-Category to which you want to add the Objective