Forms and Surveys
The Forms/Surveys module enables you to quickly create and publish custom web forms and surveys. Features include an intuitive interface which allows you to select from a variety of form fields.
Create a Form
Creating a form is a two step process. First you will add the form, then you will add the questions to your form.
- Click Forms in the Navigation Panel.
- Click the Add button.
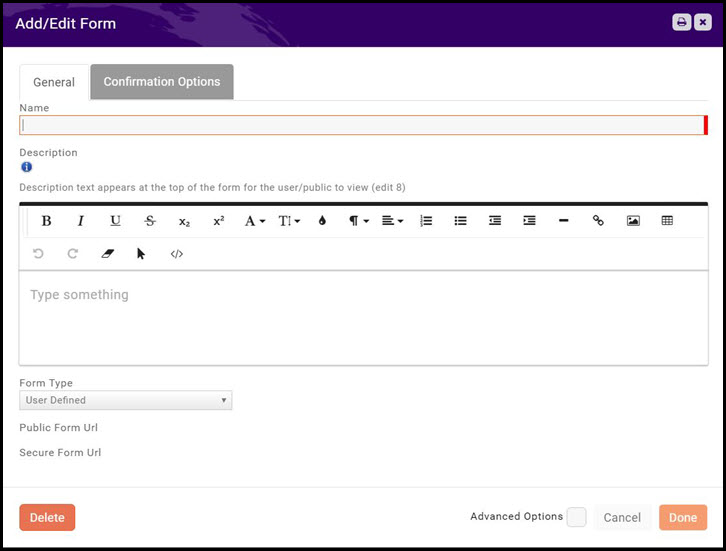
- Configure the following on the Create tab:
- Name - provide a name for your new form.
- Description - This text appears at the top of the form for the user/public to view. You may use the standard word processing functions (bold, italics, etc.), as well as add links, and images.
- Form Type - Select a form type or select User Defined.
- (Optional) Click the Advanced Options check box and configure the following:
- Published Start Date
- Published End Date
- Accept User responses via HTTP collector
- Click the Confirmation Options tab
- Configure the following:
- Post Submit Message - Enter the message to be displayed after the form is completed.
- Download File - If you wish to include a file to be downloaded after the form has been submitted, click the Select File button and import the file. Alternately, you can select a previously imported file.
- Click Done.
The Url for the form will automatically be populated once the form has been saved.
Add Questions to a Form
- In the Forms module, click the pencil icon for the form to which you wish to add questions.
- Click Add New Question Field.
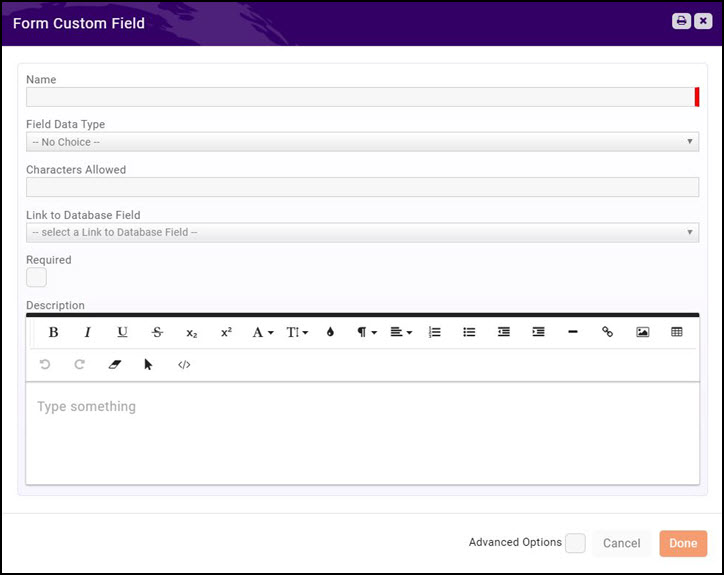
- Configure the following:
- Name - Enter in the name/question. This should be entered as you wish to see it on the form/survey. NOTE - If you have previously created the same field, you may select the field from the Link to Database Field drop-down list.
- Field Data Type -Select the type of data expected as a response to this question.
- Characters Allowed - If you have selected a Text data type, enter the number of characters that will be accepted in the field.
- Required - Select this check-box if the field is required in the form/survey.
- (Optional) Description - Enter a description of the field.
- Click Done.


